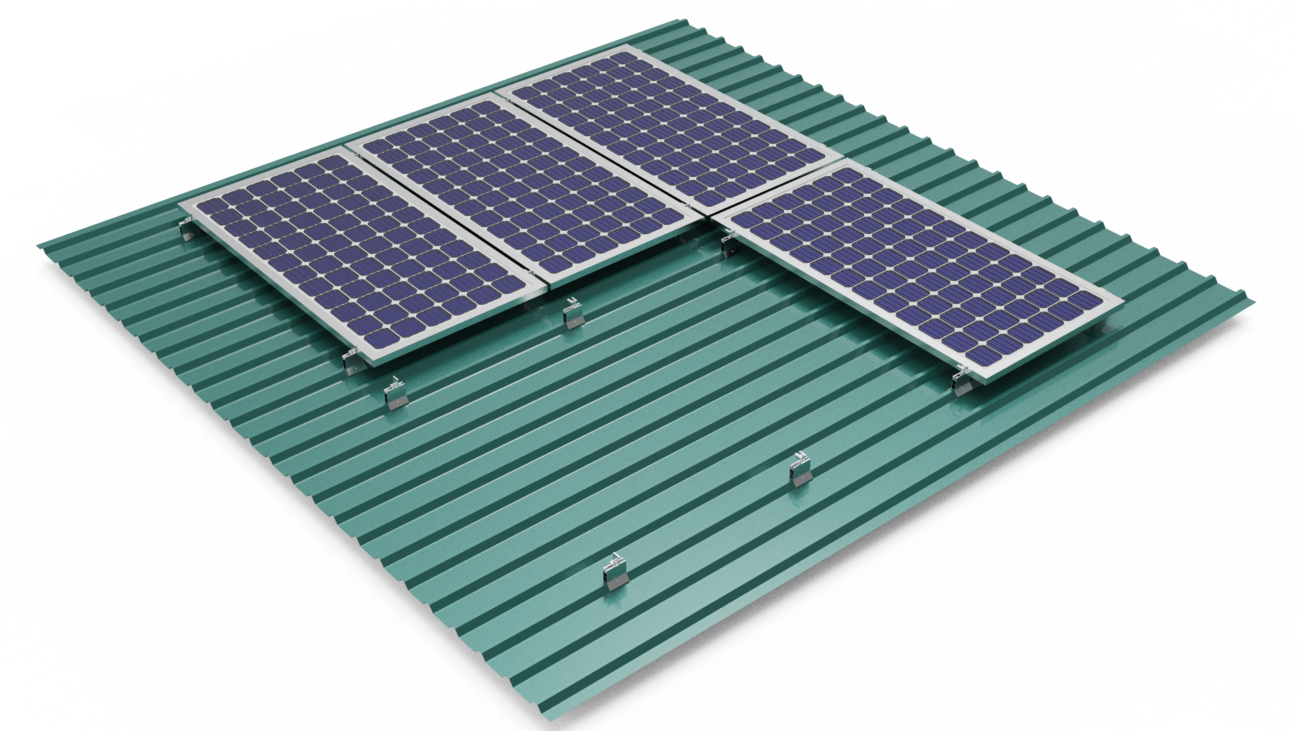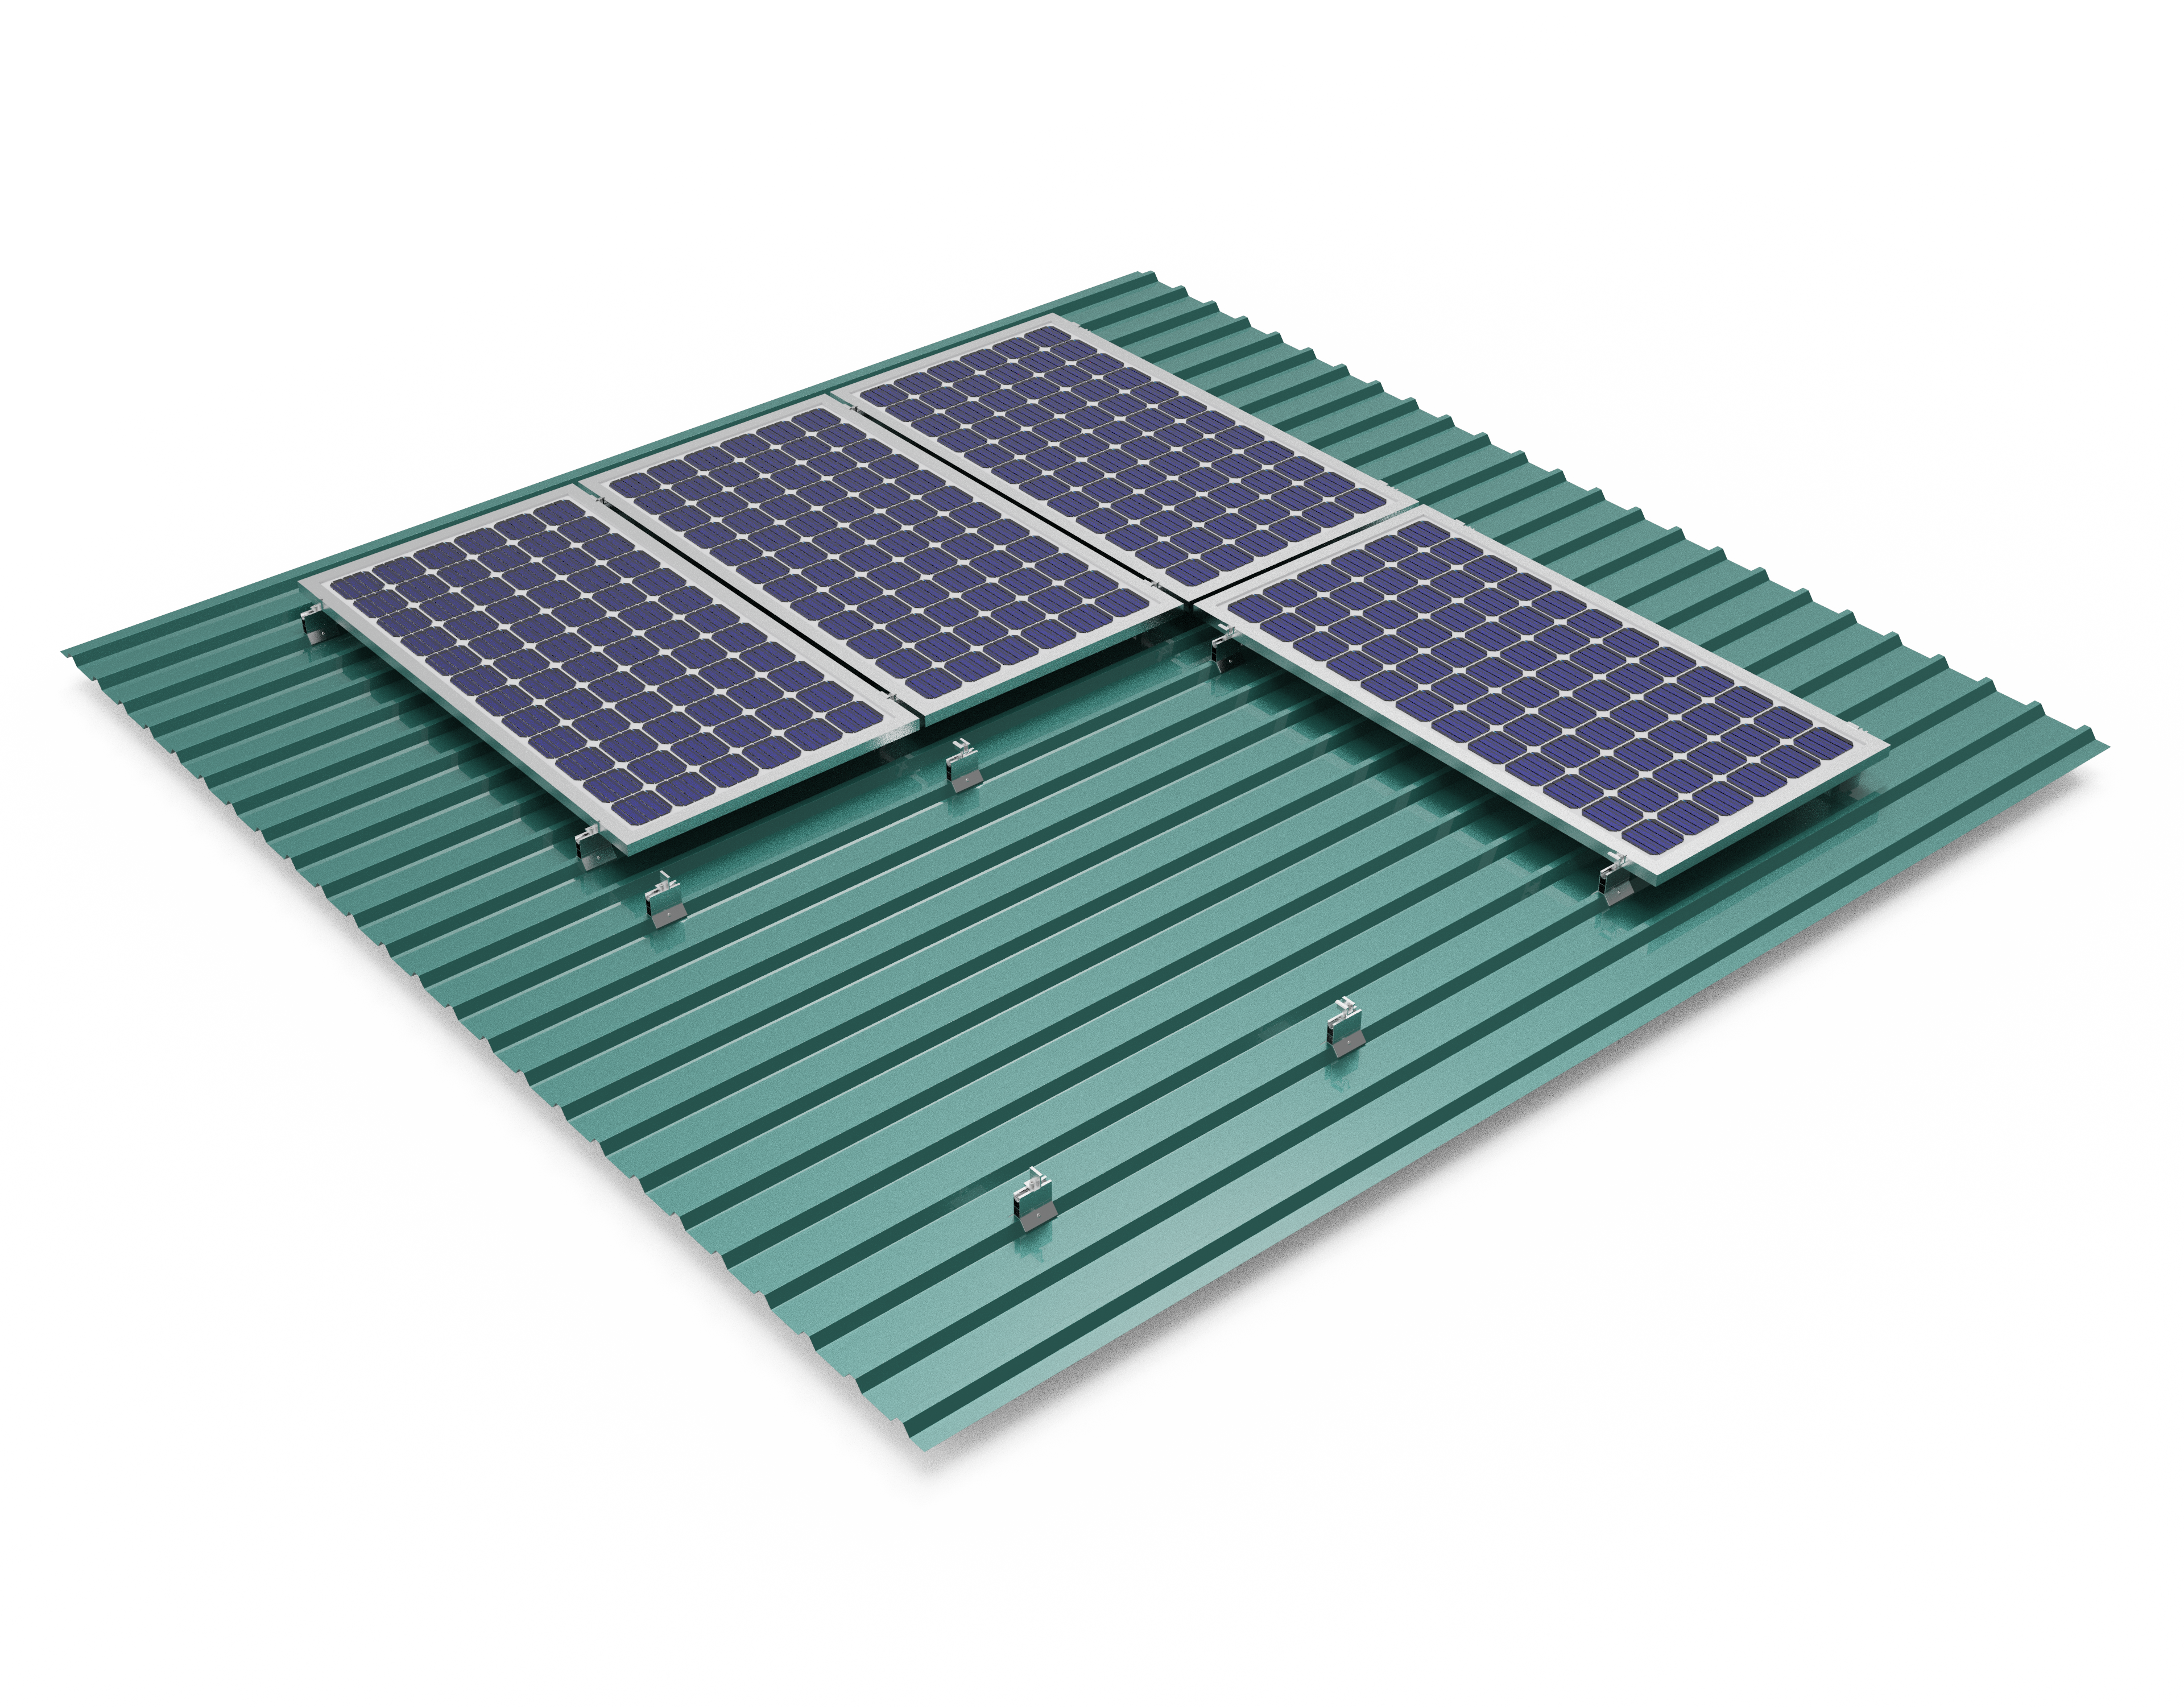
I. Trapezoidal Mounting System Types
There are two main types of trapezoidal mounting systems: clamp systems and insertion systems.
A. Clamp systems
In trapezoidal mounting system clamp systems use short rail lengths, normally aluminium are secured directly to the roof surface with screws or rivets. The solar panels are then clamped onto these rails using panel clamps.
Benefits:
- Cost-effective
- Easy to install
- Well-suited for portrait panel orientation
Considerations:
- Ensuring water tightness with the screw/rivet seals
- Accounting for varying sheet thickness with fastener pull-out strength
B. Insertion systems
In trapezoidal mounting system insertion systems use long rail profiles with built-in channels that are the modules frames slide into. These rails are also attached directly to the roof.
Benefits:
- Fast snap-in module installation
- No need for separate panel clamps
Considerations:
- Allowing proper rear ventilation
- Typically better suited for landscape panel orientation
So as per the result our clamp systems are directly attach panel on clamp to short rail pieces, while insertion systems utilize long rails that modules insert into. Both have pros and cons to weight based on factors like cost, performance, and easy for installation.
II. Components
The main components of trapezoidal solar mounting systems are:
- Rails: Used to securely mount solar panels, available in various lengths and shapes such as short rails or long insertion rails. Typically made of aluminium.
- Brackets: Attached rails to the trapezoidal roof structure. Often feature are rubber seals to ensure water tightness.
- Screws: Special ER-U-S5.5X25-S12 screws fasten brackets to roof. Need proper gauge and thread design to account for varying sheet thickness and pull-out strength requirements.
Additional accessorie include:
- Panel clamps: Hold panels onto short rail clamp systems.
- Custom mounting kits: Full kits with all trapezoidal mounting components.
- Drive tool accessory: Assists screws installation for certain systems.
In our trapezoidal mounting system the proper selection of ethes components is key for secure, high-performing, cost-effective trapezoidal solar panel installations.
III. Considerations
There are a few key considerations when selecting and installing trapezoidal solar mounting systems:
Water Tightness
- Use rail seals, screw washers, bracket seals to prevent leaks
- Penetrations through roof must be properly sealed
Sheet Thickness-
- Varies widely (0.4mm – 0.7mm)
- Affects fastener pull-out strength
- May require adjusting screw type/number
Panel Orientation
- Portrait = shorter horizontal rail spans
- Landscape = cheaper vertical rails
| Thickness | Pull-Out Strength |
| 0.5mm | Lower |
| 1.0mm | Higher |
Careful attention in these areas ensures:
- Waterproof roof integrity
- Secure mounting system under wind/snow loads
- Optimized system cost and performance
IV. Clamping systems
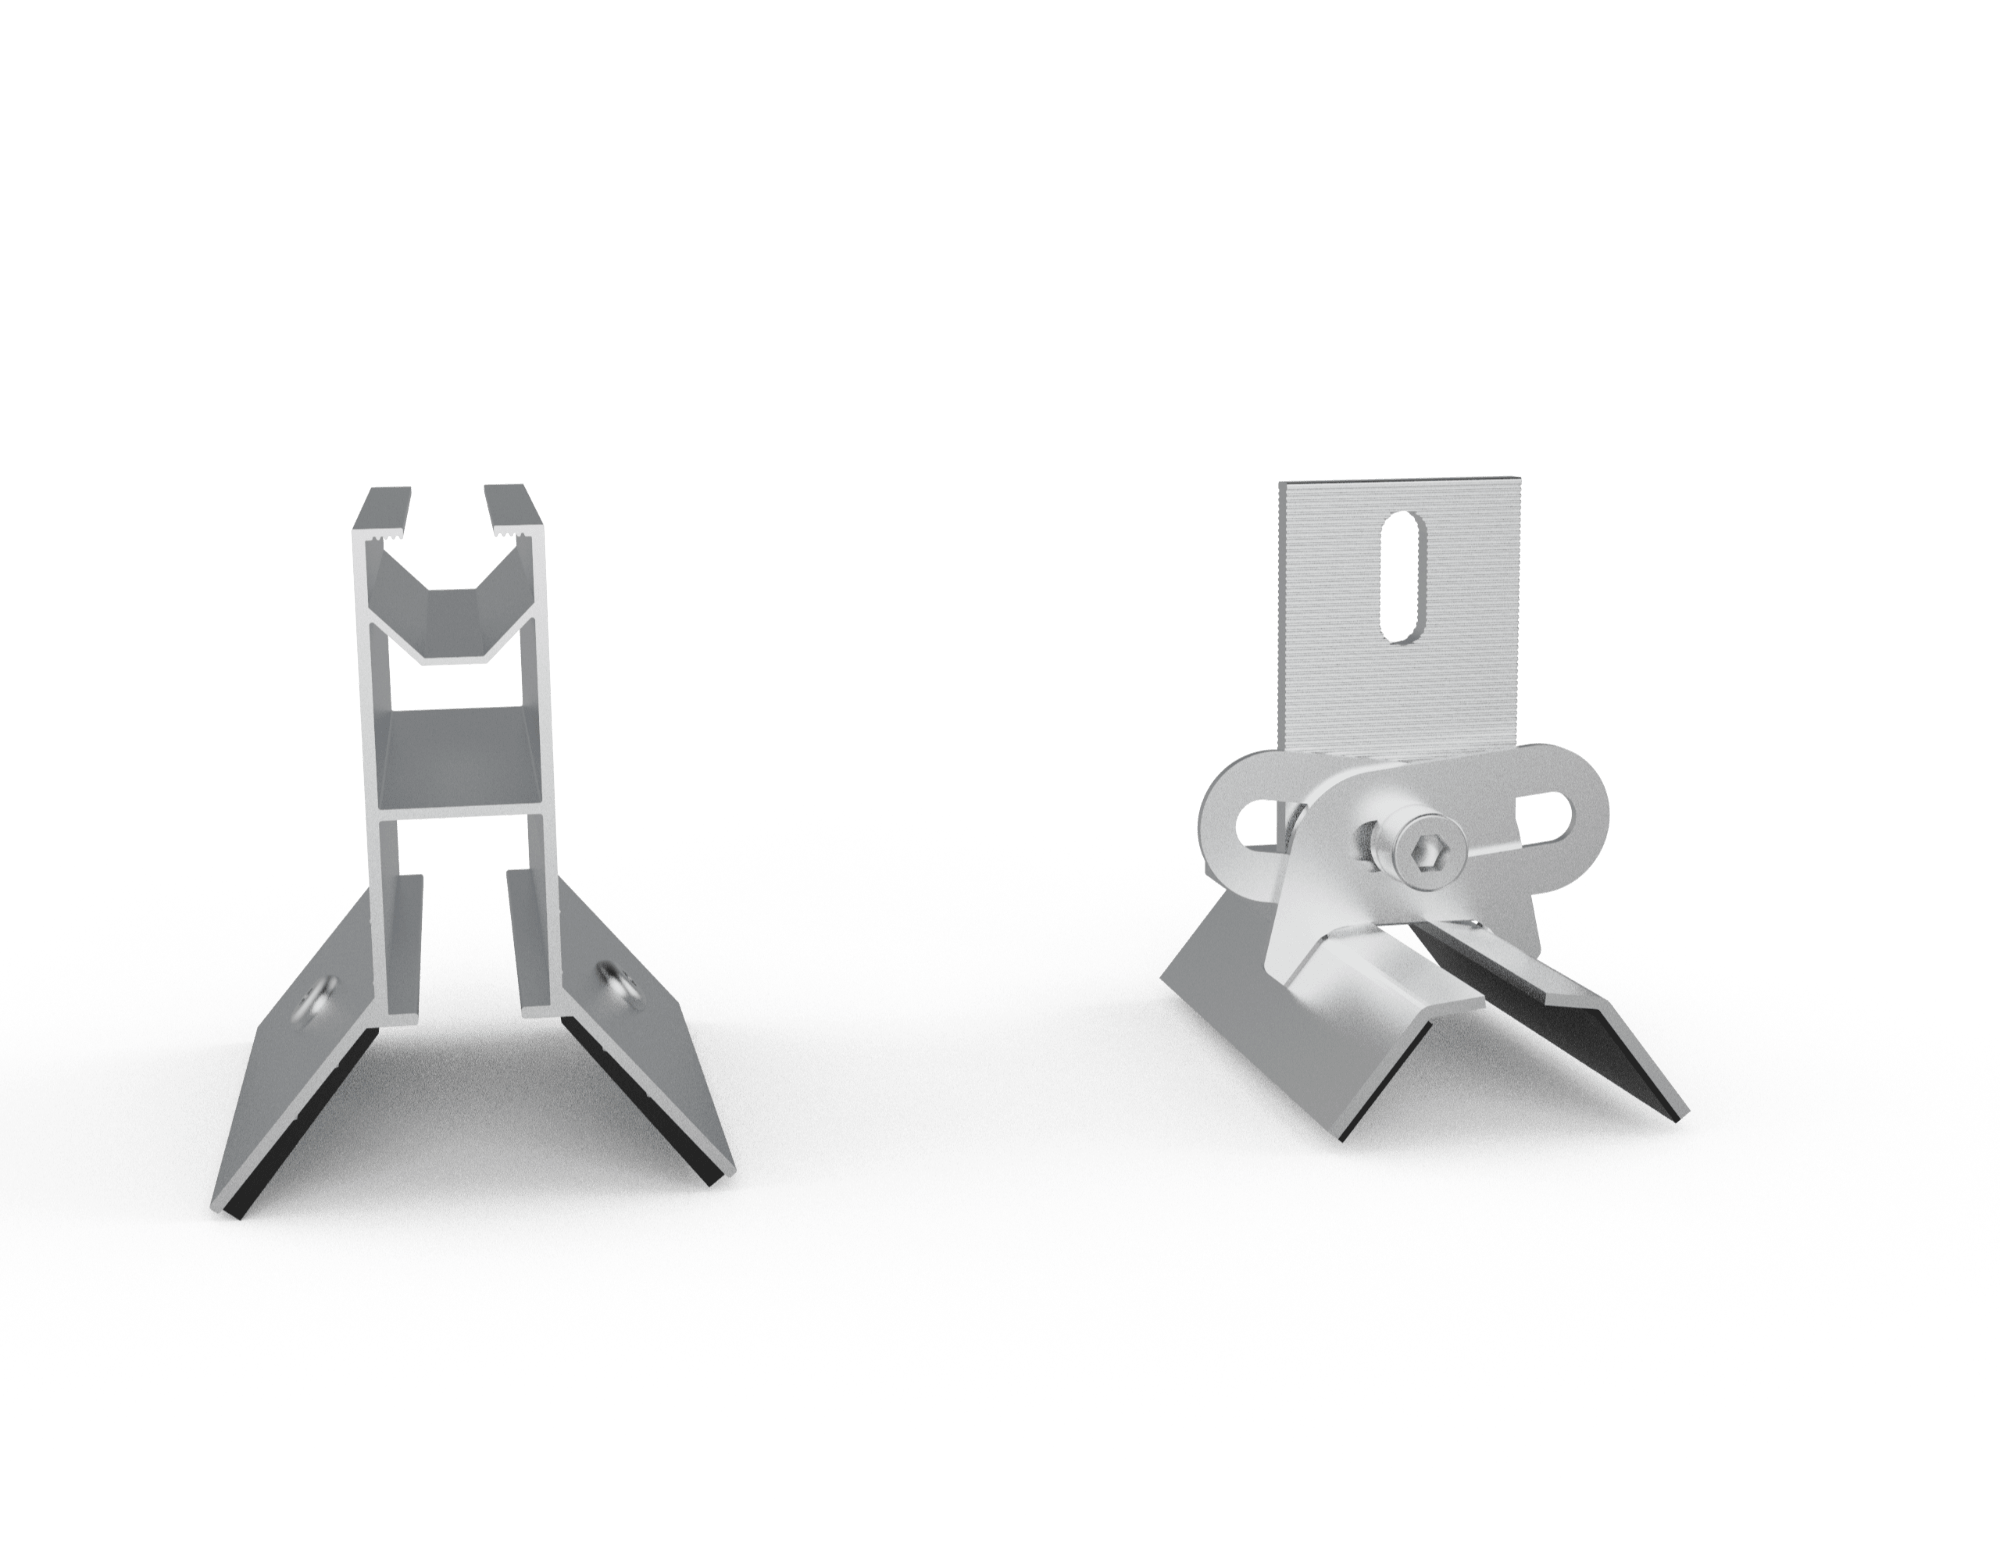
Clamping systems are a common in trapezoidal mounting solution consisting of:
- Short rails
- Pre-assembled aluminium profiles
- Attached directly to roof
- Panel clamps
- Grip module frame
- Allow for thermal expansion
Benefits:
- Preassembled – faster installation
- Less rails – lower cost
- Short rails – easy to handle
They secure modules directly to the roof, eliminating the need for long rails.
Some key points:
- Attach rails with screws/rivets
- Use neoprene washers to ensure water tightness
- Adjust rail length based on crown spacing
- Account for sheet thickness with fastener type and number
With smart design choices, these economical systems can be quickly mounted while keeping the roof sealed and secure.
V. Insertion systems
In trapezoidal mounting system the “Insertion systems” use long aluminium rail profiles with built-in channels that module frames slide and “insert” into.
Benefits:
- Fast snap-in module installation
- Clean aesthetics (no visible clamps)
- Allows both portrait and landscape orientation
Considerations:
- Ensure proper rear ventilation
- Use spacer blocks or slight tilt
- Allow for thermal expansion
- Slot size matches frame thickness
- Span spacing between trapezoid crowns
- Rail length > crown spacing
Slight elevation angles can also improve performance:
- Increased yield
- Enhanced self-cleaning
- Better rear ventilation
VI. Customized Mounting kits
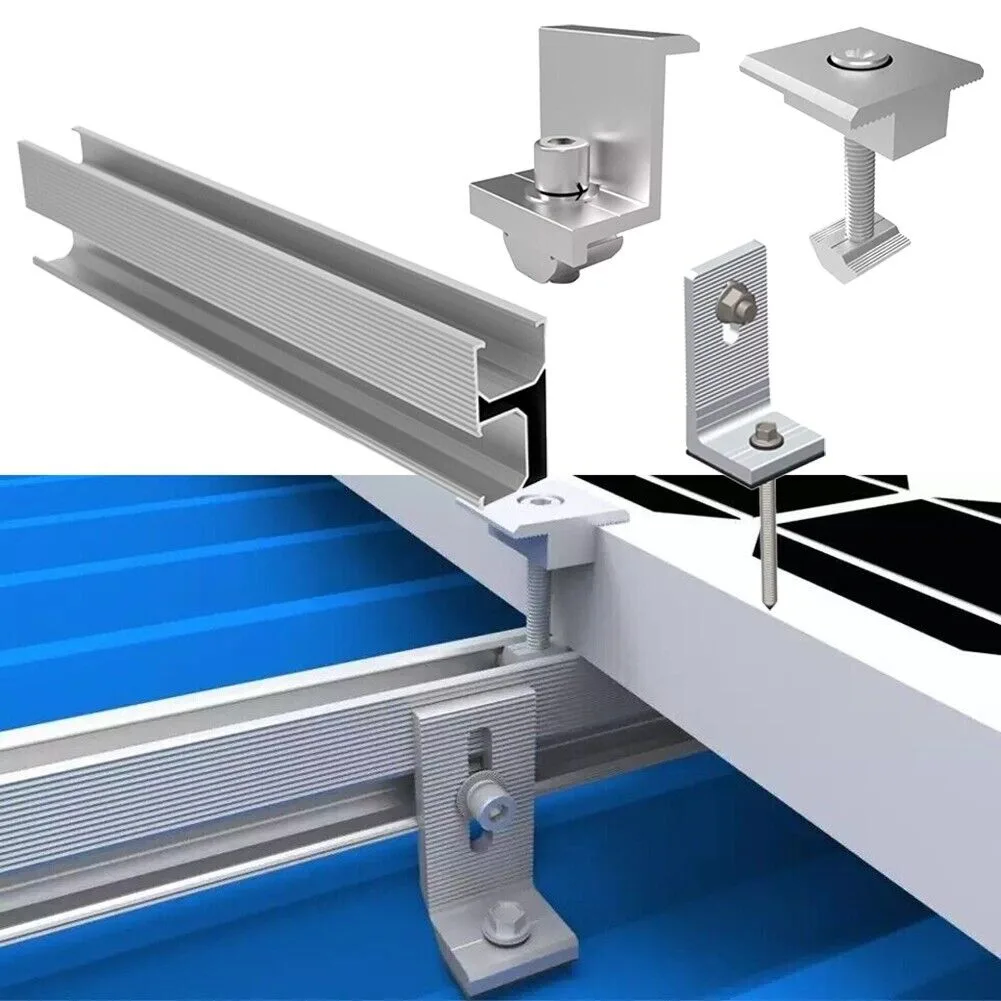
In our trapezoidal roof installations, customized mounting kits bundle all the necessary components in one package:
- U-Support brackets
- ER-U-S5.5X25-S12 screws
- FR Drive tool accessory
- Rails (if needed)
- Seals/washers
- Cable parts
Benefits:
- Simple ordering/inventory
- Perfectly matched components
- Optimized for specific projects
For example, the Trapezoidal system uses just in 3 main parts:
- U-Support bracket
- Lightweight aluminium
- 20mm wide base for all profiles
- Special screw
- Twin asymmetric thread
- Range of sheet thickneses
- FR Drive tool
- Speeds installation
- Prevents overdriving
This streamlined approach simplifies and speeds mounting:
- Only 2 min per PV module
- No concerns over expansion joints
- Significantly reduces cost
The key with any kit is ensuring it meets the needs – sheet thickness, panel layout, wind/snow loads. Prefabbed for rapid mounting. Fully customized for your trapezoidal rooftop.
VII. U-Support Brackets
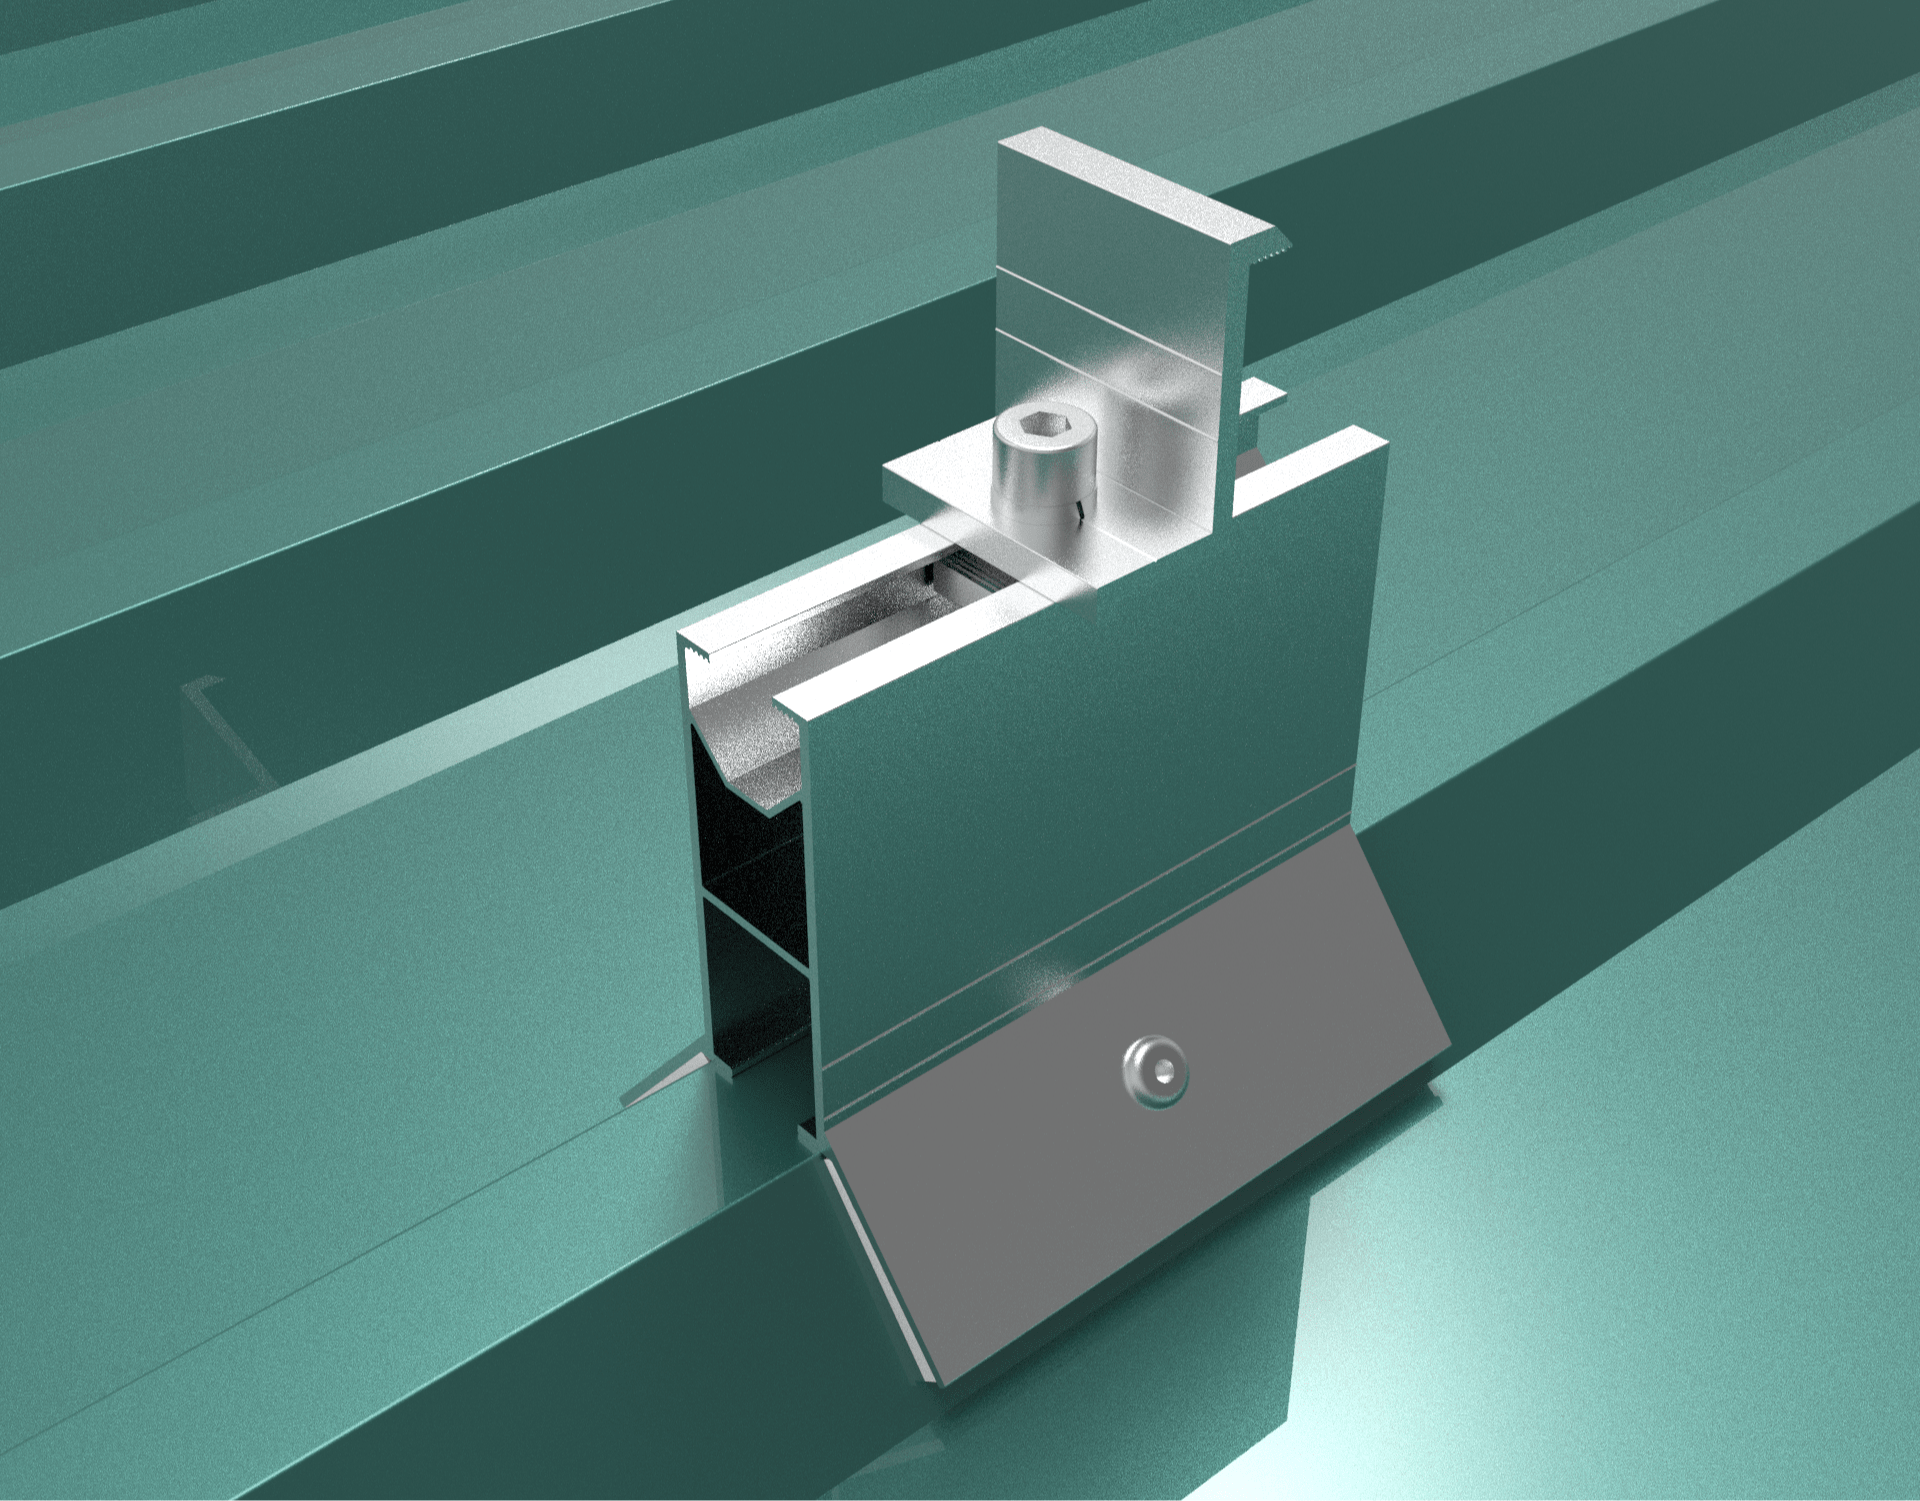
U-Support brackets are a component specifically designed for trapezoidal sheet metal roofs. They offer a simple but versatile mounting solution.
Features:
- Made of durable, lightweight aluminum
- Narrow 20mm width
- Suits all trapezoidal profiles
- Integrated EPDM rubber seal
- Ensures water tightness
- Height options
- 25-35mm: optimize rear ventilation
- 60mm+: high snow loads
Benefits:
- Rapid installation (~2 min per module)
- Avoid concerns over rail expansion
- Less parts = lower system cost
Considerations:
- Proper torque to avoid overdriving screws
- Use appropriate screw for roof sheet thickness
- Meet wind/snow load requirements
With smart design and engineering, U-Support brackets enable simple, cost-effective trapezoidal solar mounts.
VIII. Drive Tool Accessory
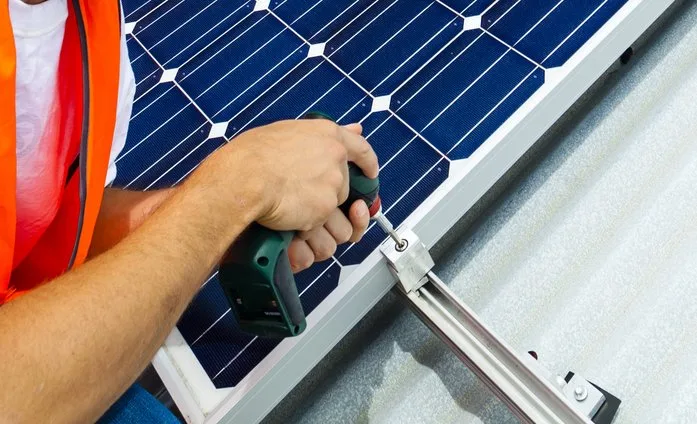
Installing solar on trapezoidal metal roofs requires unique screws that are carefully torqued to avoid damage. A drive tool accessory makes this process faster and easier.
Benefits
- Speeds installation time
- Enables proper screw guidance
- Prevents overdriving
- Works with specific electric drivers
How it works:
The tool interfaces with the ER-U-S5.5X25-S12 screws to:
- Guide screw correctly to roof hole
- Drive screw to proper depth
- Stop driver when reaching target torque
Considerations
- Works for specific screw types and drivers
- FR tool suits certain hex drive sizes
- Bit holder required for some drivers
| Component | Details |
| Screw type | ER-U-S5.5X25-S12 |
| Drive size | 1/4″ hex |
| Driver torque | Low (< 3 Nm) |
The trapezoidal mounting system are using a drive tool is highly recommended for trapezoidal solar mounts using specialty screws, which have very precise torque requirements. This accessory makes meeting roofing best practices much simpler!
IX. Mounting Brackets
Mounting brackets are a versatile solution for installing solar panels on trapezoidal and corrugated metal roofs. They allow for height-adjustable installation to ensure the panels sit completely flush on uneven sheet metal roofing.
Key advantages of mounting brackets:
- Fast and direct attachment to the raised seams of the roof with rivets or sheet metal screws
- Height adjustment enables flat, tension-free panel installation
- Connections to crossbar adapters simplifies frameless panel installation
- Made of weather-resistant aluminium
- Pre-assembled with sealing tape
Components
| Component | Description |
| Bracket | Attaches to the roof seams |
| Mounting rails | Lightweight rails to mount panels |
| Rail connectors | Join rails with structurally integrity |
| **Cross adapters ** | Connect floor rail to panel rail |
In trapezoidal mounting system the versatility of mounting brackets makes them an ideal solution for residential and commercial trapezoidal roof solar projects. Their height flexibility and ability to integrate with leading rail and panel systems reduces installation labor and ensures an optimized, secure panel fit. As solar access expands globally, mounting brackets have become a contractor-preferred best practice for metal roof applications.
X. Delta Triangles
Delta triangles are an exceptional solution for elevated solar panel mounting on trapezoidal and corrugated metal roofs. Their adjustable tilt angle and compatibility with leading rail systems enables optimized solar capture.
Key advantages of delta triangles:
- Installation at tilt angles from 5° to 45°
- Position and size of solar array is variable
- Orientation towards eaves or verge possible
- Ideal even for small, 1-panel systems
- Low shipping cost due to collapsible design
How Delta Triangles Work
Delta triangles have a triangular frame that sits atop roof seams, secured directly using sheet metal screws. The triangles pivot to adjust tilt angle to the ideal degree for solar exposure.
Trapezoidal sheet metal rails then attach to connect the triangle to the roof seem. The panels themselves mount to the rails using end clamps and mid clamps.
Cross adapters join the upper rail to the triangle base, enabling a secure structural connection.
Components
| Component | Description |
| Delta triangle | Adjustable tilt mount |
| Sheet metal rail | Attaches triangle to roof |
| Mounting rails | Secure solar panels |
| Rail connectors | Join mounting rails |
| Cross adapters | Connect rails to triangle |
Applications
Thanks to their flexibility, delta triangles have become a preferred solution for solar mounts on metal roofs of:
- Warehouses
- Processing plants
- Commercial buildings
- Aircraft hangars
- Agricultural structures
If there is a either facing issues with shading, angling for max sunlight, or working with curved roofing, delta triangle systems enable customized solar captures for metal roof applications. Their lightweight triangle frames allow cost-effective shipping and hands-free installation.

