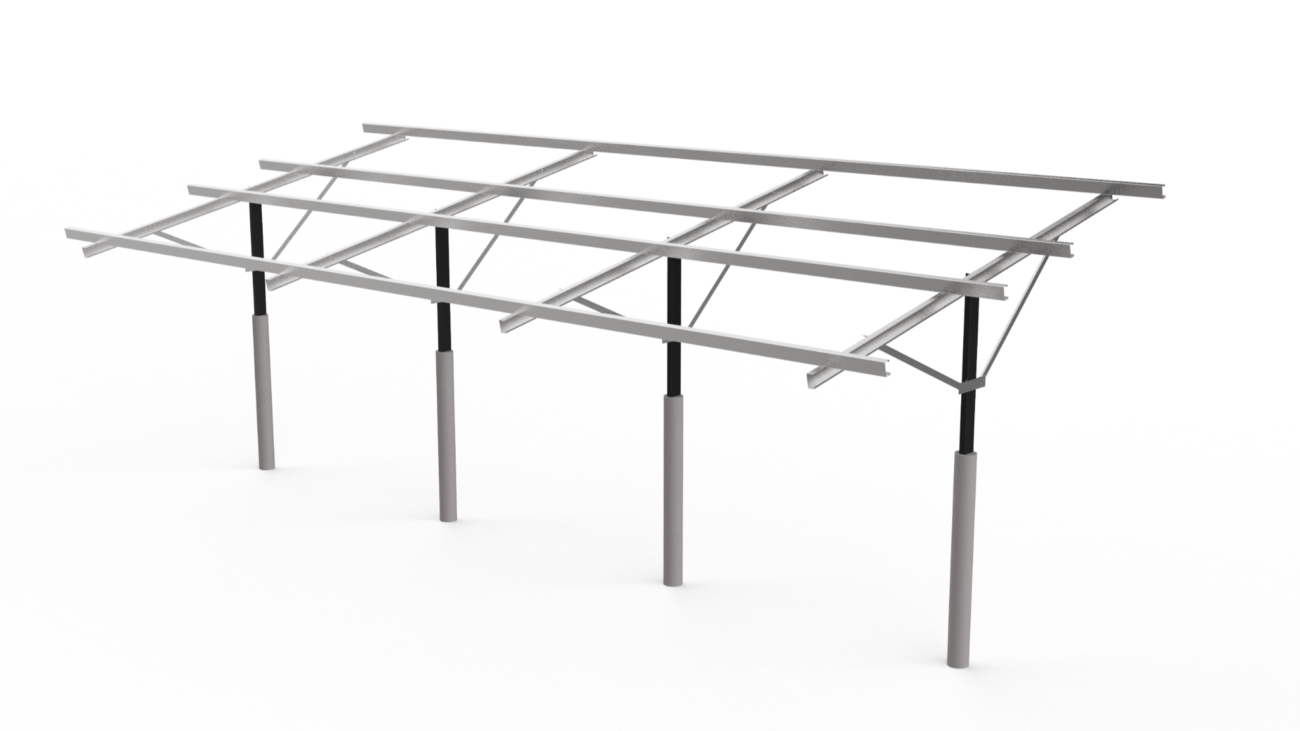
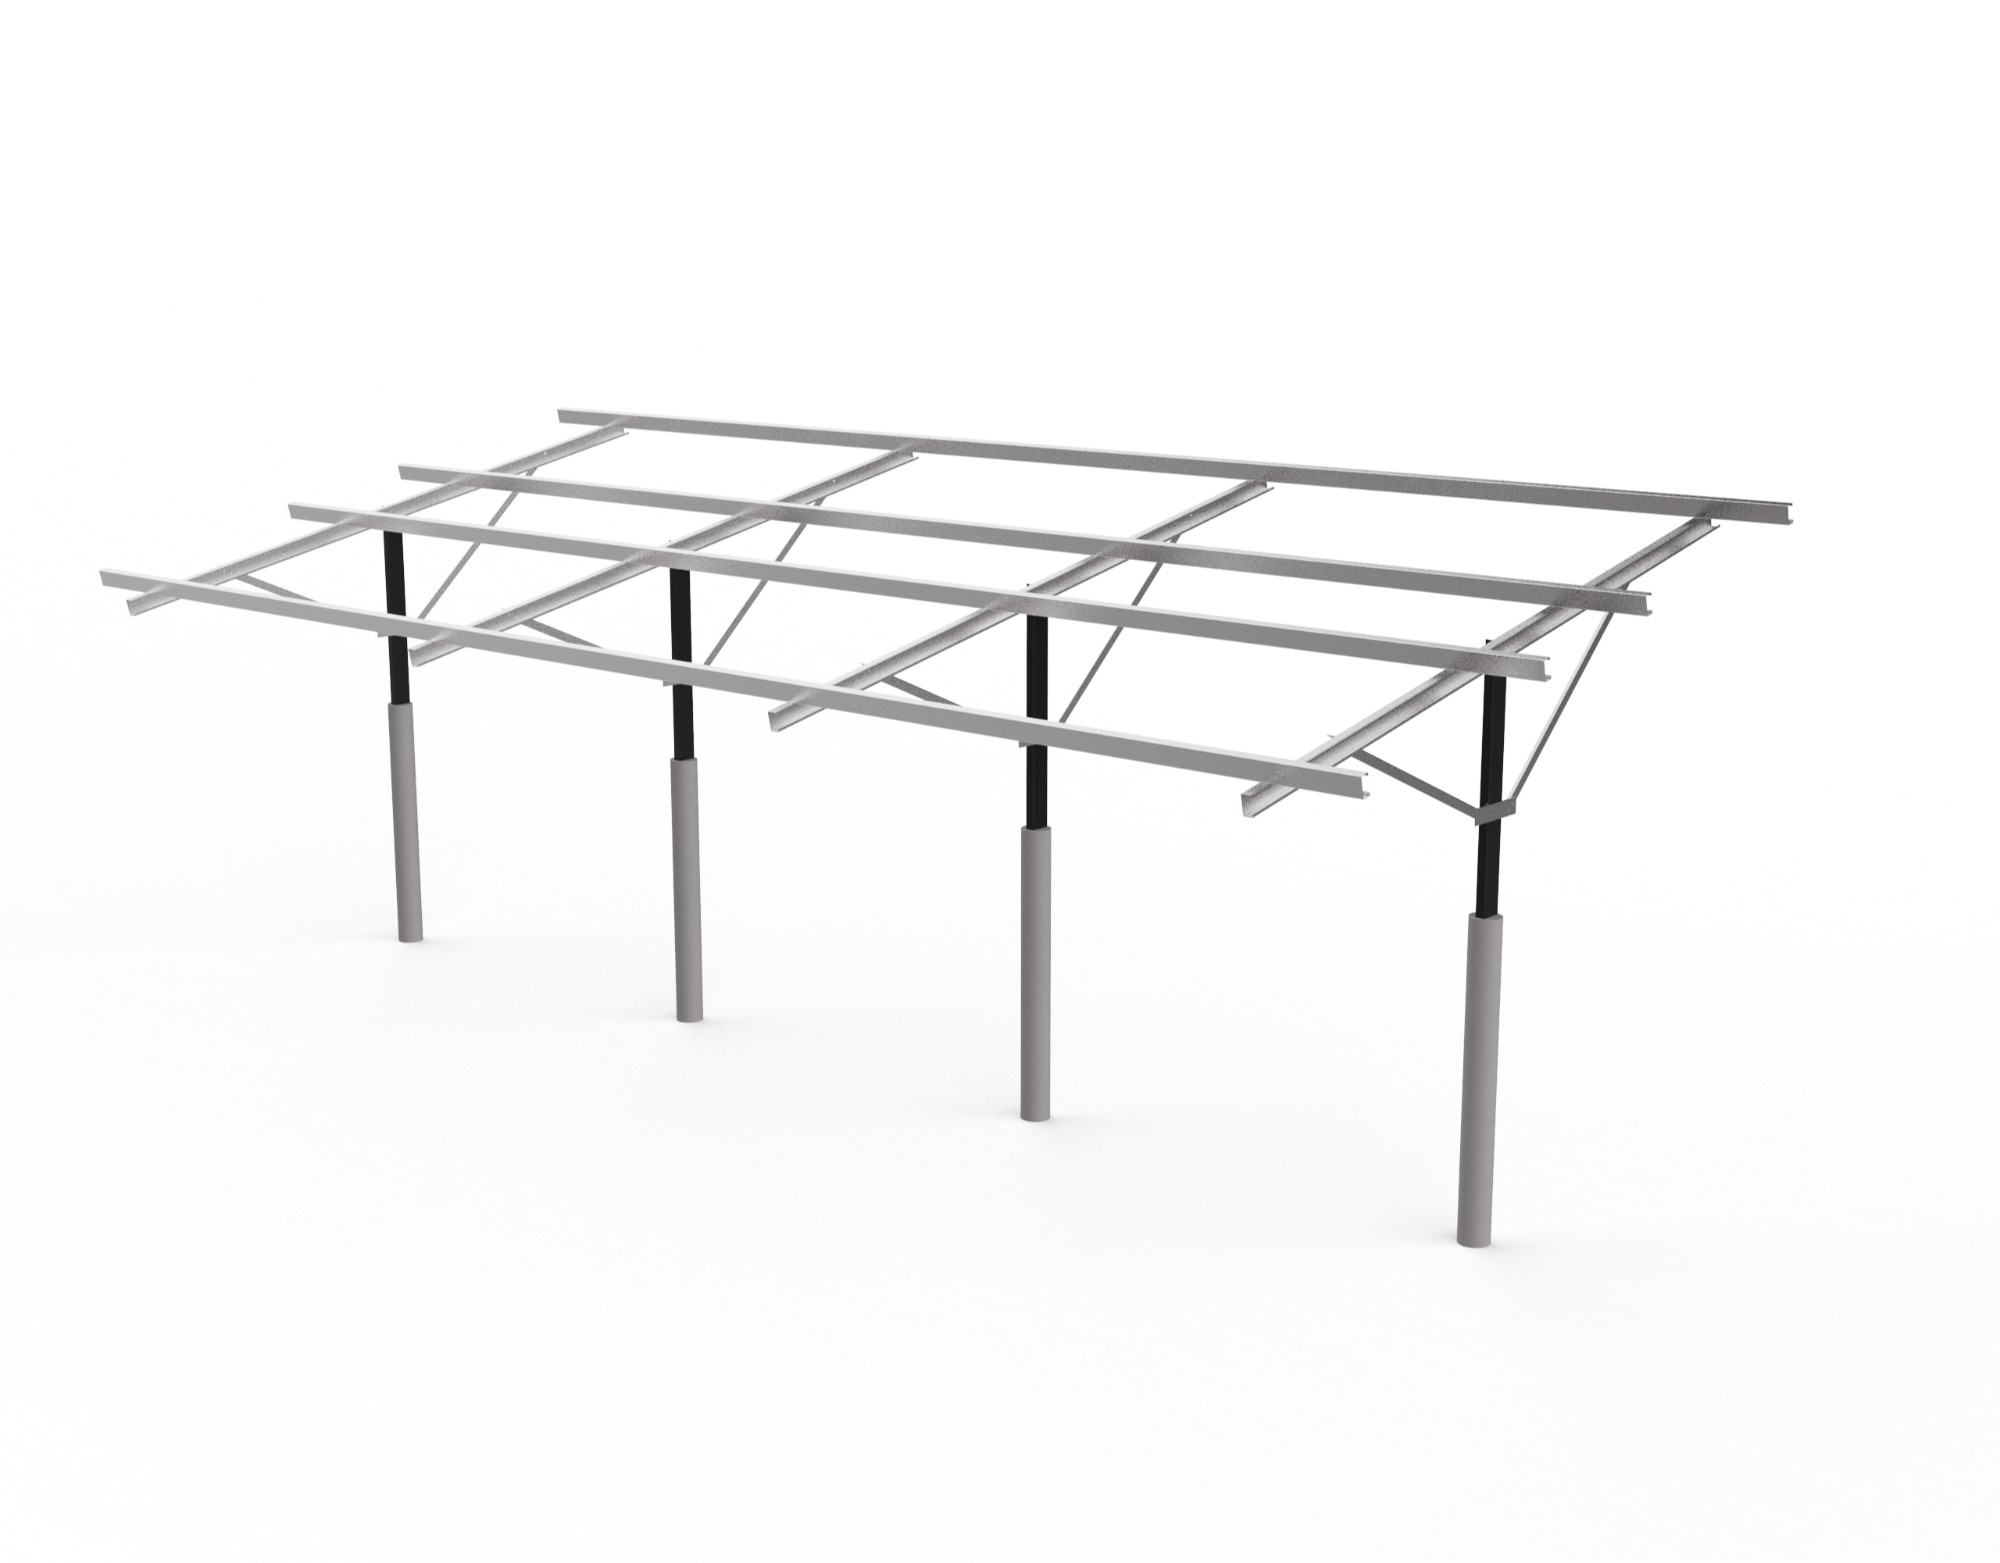
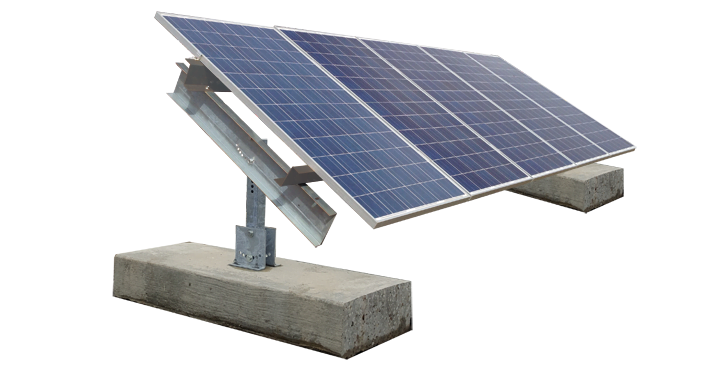
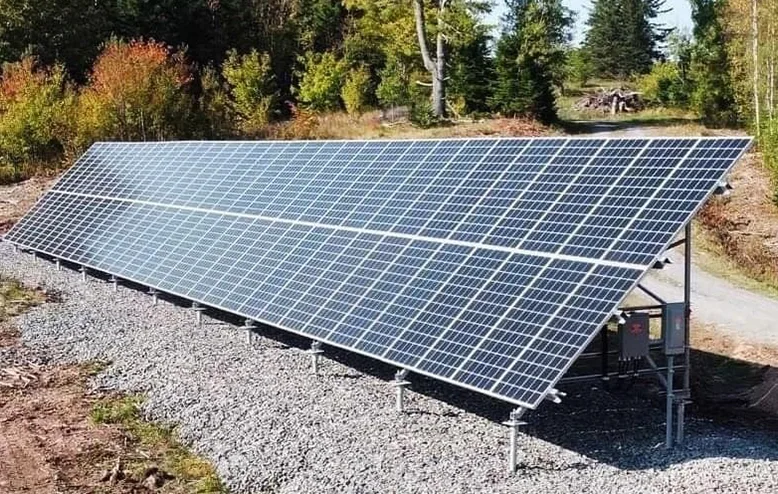
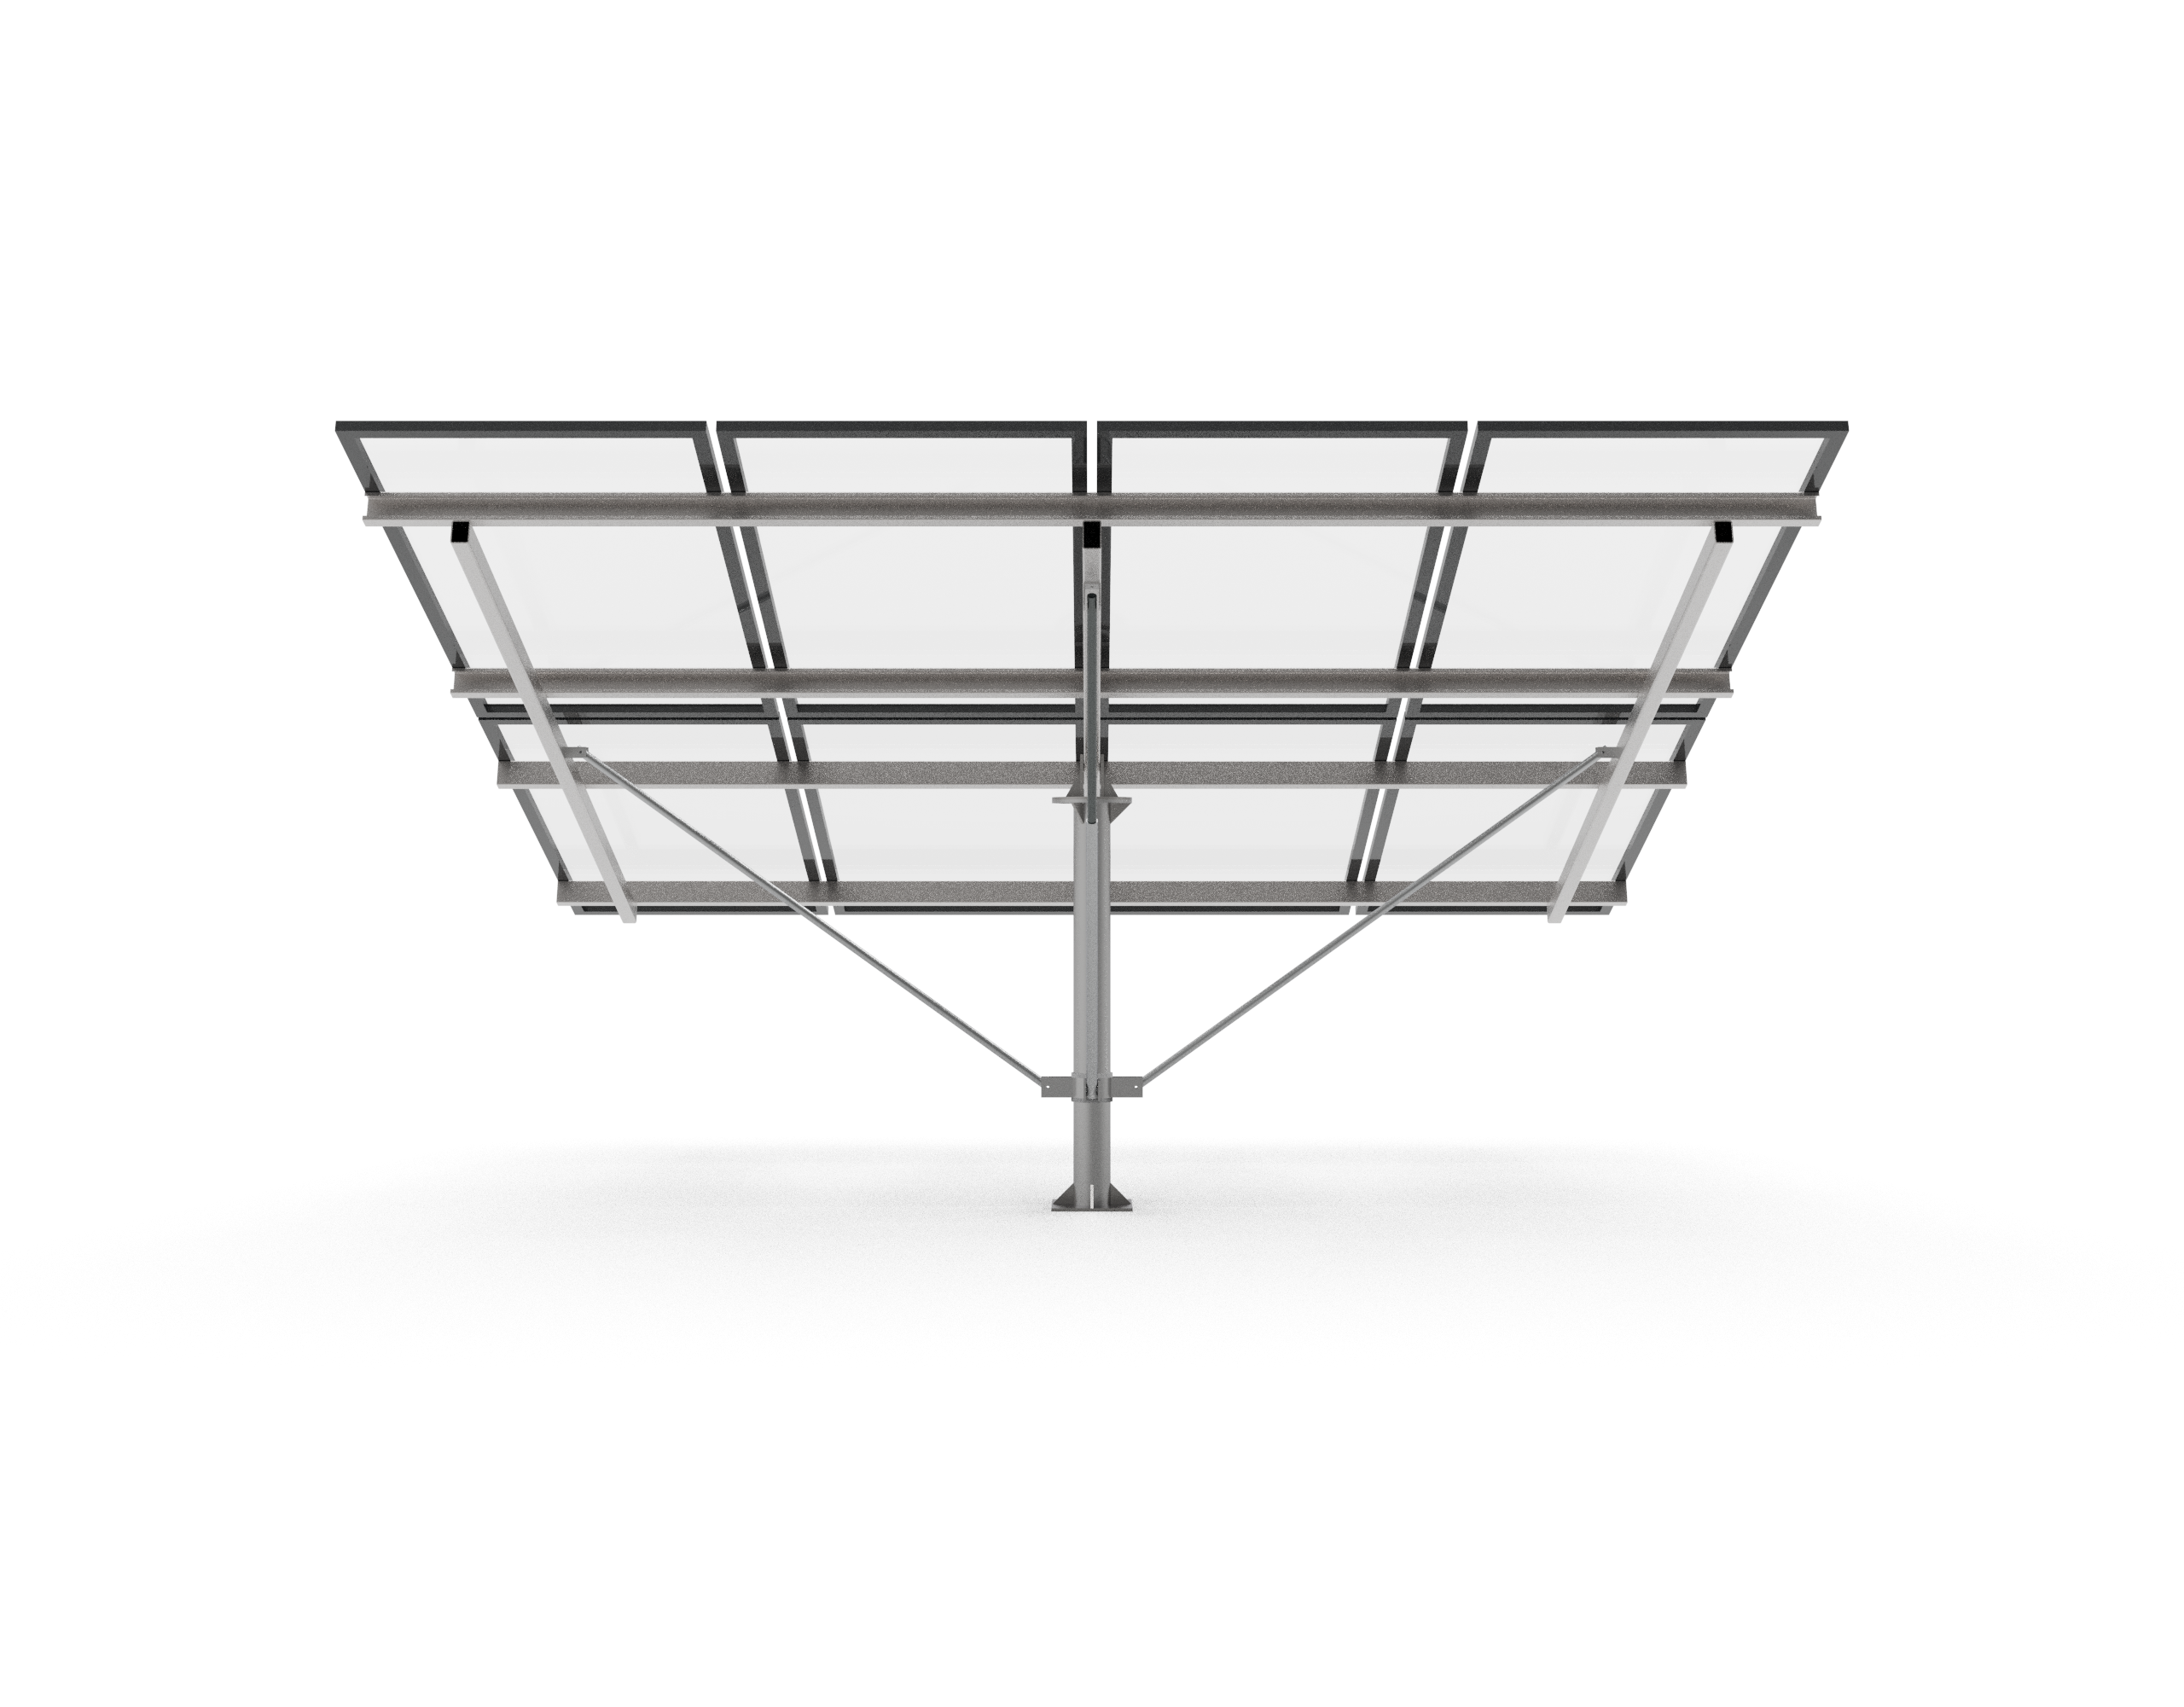
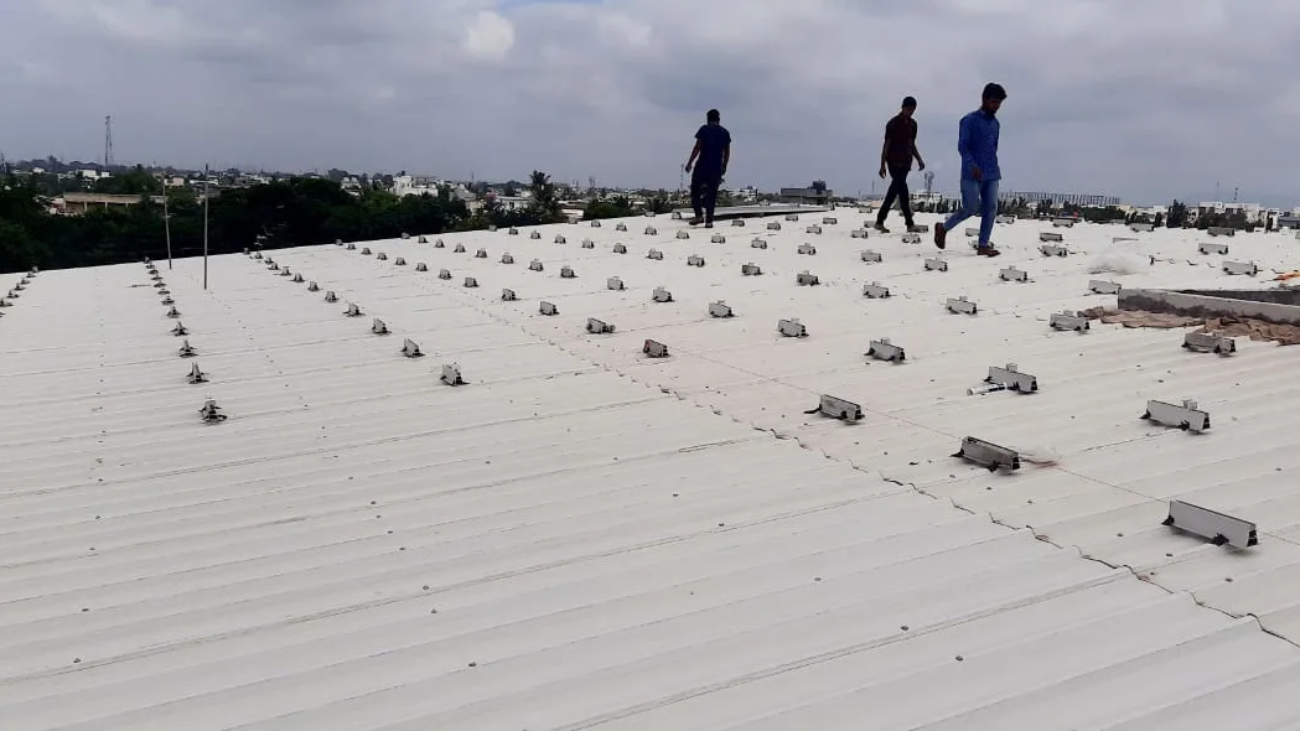
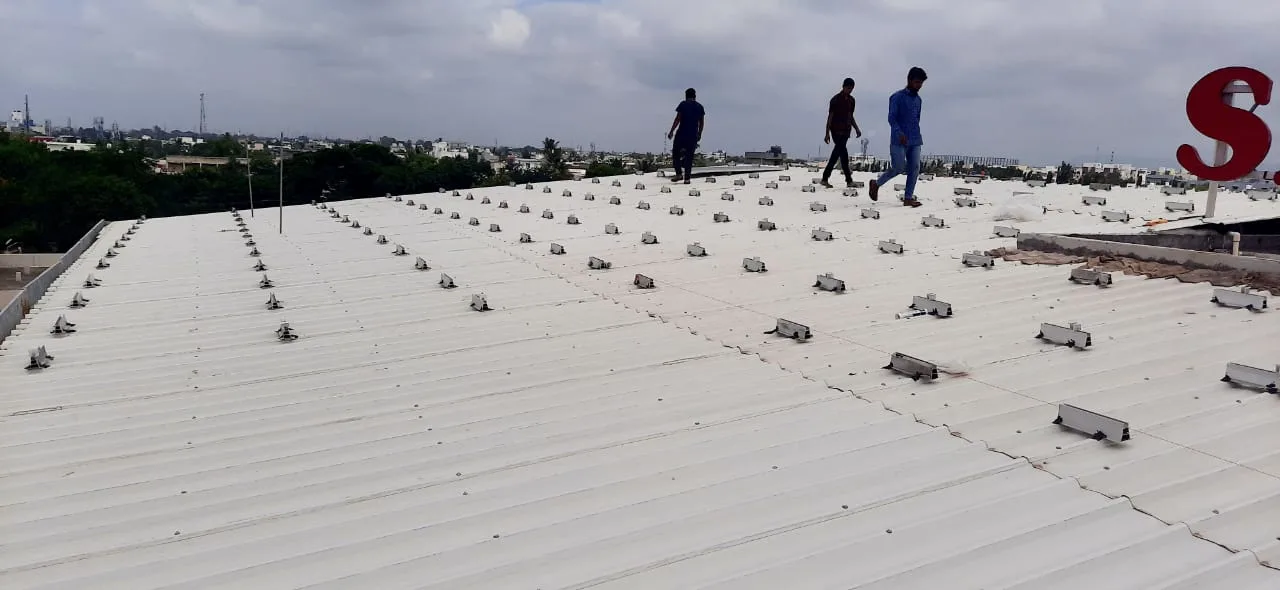
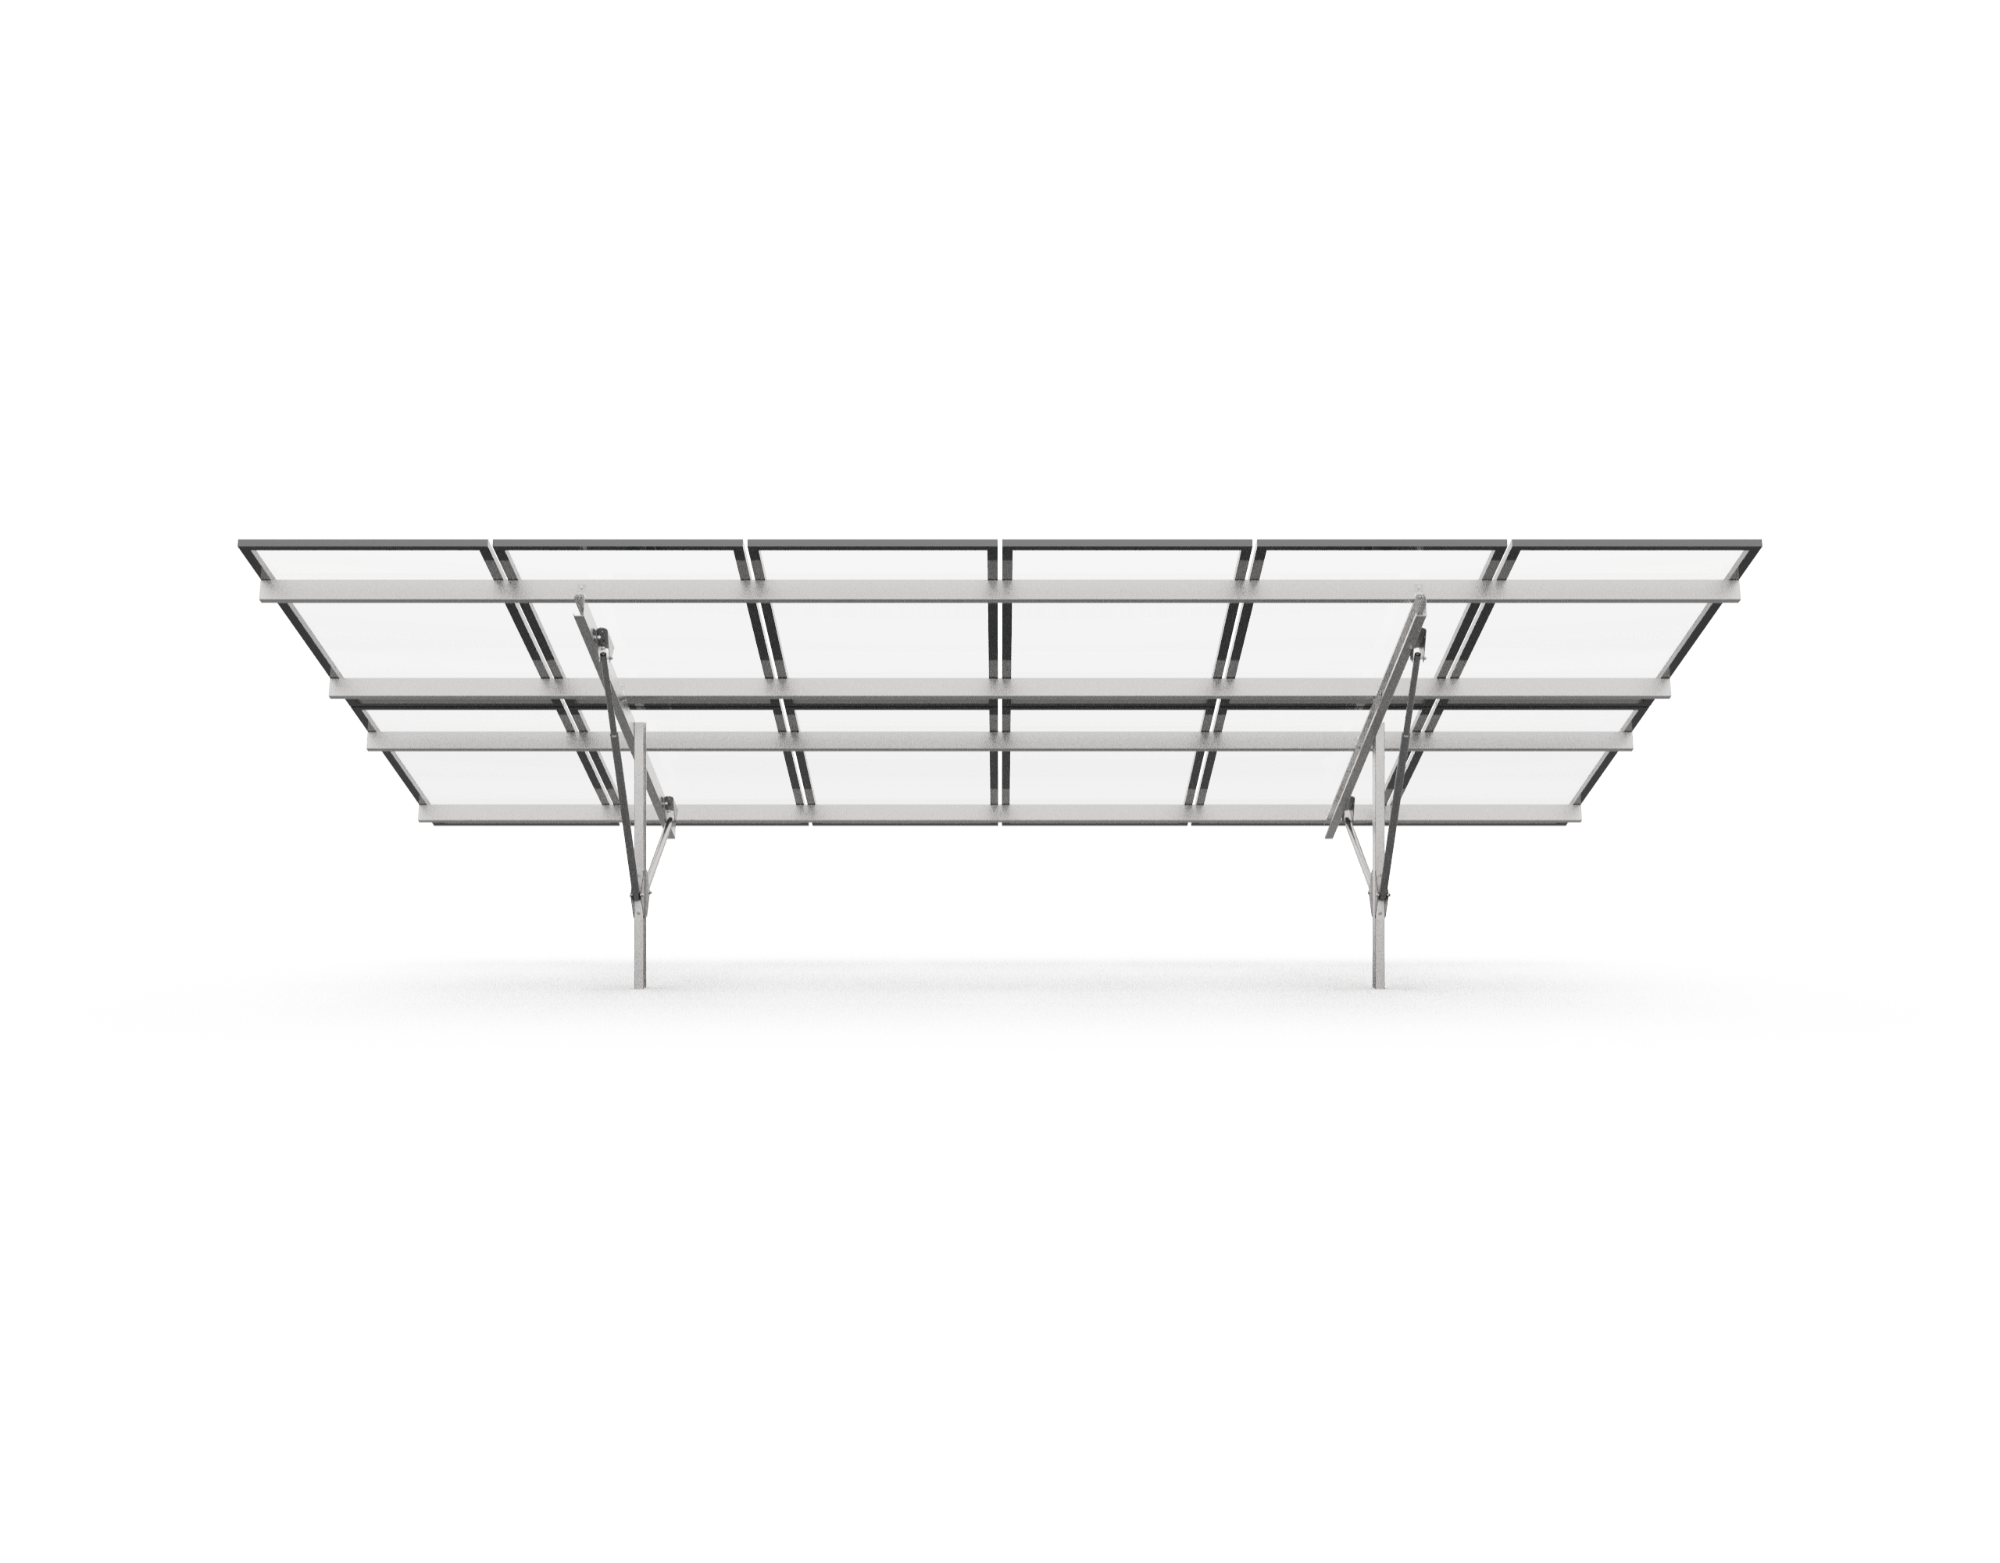
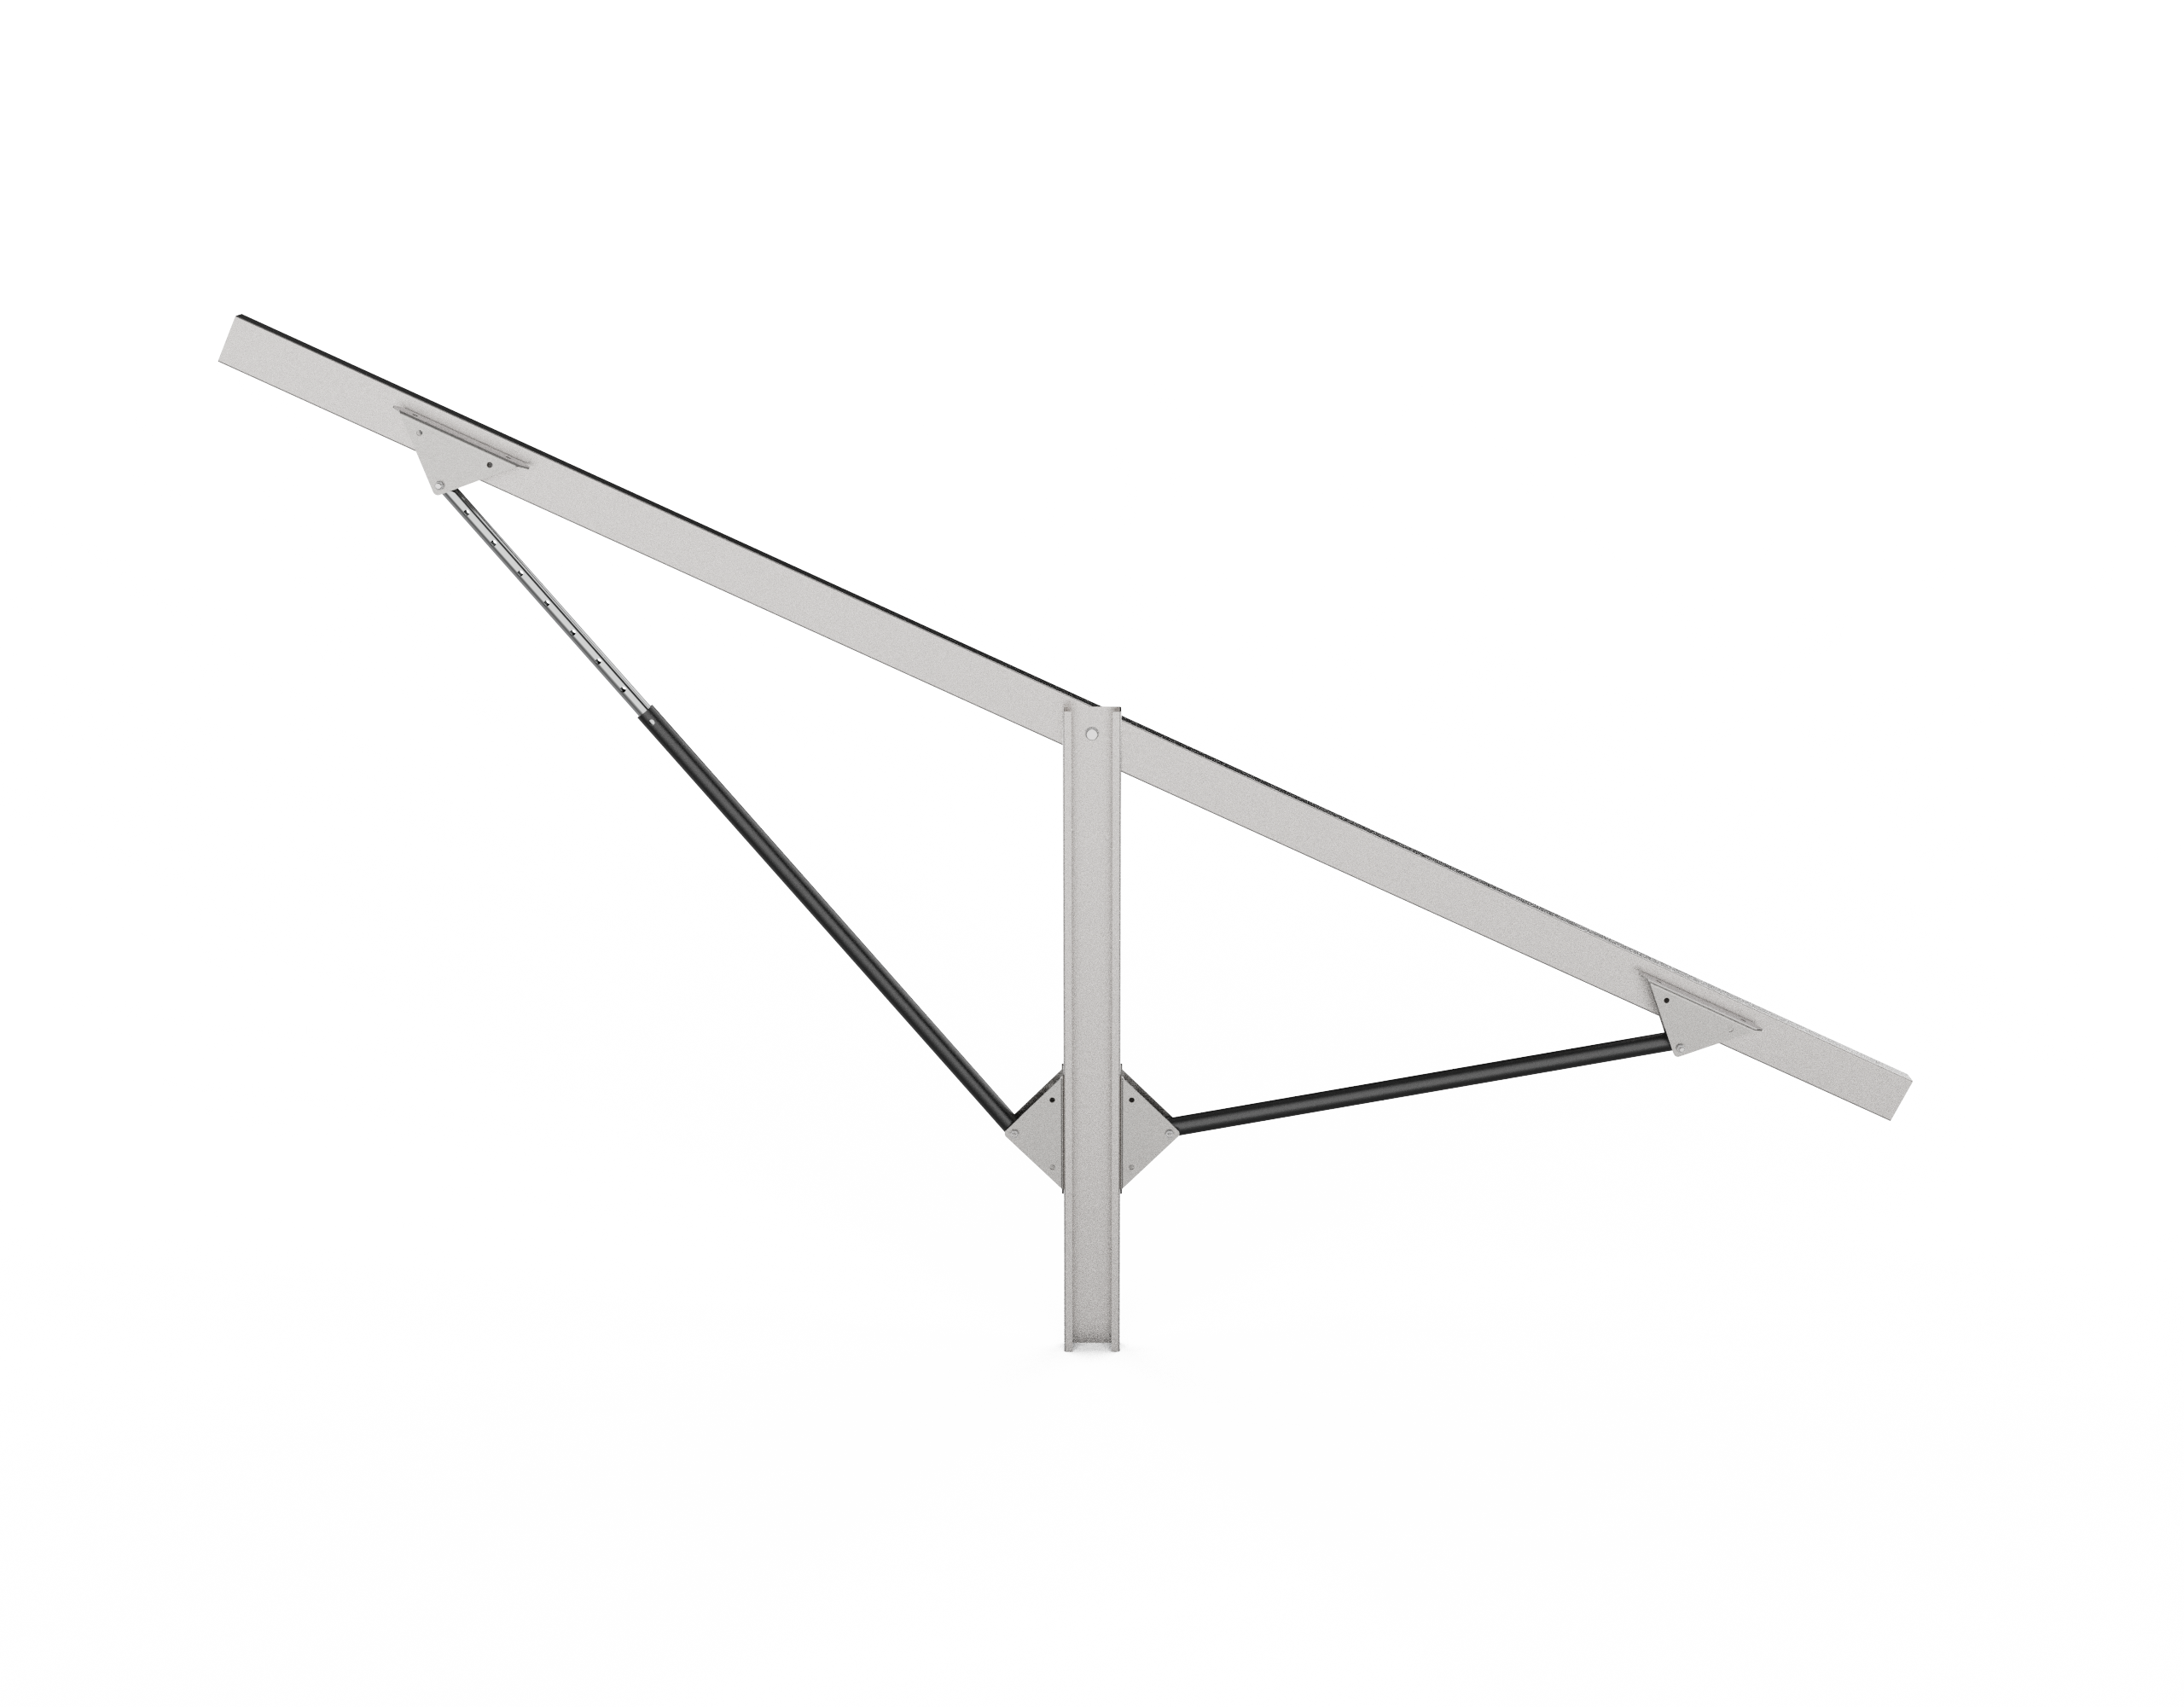
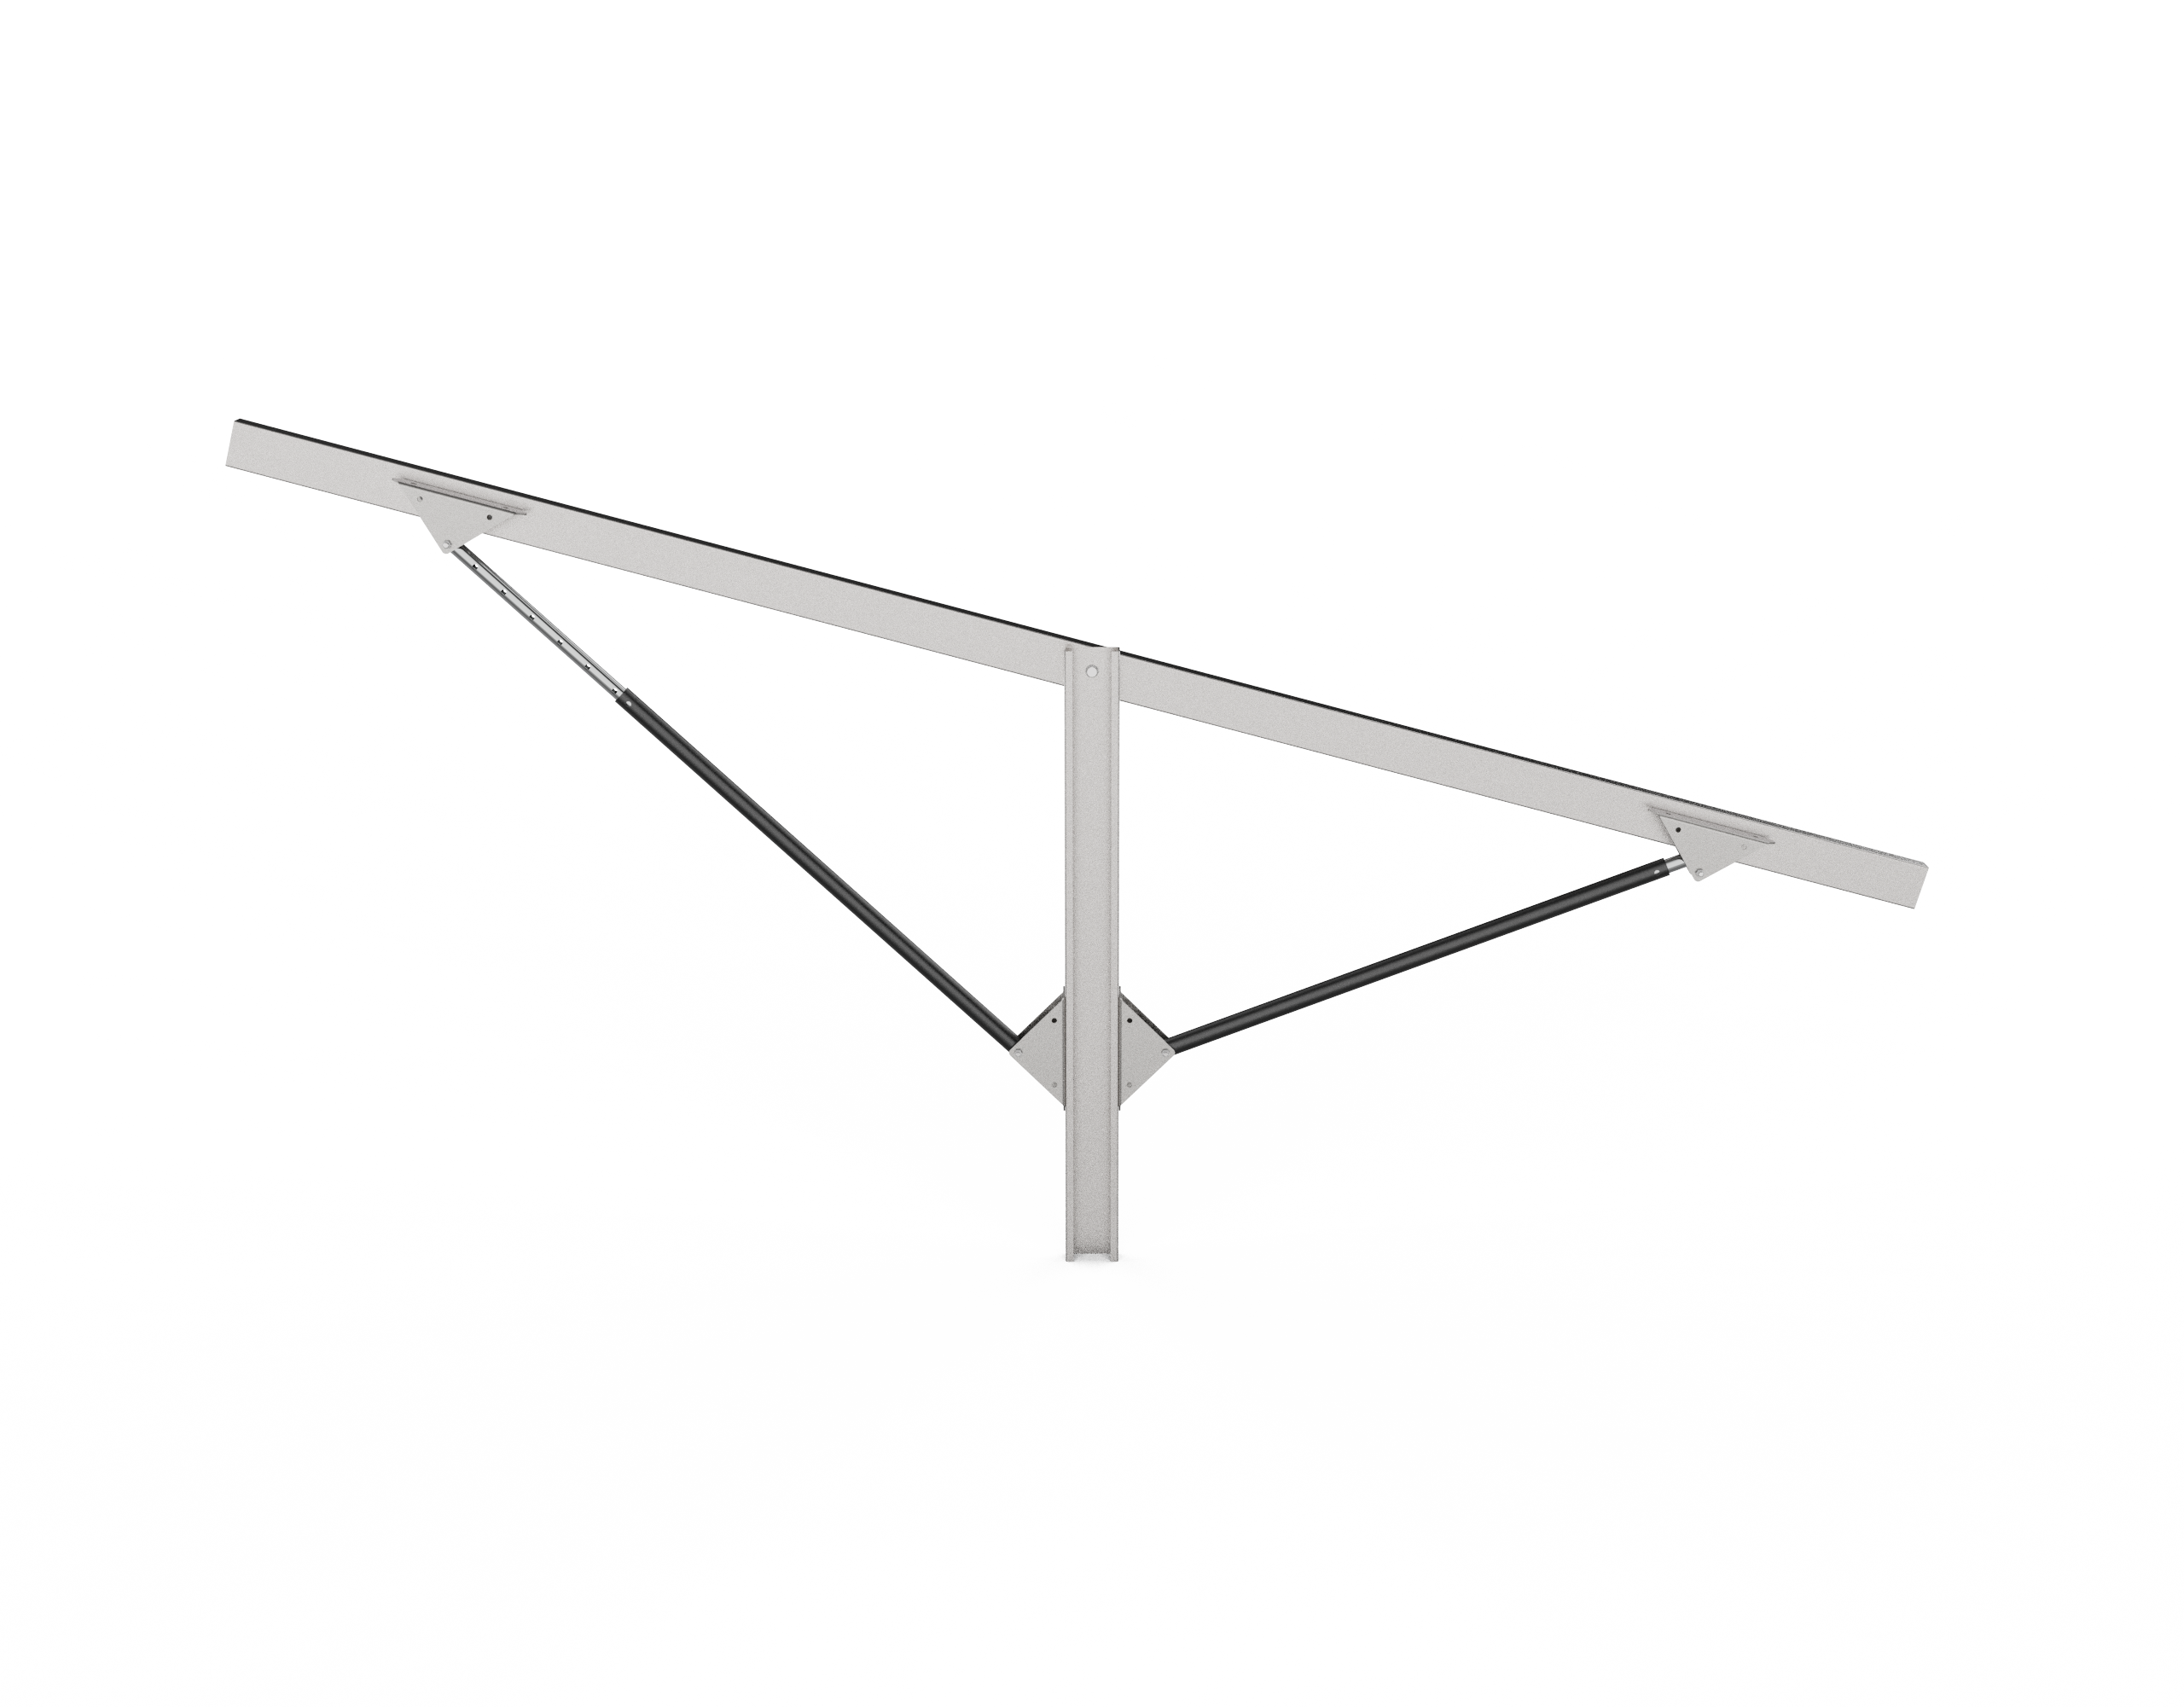
Solar Panel Mounting Accessories

Accessories Used in Solar Panel Mounting System

I. Introduction to Solar Panel Mounting Accessories
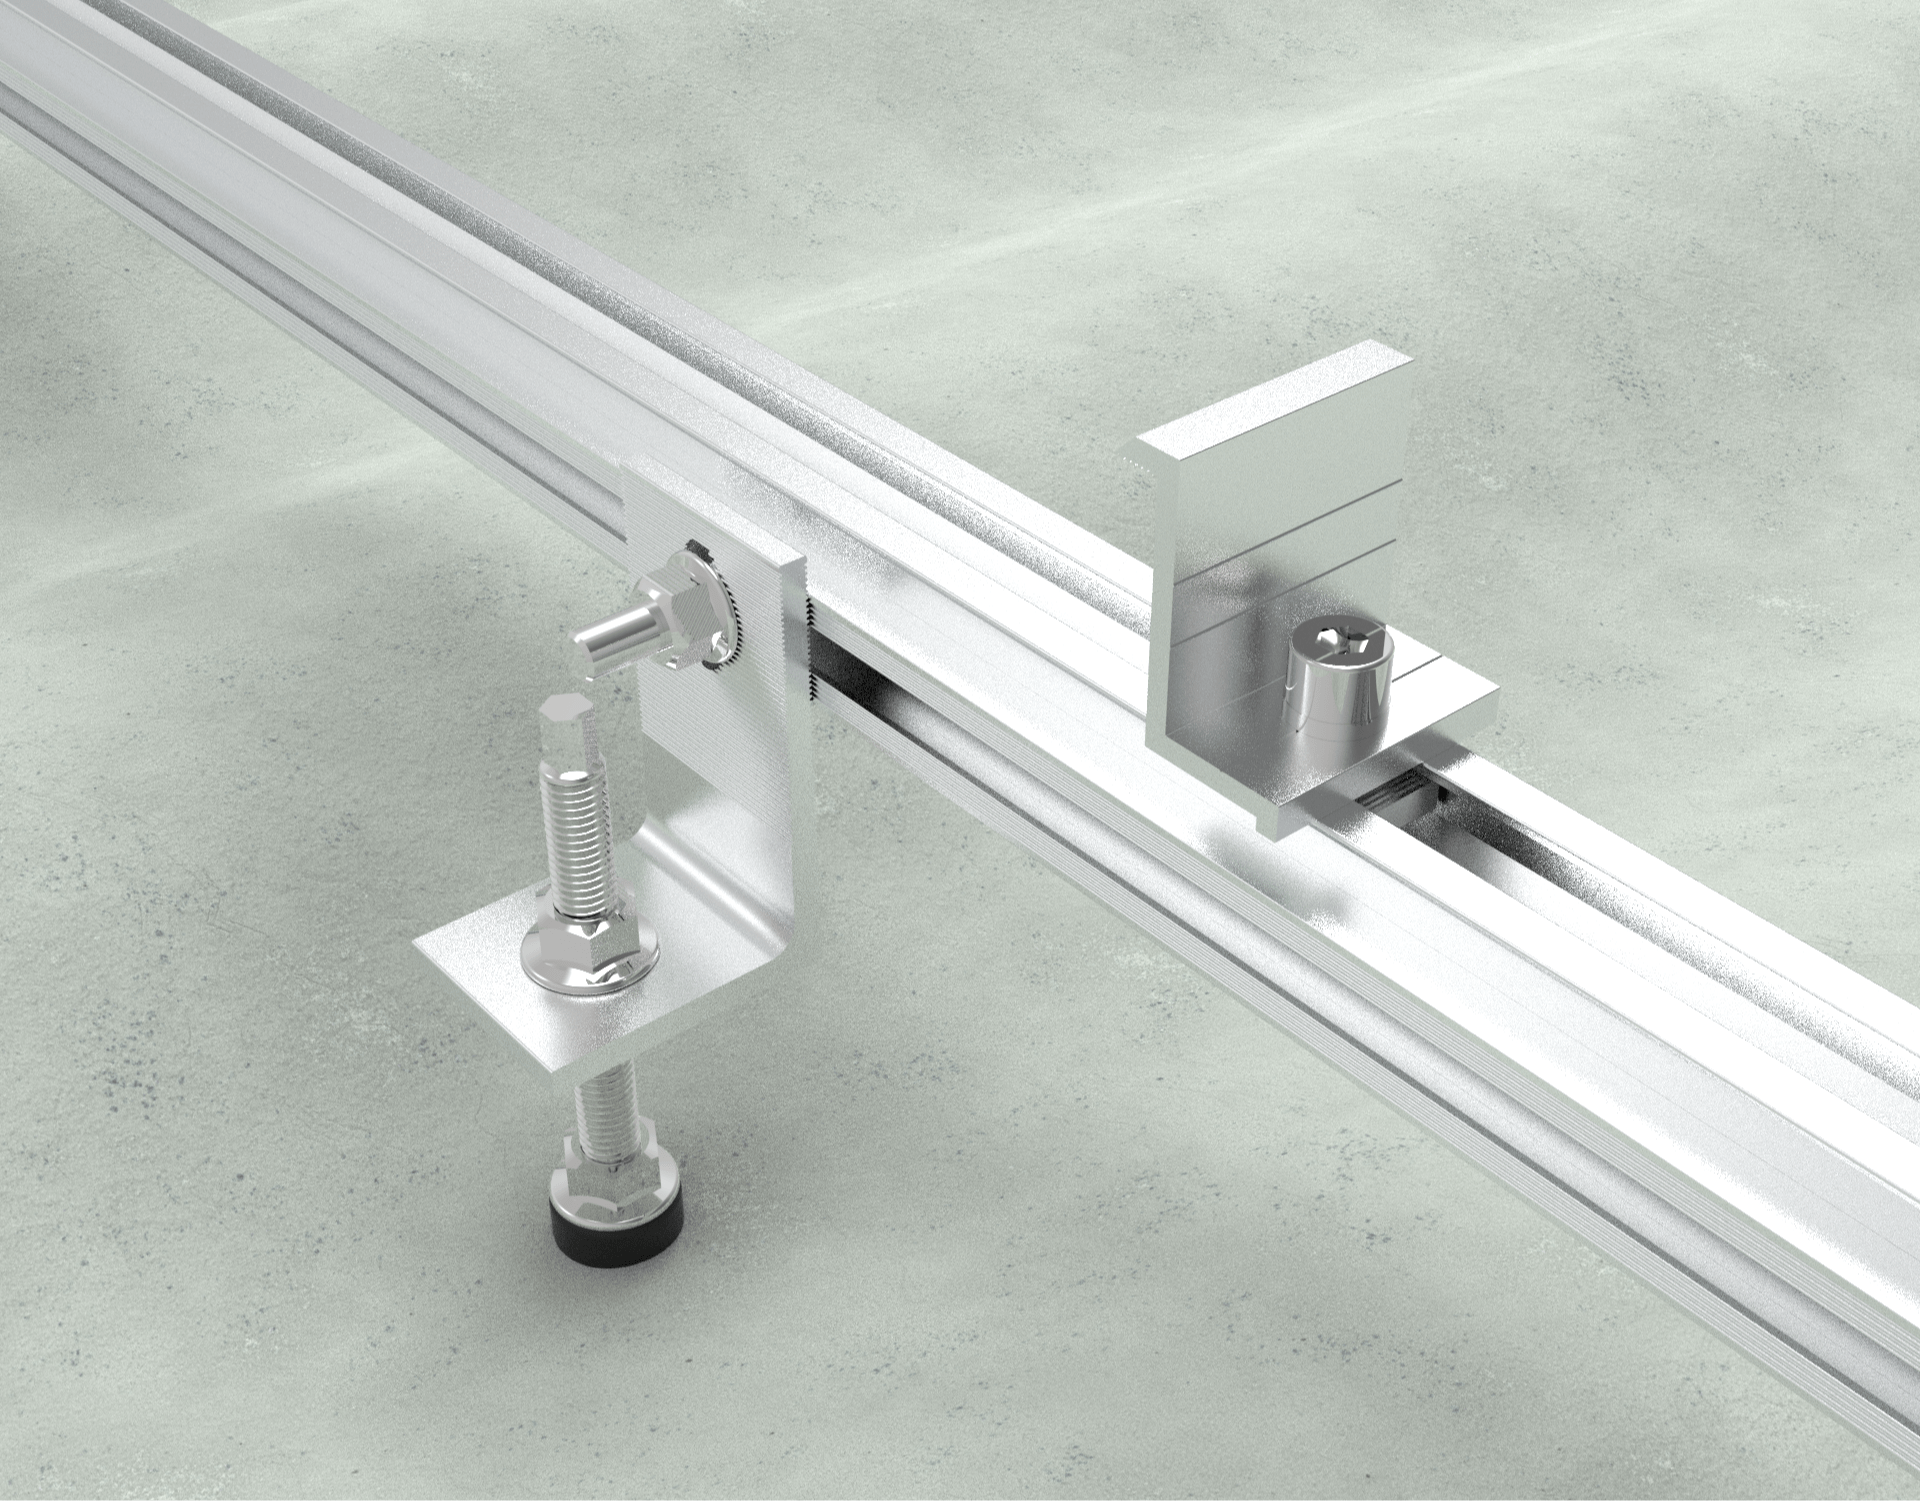
Solar Panel Mounting Accessories

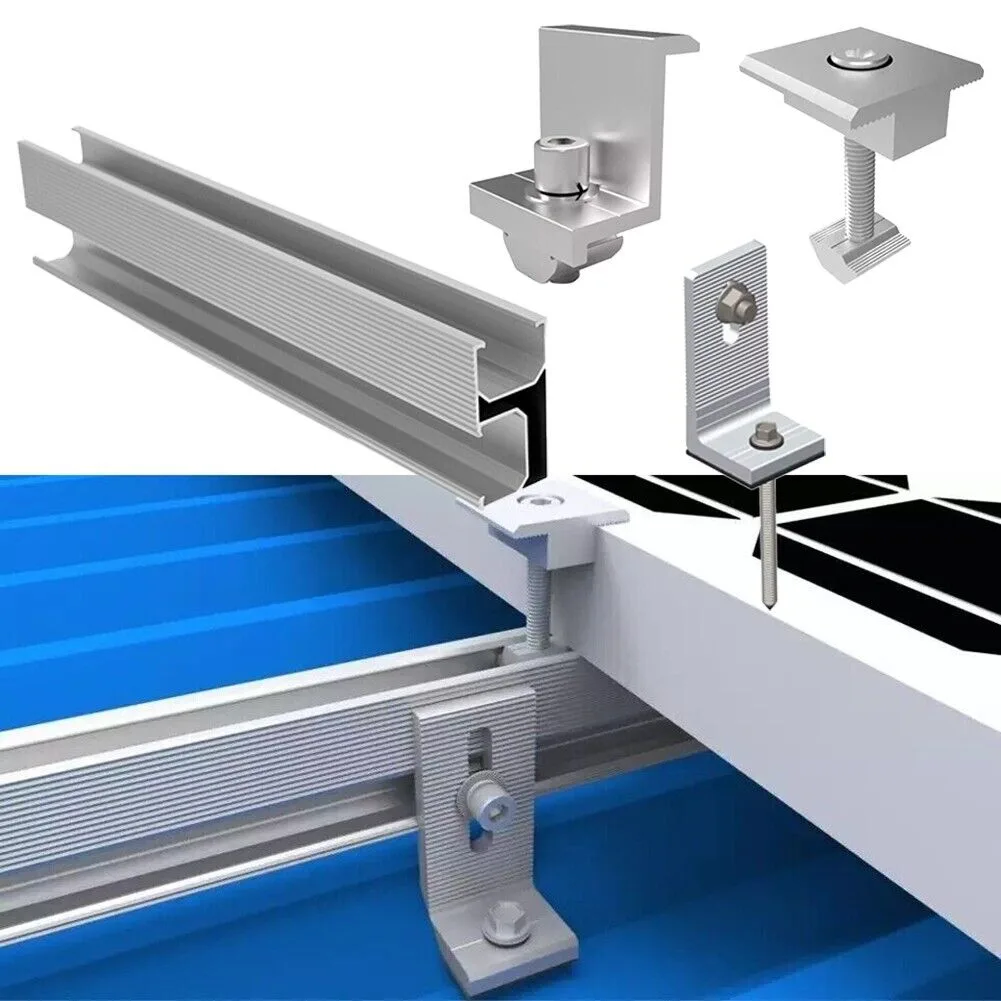
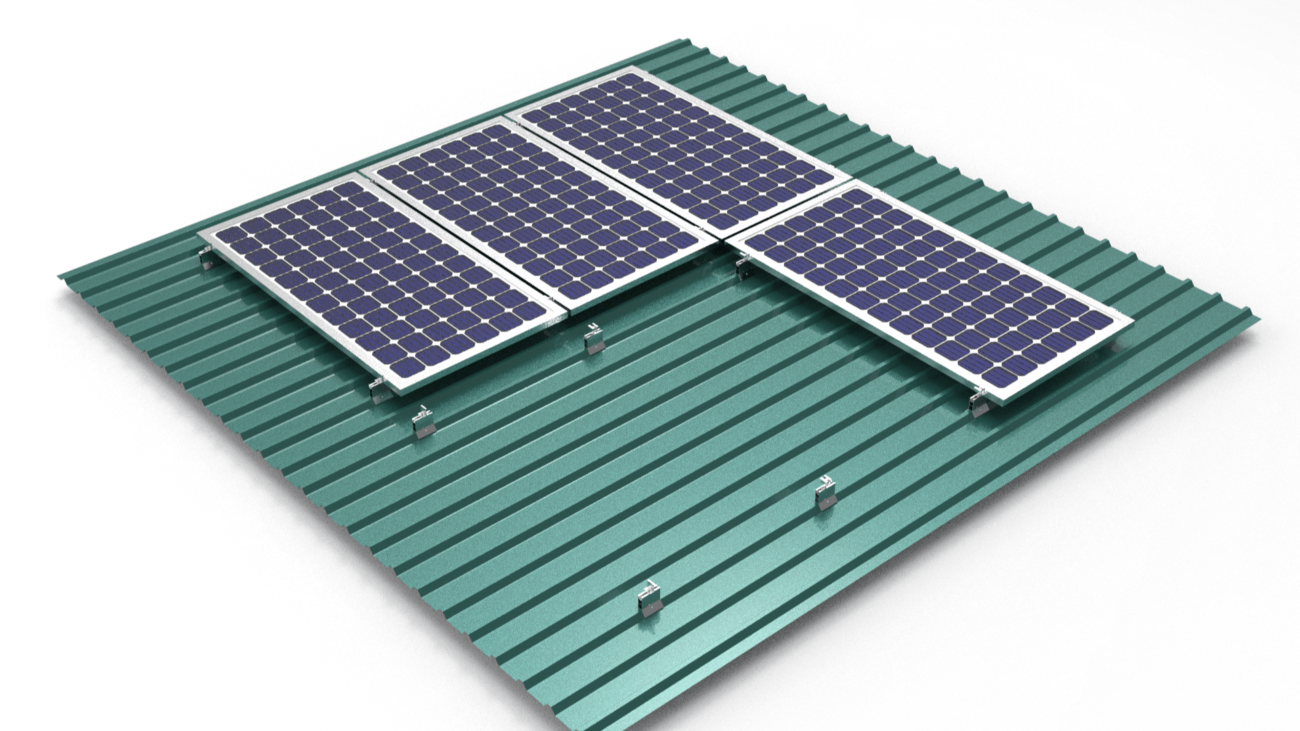
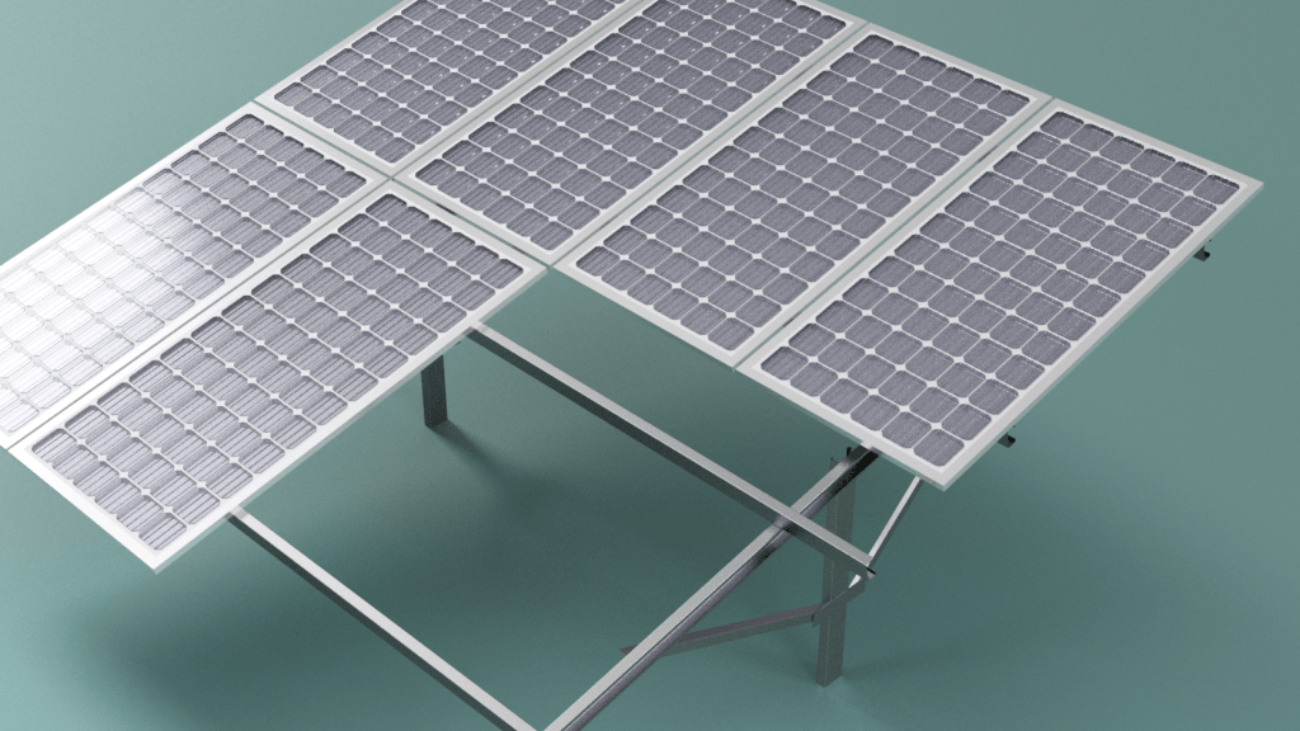
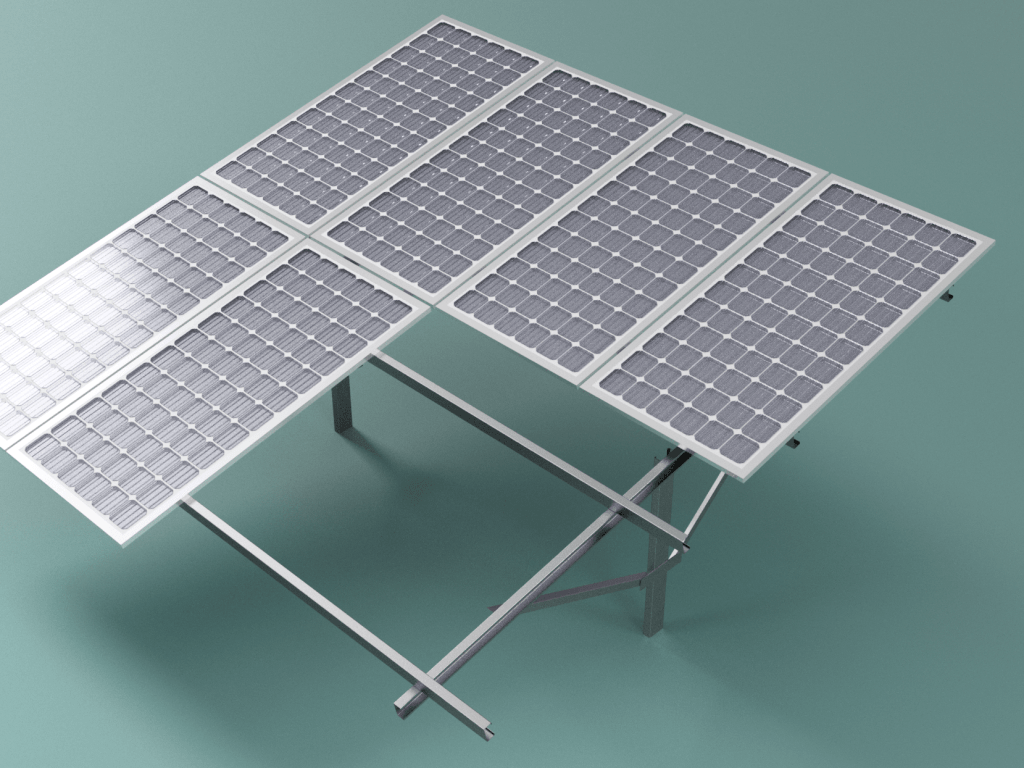
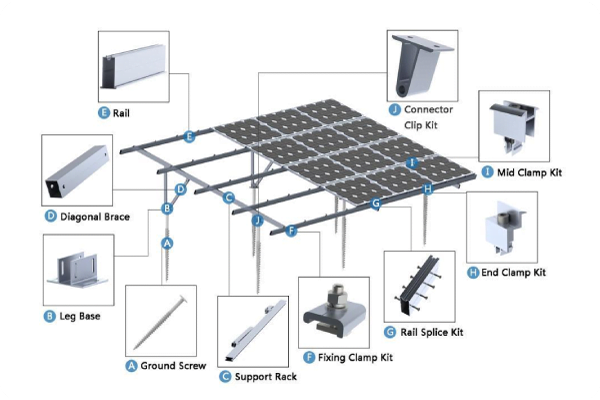
Solar panel mounting accessories are essential components of any solar panel mounting system. These accessories help securely install solar panels on rooftops, ground mounts or other surfaces.

Some key solar panel mounting accessories include:

  • Solar base plate – Provides a sturdy foundation for the solar panel structure.
  • Solar degree clamps – Allow adjusting the solar panel angle to optimize sunlight exposure.
  • End Z clamps – Attach solar panels securely to the mounting rails.
  • Middle U clamps – Hold solar panels together on mounting rails for stability.
  • Power snaps – Anti-theft clips to prevent solar panel theft.
  • Nuts and bolts – Fasten all components of the solar structure together.
  • Fastener chemicals – Bond mounting bolts to the installation surface for strength.
AccessoryPurpose
Solar base plateFoundation
Solar degree clampAngle adjustment
End Z clampPanel attachment
Middle U clampStability
Power snapSecurity
Nut/BoltStructure
Fastener chemicalStrength

These solar panel mounting accessories are made from durable materials like steel and aluminum. They can withstand tough outdoor conditions for long periods.

Using the right mounting accessories improves the safety, performance and lifespan of any solar panel installation. They provide the structural integrity needed to keep solar panels fixed securely under different wind, weather and environmental conditions.

Investing in good quality mounting accessories like spring nut-bolts, SS Allen bolts and structural fastener chemicals ensures your solar power system will function optimally for many years.

II. Solar Base Plate for Foundation

The solar base plate provides a sturdy foundation for the entire solar panel mounting structure. It is installed directly on the roof, ground or any other mounting surface.

The base plate bears the weight of solar panels, racks and other components. It must be made of durable materials like:

Base plates are available in different sizes like:

  • 41mm x 41mm
  • 80mm x 40mm

Larger solar panel installations require bigger base plates for greater load bearing capacity.

The key functions of a solar base plate are:

  • Anchor the mounting structure securely to the installation surface.
  • Resist corrosion and environmental damage.
  • Support the weight of solar panels, racks, wires etc.
  • Withstand high winds without failing.

A proper foundation is crucial for safety and performance of the solar power system. High quality base plates ensure:

  • Long term mounting structure stability.
  • Optimized energy output.
  • Reduced risk of collapse or damage.

Invest in sturdy and appropriately sized solar base plates for your installation. Proper selection and installation of base plates will maximize the lifespan of your solar panel mounting system.

III. Solar Degree Clamps for Angle Adjustment
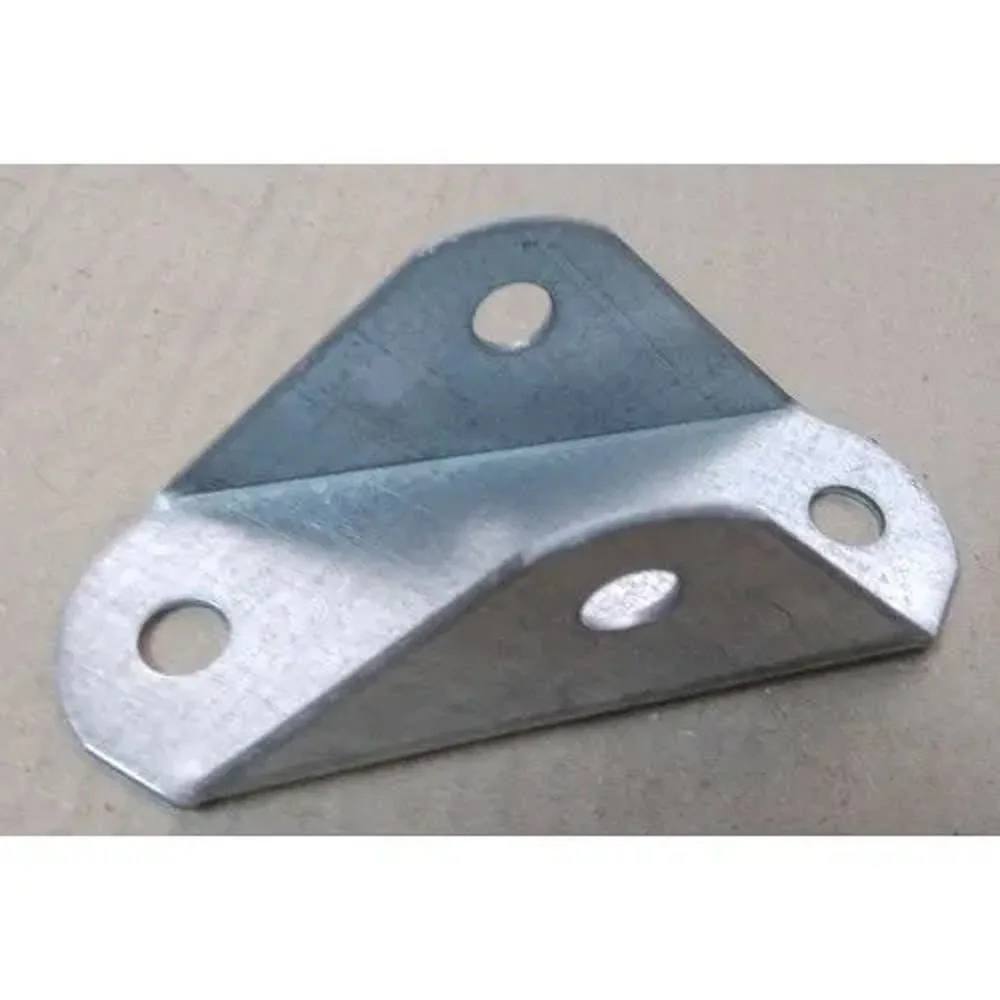
Solar Degree Clamps for Angle Adjustment

Solar degree clamps allow for seasonal tilt angle adjustment of the solar panels to optimize energy production.

These clamps are installed between the solar panel frames and the mounting rails. They have adjustable knobs that can tilt the panels at different angles.

Degree clamps are available in different sizes like:

  • 41mm x 41mm
  • 80mm x 40mm
  • High quality solar degree clamps are made of materials like:
  • Anodized aluminum
  • Stainless steel

Key features of degree clamps include:

  • Adjustability range of at least 45 degrees tilt.
  • Corrosion resistant construction.
  • Easy to install knob bolts.
  • Compatibility with panel frame sizes.

Proper tilt angle as per sun’s position ensures:

  • Maximum sunlight exposure on the solar panels throughout the year.
  • Optimized power output.
  • Enhanced return on investment.

Solar degree clamps must be robust enough to hold the panels steadily at the right angles. Investing in properly sized, good quality clamps will maximize energy production from your photovoltaic system.

Annual seasonal adjustment of panel angles using degree clamps improves solar electricity generation and economic viability of the installation.

IV. End Z Clamps to Attach Panels
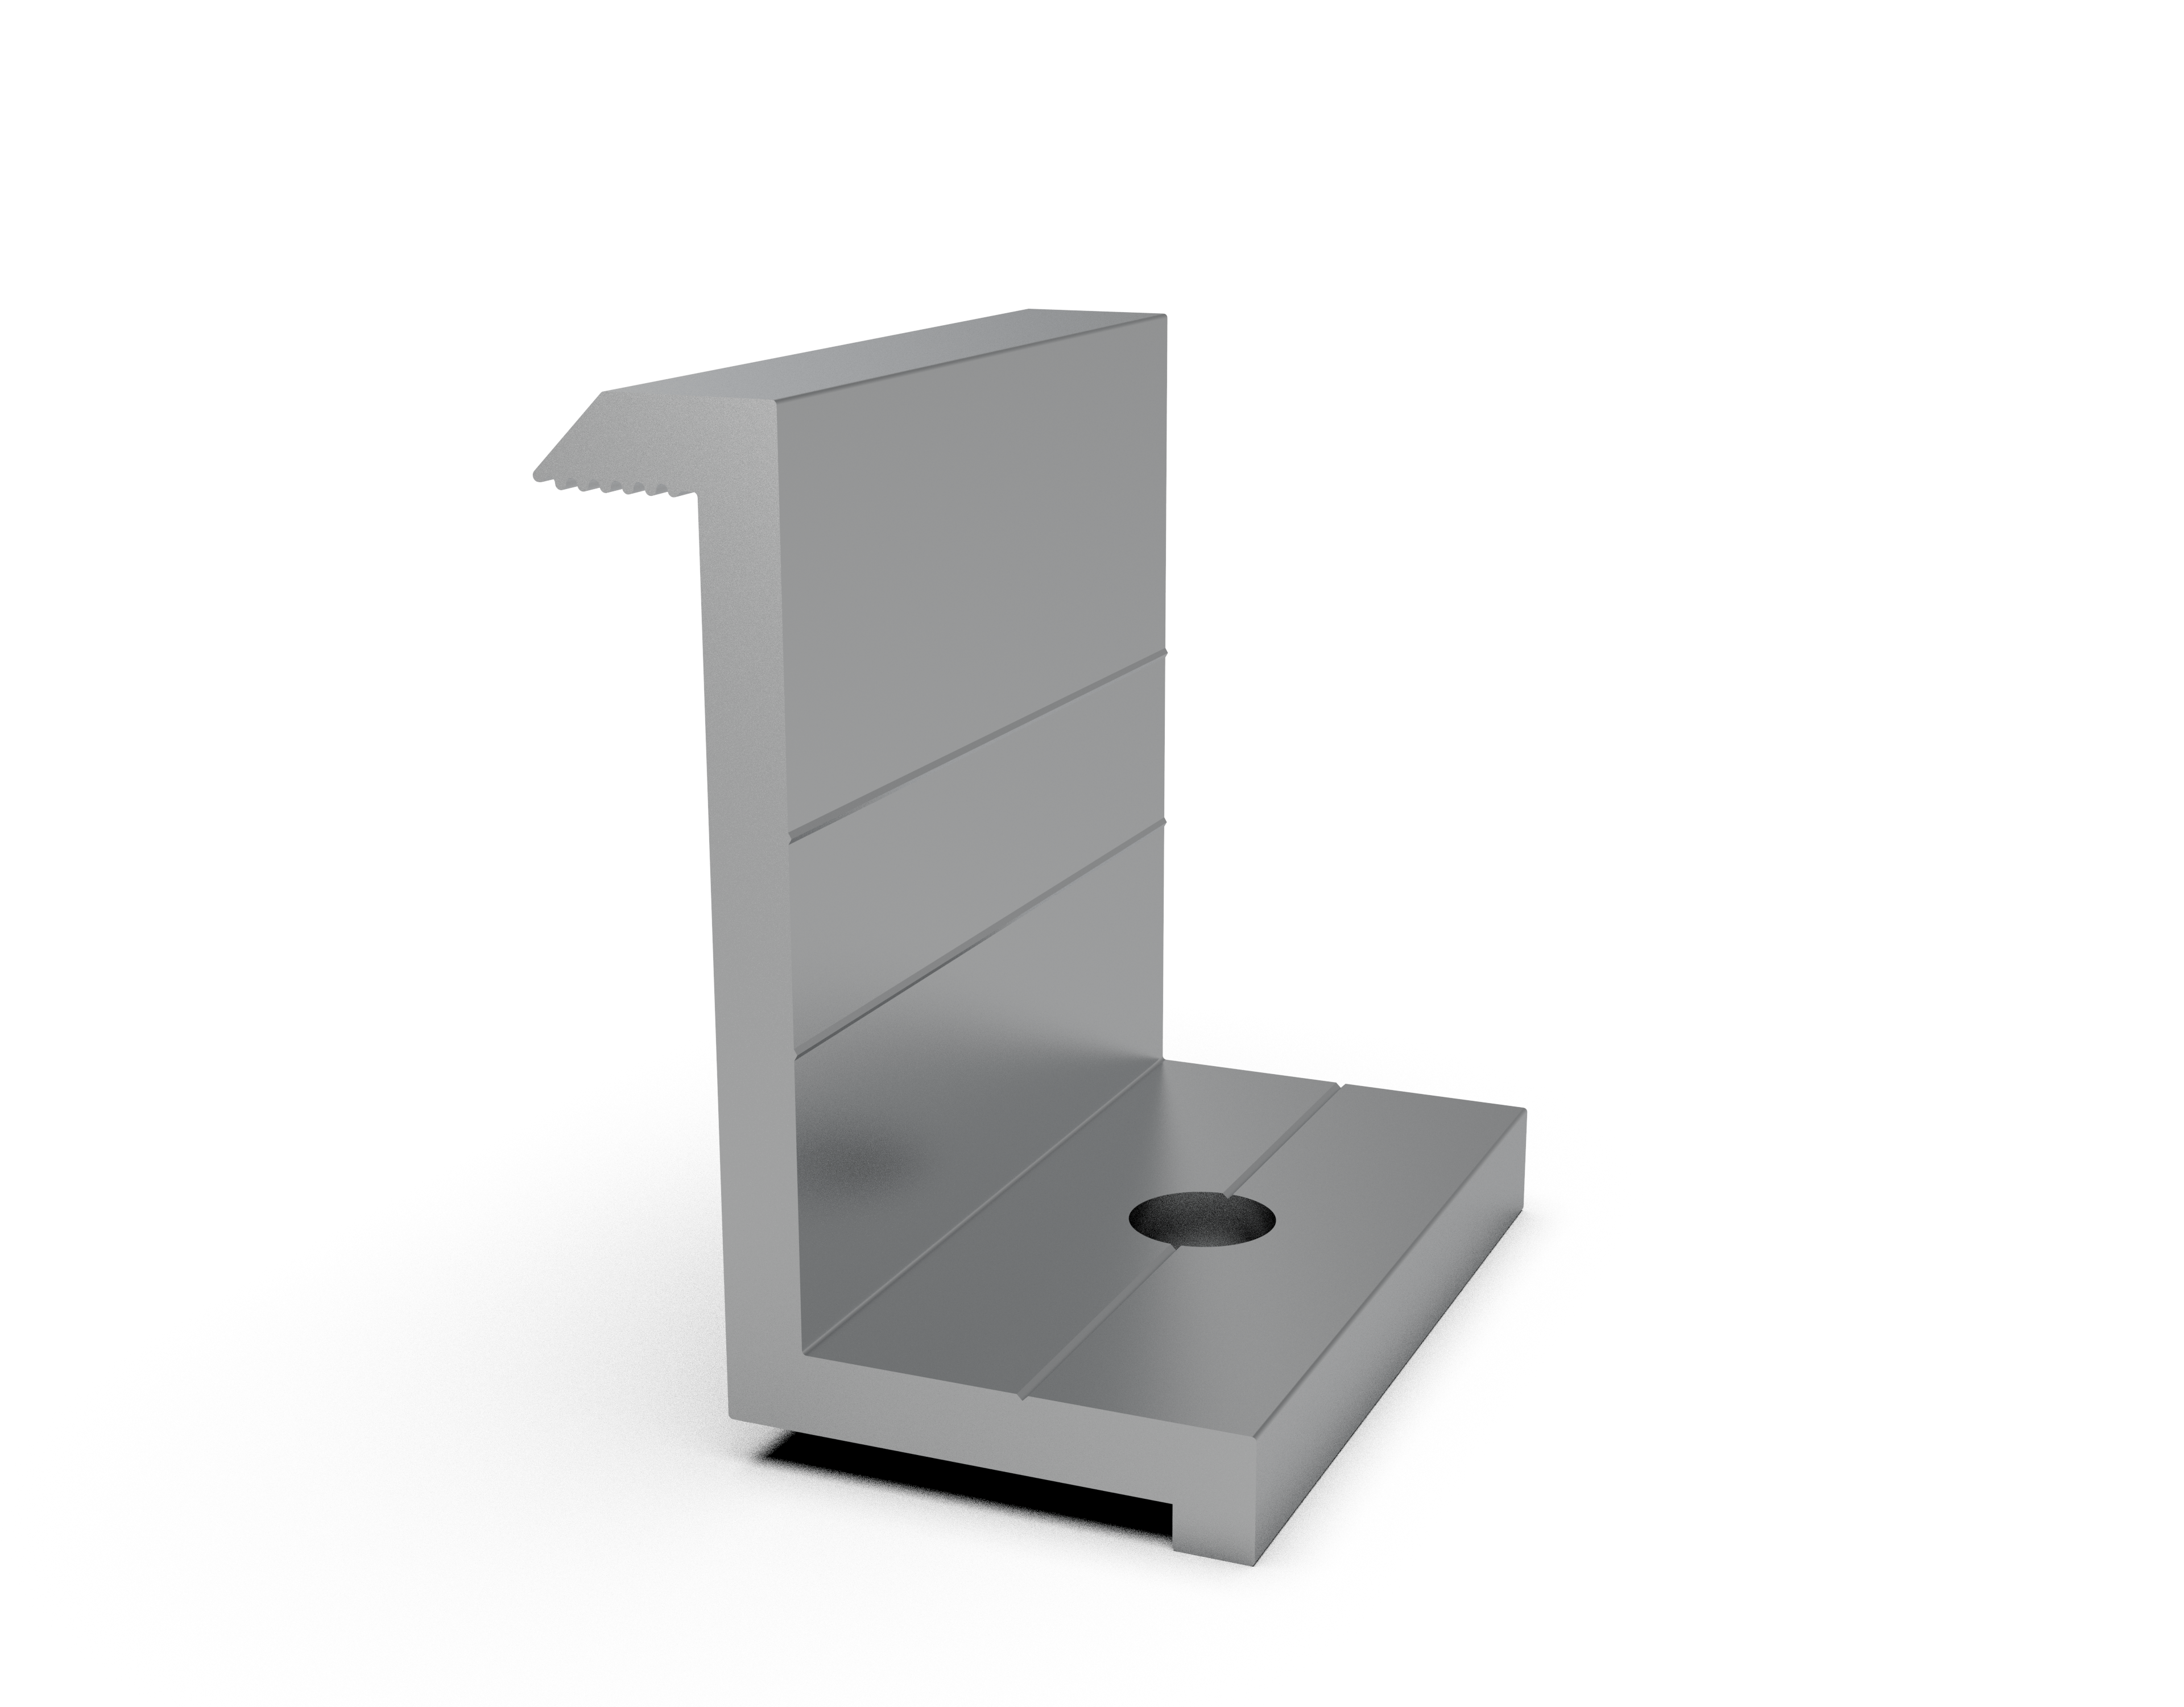
End Z Clamps to Attach Panels

End Z clamps are used to securely attach the solar panels to the mounting rails of the structure.

These clamps have a unique Z-shape design that tightly grips the edge of the solar panel frame on one side and the mounting rail on the other.

Key features of high quality end Z clamps include:

  • Sturdy aluminum or galvanized steel construction.
  • Weather resistant build.
  • Pre-drilled holes for easy installation.
  • Long lasting finish to prevent corrosion.

End clamps are available in various sizes to match different solar panel frame dimensions.

Benefits of using end Z clamps:

  • Provide very secure attachment of panels without gaps or loosening.
  • Allow for quick and easy panel installation.
  • Suitable for long term outdoor use.
  • Reusable if panels need rearranged.

Proper panel attachment is crucial for:

  • Optimized solar energy production.
  • Withstanding wind, rain and other weather events.
  • Preventing panel theft.
  • Ensuring long term safety and function.

Invest in good quality end Z clamps designed specifically for your solar panels. Correct installation using the right clamps will maximize the stability and lifespan of your photovoltaic system.

V. Middle U Clamps
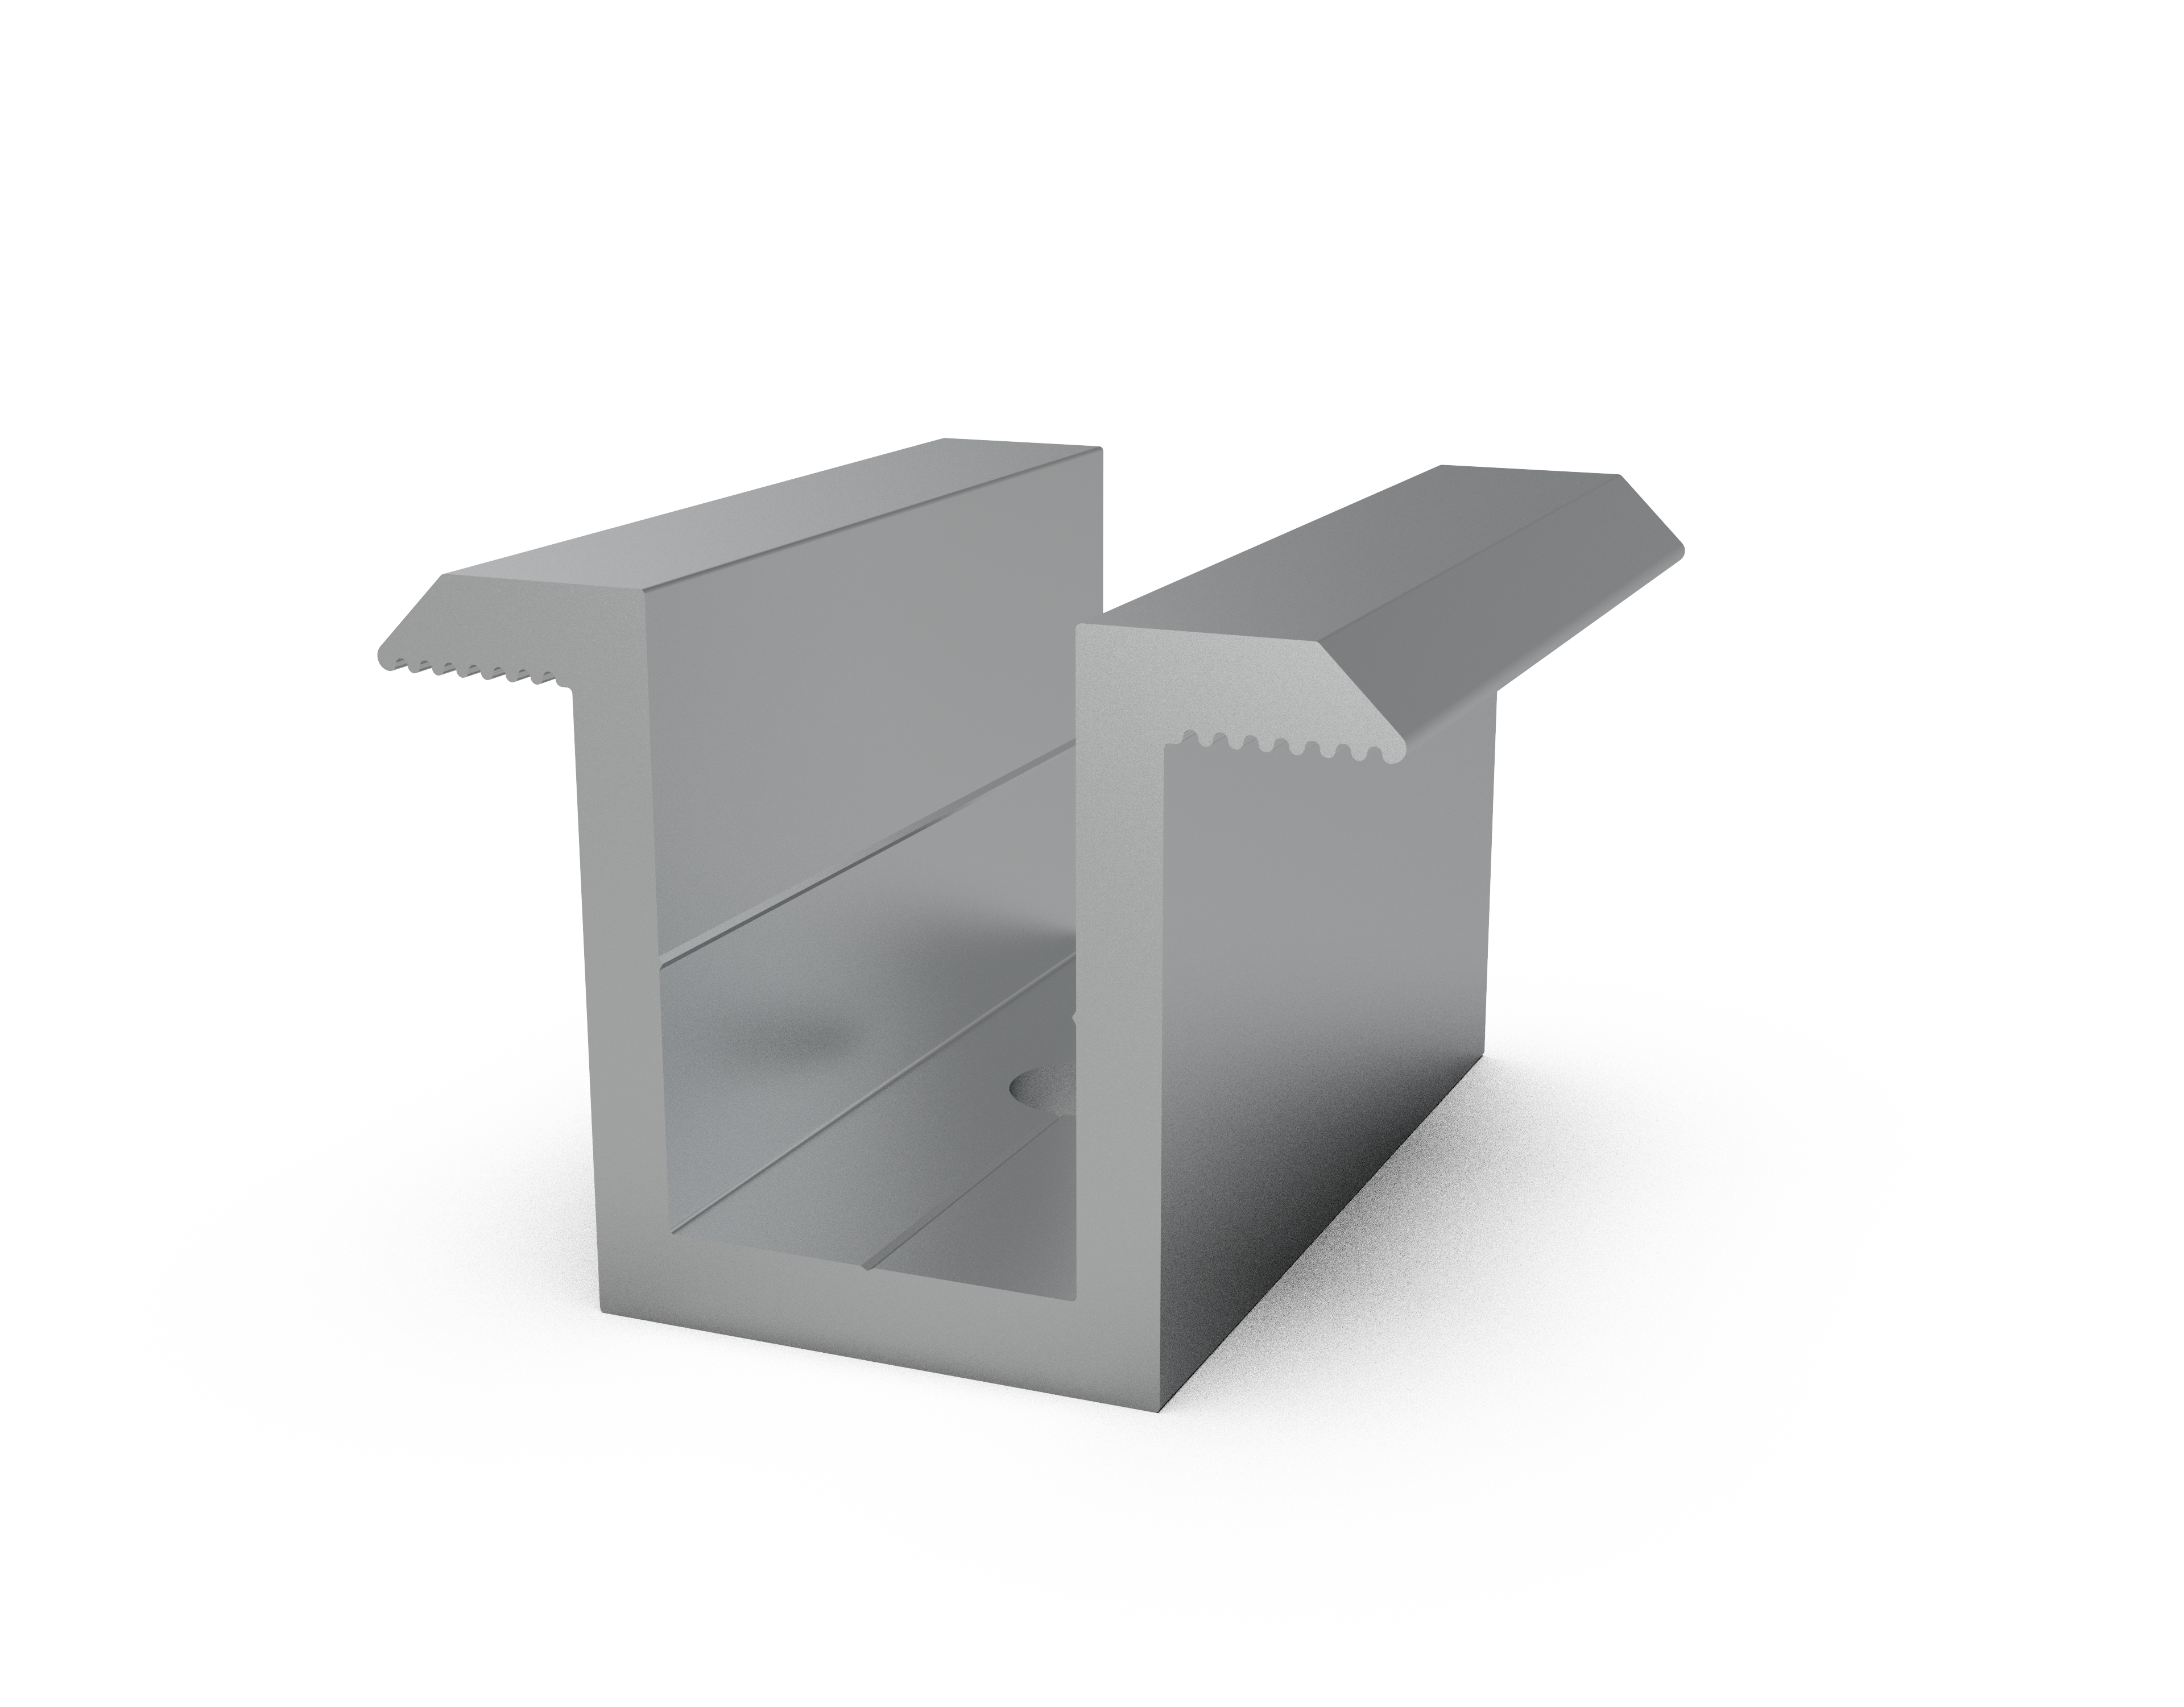
Middle U Clamps for Stability

Middle U clamps are installed between two adjacent solar panels on the mounting rail for optimum stability.

These U clamps have a curved, rounded shape that securely grips the edges of two panels equally.

Key features of high quality middle U clamps are:

  • Durable aluminum or galvanized steel construction.
  • Corrosion resistant finish.
  • Available in various sizes to fit panel frames.
  • Pre-drilled holes for quick installation.

Benefits of using middle U clamps:

  • Prevent panels from sliding down or drifting apart.
  • Provide excellent structural support.
  • Suitable for all types of solar panel mounting structures.
  • Reusable if panel positions need adjusted.

Proper stability of the solar panels ensures:

  • Optimized energy production over time.
  • Ability to withstand weather events like storms, snow etc.
  • Long term safety and function of the system.
  • Reduced maintenance costs.

Invest in appropriately sized, high quality middle U clamps designed for your specific solar panels. Correct installation of these clamps will maximize the structural integrity and lifespan of your photovoltaic system.

Key features of power snaps:

  • Made of durable UV-resistant plastic.
  • Available in different sizes to fit rail dimensions.
  • Require no tools for installation.
  • Reusable as needed.

Benefits of power snaps:

  • Deters potential solar panel theft.
  • Provides extra peace of mind and security.
  • Suitable for all types of panel mounting structures.
  • Quick and easy to install.

VII. Nuts and Bolts for Structure

Nuts and bolts are used extensively in solar panel mounting to assemble the structural framework.

Common types include:

  • Spring nuts – Allow easy insert of bolts into drilled holes.
  • SS Allen bolts – Tighten panels and components securely.
  • Stud bolts – Attach items like junction boxes.

Benefits of using the right nuts and bolts:

  • Strong assembly of the entire mounting structure.
  • Ability to withstand weather elements like rain, wind.
  • Long term integrity and stability.
  • Reusability during the maintenance.

High quality hardware is essential for:

  • Optimized energy production over decades.
  • Reduced risk of structural failures.
  • Lower maintenance time and costs.

Choosing appropriately sized nuts and bolts made of durable materials ensures a sound framework for your solar panels. Periodic inspection and proper re-tightening preserves the stability and lifespan of the installation. Investing in good quality mounting hardware is vital for a robust and long-lasting solar power system.

VIII. Fastener Chemicals for Extra Strength

Fastener chemicals provide additional strength and stability for roof-mounted solar installations.

These adhesives are used with bolts and screws to securely bond the mounting structure to the roof surface.

The typical application process involves:

  • Drilling a hole in the roof material.
  • Injecting the chemical into the hole.
  • Inserting a bolt and allowing the adhesive to set fully.

Benefits of using fastener chemicals:

  • Create an exceptionally strong and waterproof bond.
  • Allow secure attachment to tile, metal and other roof types.
  • Compensate for weaker roof materials.
  • Resist weathering and deterioration over time.

Proper structural strength enables the solar system to:

  • Withstand extreme winds, rain and other weather events.
  • Avoid leaks, cracks and damage to the roof.
  • Maintain optimal mounting integrity for decades.

Proper installation by trained professionals ensures maximum structural reinforcement and lifespan for your roof-mounted solar system.                

Solar Roof Mount - 5 Things to Know

Solar Roof Mount – 5 Things to Know

Solar Roof Mount - 5 Things to Know

I. Roof Requirements for Installing Solar Roof Mounts

Installing solar panels on your roof requires ensuring your roof’s direction, sun exposure, condition, and expected lifespan will support a successful solar array installation. Meeting key roof requirements will allow your solar roof mount system to maximize energy production over the 30+ year system life.

A. Roof Direction and Sunlight Exposure

Optimizing roof direction and sunlight access is crucial for solar. Some key considerations include:

  • The roof should face southwards to maximize exposure. Southern roof orientations are best, while east/west may work depending on panels and location.
  • Trackers may help capture more energy if limited by non-southward roof directions.
  • The roof should get full sun for at least 5 hours per day year-round.
  • Nearby trees, buildings, or other structures should not heavily shade the solar roof space.

Some Guidelines for Hours of Direct Sunlight

Roof DirectionGood Solar ExposureMarginal Solar Exposure
South6-8 hours4-6 hours
East/West5-6 hours3-5 hours

B. Roof Condition and Lifespan

The roof must also meet durability and lifespan needs:

  • Roof condition should be assessed before installing solar. Look for:
  • No major damage, leaks, or structural issues
  • No more than two layers of roofing
  • At least 10 years of expected lifespan remaining
  • If roof condition is inadequate, replace or repair prior to or alongside solar install.
  • Roof must withstand 30+ years to match expected solar panel system lifespan.
  • Additional roof supports may be added depending on climate factors like snow.

Professional installers conduct thorough roof inspections and advise if repairs or reinforcements are recommended before mounting racks and panels. Solar arrays can place significant weight loads on roofs.

Following proper procedures for durable roofing and structural enhancements ensures your home can support solar over the long term. This allows you to maximize return on investment through decades of ongoing solar energy harvesting.

Click here to Learn More

II. Types of Roofs Best Suited for Solar Mounts

Many common roof types can support solar panels, including:

  • Asphalt – The most popular residential roofing. Durable and low maintenance.
  • Metal – Long lasting. Galvanized steel and aluminum are common.
  • Tile – Beautiful option made from terracotta or concrete. Handles weather well.
  • Slate – Traditional natural stone roofing with longevity. More expensive.
  • Gravel built-up roofs – Common flat commercial roofing using gravel for reflectivity.

The best roof type depends on your home’s specific:

  • Building size, height, and layout
  • Climate and weather conditions
  • Location’s seismic activity
  • Aesthetics and budget

An experienced solar installer will evaluate the above situation and structural factors during a site survey. This informs the customized system design and installation plan for your roof.

Both sloped and flat roofs can integrate solar successfully. Ballasted footing systems are often used on commercial flat roofs since they don’t penetrate the roof membrane.

Solar shingles that embed panels directly into your roof are also an option. While more expensive, they provide a sleek, integrated appearance.

Overall, a reputable solar provider can customize the solar setup for nearly any residential or commercial roof type.

III. Ballasted vs. Penetrating Solar Roof Mount Types

Ballasted vs. Penetrating Solar Roof Mount Types

There are two main solar roof mount system types – ballasted and penetrating:

Ballasted Mounts

  • Placed on top of the roof without penetrations
  • Held in place by heavy weighted bases as ballast
  • Well-suited for flat commercial roofs
  • Pros:
  • Don’t damage roof membrane
  • Easier installation
  • Can be moved and reconfigured
  • Cons:
  • More prone to wind or storm disruption
  • Generally require larger roof space

Penetrating Mounts

  • Attached directly into the roof using lag bolts
  • Provides very secure attachment
  • Allows for steeper angle/tilt for sloped roofs
  • Pros:
  • Maximum stability and wind/seismic resilience
  • Enable roof tilt for better sun exposure
  • Cons:
  • Risk leakage if not properly sealed
  • May void roofing warranties

Professional installers evaluate factors like roof type, weather, seismic issues, and snow load to recommend the optimal mounting system. Hybrid approaches are also possible using some ballast along with penetrating mount points.
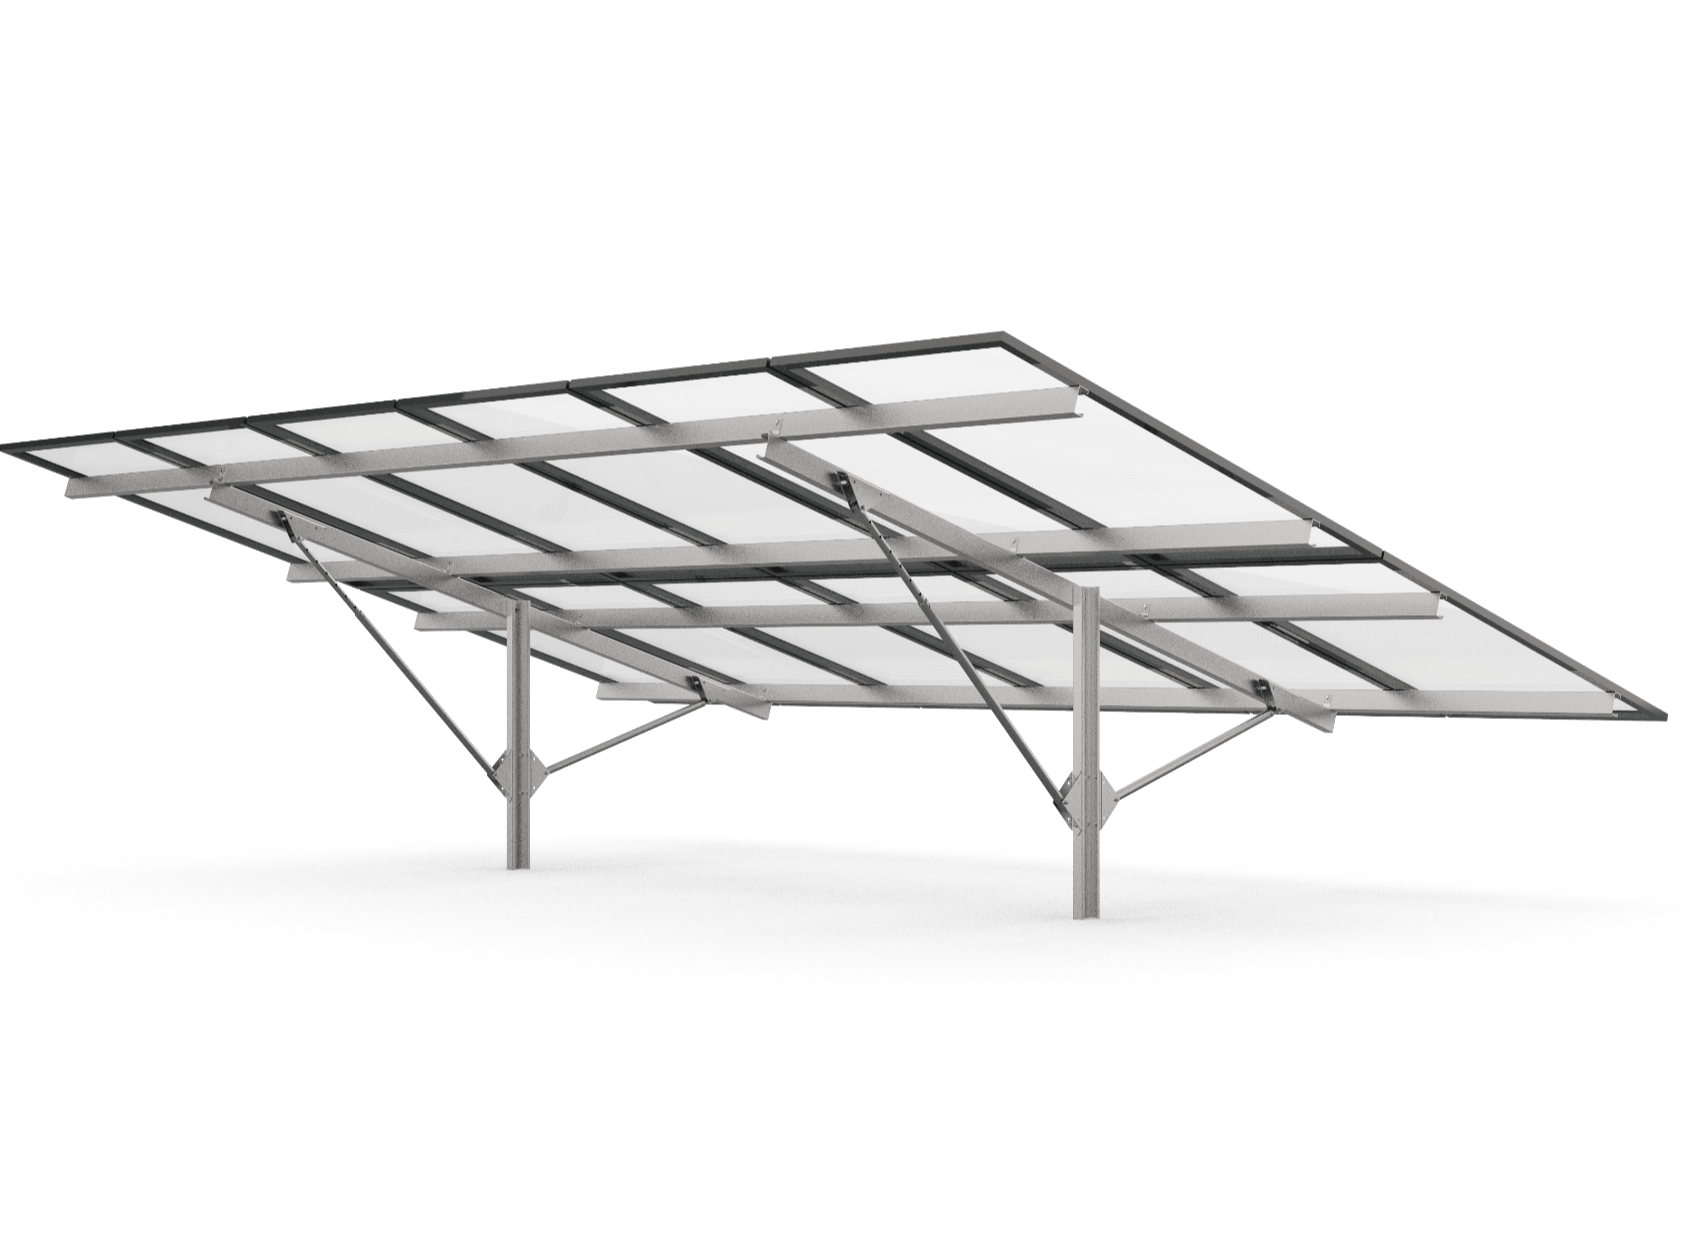
The right solar mounting method helps ensure safety, stability, and maximized solar panel efficiency over decades of operation.

IV. Amount of Roof Space Needed for Residential Solar Panels

A common question homeowners have is how much roof area a solar panel system requires. For a typical residential home, the average system size is:

  • 400-700 square feet – This usually allows meeting 60-100% of the household’s electricity usage, depending on energy efficiency and family size.
  • Within that range, considerations for solar array size include:
  • Percentage of electric bill offset desired
  • Available south-facing roof square footage
  • Panel output and efficiency ratings
  • Electricity usage amounts and patterns
  • Budget
  • Aesthetic preferences

If limited by insufficient rooftop space, you still have options:

  • Smaller
  • to offset a portion of usage
  • Ground-mounted panels in the yard
  • Panels split across available roof sections
  • Solar shingles embedded seamlessly into roof
  • Offsite or community solar program subscriptions

For specific homes, an even larger or smaller customized system may be recommended by your solar installer:

  • Large luxury homes may install 1000+ square foot arrays
  • Special projects like garages or pool houses could use 50-200 square feet

Factor in your own goals and talk to an installer about tailoring the optimal solar system size for your residential roof.

V. Hiring an Experienced, Licensed Solar Installation Company

The key to a successful, problem-free solar array installation is hiring a qualified solar provider. Be sure to verify any potential installers:

  • Have all required licenses for solar and electrical work in your state
  • Carry general liability insurance plus workers’ compensation
  • Have certified installers on staff
  • Are registered with the Better Business Bureau
  • Have been operating for 5+ years
  • Can provide multiple local customer references

For roof-mounted solar, prior roofing experience is highly recommended to safeguard your home’s integrity. Seek out installers with expertise in:

  • Inspecting roof structural soundness
  • Assessing roof lifespan compatibility with 30-year solar life cycles
  • Mounting racking systems securely on sloped and flat roof structures
  • Sealing penetrations properly during mounting to avoid leakage
  • Working carefully around vents, skylights and other rooftop elements

Choose a reputable local solar company dedicated to:

  • Providing customized site evaluations and solar system design
  • Clearly explaining mounting methods, panel options, and installation steps
  • Minimizing interference and damage to your roof
  • Installing solar properly to meet your energy needs and maximize ROI

Taking care to vet and hire the best solar provider protects your investment and ensures your roof-mounted solar system performs safely for decades.

Anodized Aluminum

Anodized Aluminum: Is it the Ideal Solar Panel Frame Material?

Anodized Aluminum

I. Understanding Anodized Aluminum

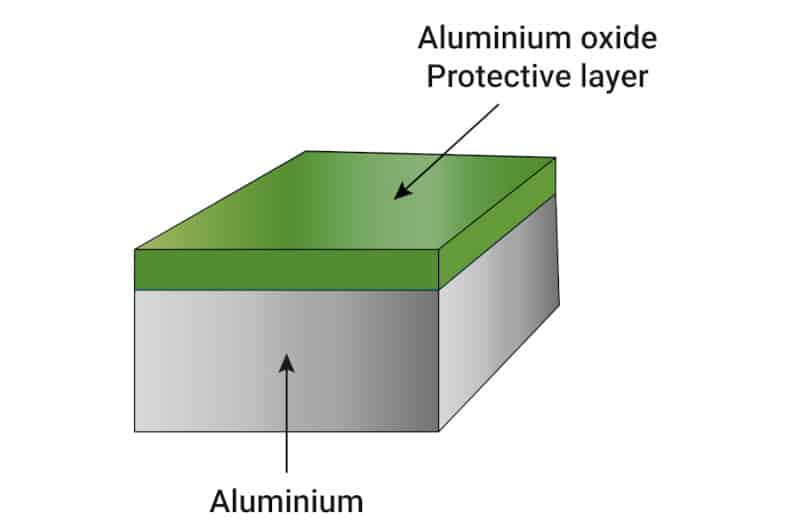
Anodized aluminum is an aluminum alloy that undergoes a process called anodization, in which an oxide layer forms on the surface of the metal.

Key properties of anodized aluminum include

  • Corrosion resistance
  • Strength
  • Durability
  • Light weight

The anodization process:

  • Thickens the natural oxide layer on the aluminum surface
  • Creates a transparent, hard and protective finish

The resulting surface resists:

  • Corrosion
  • Wear
  • Weathering
  • Scratching

Benefits of the anodized layer:

  • Corrosion resistance
  • Protects against oxidation, rust, staining
  • Surface hardness
  • More scratch and abrasion resistant
  • Durability
  • Withstands weathering and harsh conditions
  • Aesthetic versatility
  • Available in a range of finishes and colors

 Anodizing is an electrochemical process that creates a protective oxide layer on the surface of aluminium. This coating is highly durable, resistant to weathering, and provides excellent insulation. Anodized coatings are often used on aluminium solar mounting structures. AA10 is the common industry standard of anodized coating which is 10 microns thick.

Common applications for anodized aluminum:

ApplicationBenefits Provided
Building exteriorsCorrosion protection, strength
ElectronicsLight weight, thermal performance
Solar panel framesCorrosion resistance, strength-to-weight ratio

The anodized aluminum layer can be thinner or thicker depending on the required characteristics:

  • Hard-coat anodizing produces thicker oxide for wear resistance
  • Architectural anodizing provides corrosion protection and aesthetic options

Anodization transforms aluminum into a tougher, more durable and weather-resistant material while retaining its light weight. This makes it well-suited to applications like solar panel frames that demand corrosion resistance, strength and durability in outdoor environments. The thermal conductive properties also aid solar panel thermal performance.

II. Advantages of Anodized Aluminum Frames

Anodized aluminum frames offer several key strengths that make them an exceptional choice for solar panel installations:

Anodized Aluminum Frames

Corrosion Resistance

  • The anodized surface strongly resists corrosion, oxidation, and rust
  • Ideal for outdoor use in high humidity, coastal, industrial and other harsh environments
  • Requires very little long-term maintenance

Strength-to-Weight Ratio

  • Frames are lightweight yet highly durable
  • High strength-to-weight ratio enables stable structures without added weight
  • Easier transportation, handling and installation
  • Suitable for elevated and pole-mounted solar arrays

Aesthetic Versatility

  • Available in a diverse range of architectural finishes and colors
  • Can mimic styles like wood grain or granite
  • Blends into natural scenery or matches building exteriors
  • More aesthetically appealing than industrial-looking steel frames

Thermal Performance

  • Excellent heat dissipation properties
  • Prevents solar panels from overheating
  • Enhances efficiency and prolongs operational lifespans
  • Ideal for solar installations in hot climates

Anodized aluminum frames combine optimal corrosion resistance, strength, durability and flexibility in design to meet the demanding structural and environmental needs of solar panel systems. The exceptional thermal performance also enhances efficiency. This blend of technical and aesthetic qualities makes anodized aluminum an outstanding solar panel frame material for varied installations.

Click Here to Learn More

III. Applications

Anodized aluminum frames are extensively used in diverse solar panel installations:

Residential, Commercial and Industrial

  • Rooftop solar panels for homes, factories, offices
  • Ground or pole mounted arrays
  • Thermal properties aid efficiency

Carports and Building-Integrated

  • Vehicle and parking shade structures
  • Building facades, walls, rooftops
  • Aesthetic finishes blend seamlessly

Ground Mount and Tracking

  • Free standing arrays on ground bases
  • Solar trackers following sun movement
  • Resilience to outdoor exposure

Off-Grid Installations

  • Remote cabins and rural areas
  • Recreational vehicles and trailers
  • Resistant to vibration and shock

Sustainability

  • Recyclability makes suitable for green building

The lightweight yet durable anodized aluminum provides both structural integrity and design flexibility for solar panels across small scale residential to large commercial installations in diverse settings. It remains one of the most versatile and reliable solar infrastructure materials.

Let me know if you need any changes or elaboration on the highlighted applications. I aimed for brevity while including relevant keyword targets.

Learn More

IV. Sustainability

Anodized aluminum stands out as an eco-friendly metal used for solar panel frames due to:

Recyclability and Reduced Waste

  • Fully recyclable at end of product lifecycle
  • Recycling requires little energy
  • Reduces landfill waste
  • Conserves bauxite ore resources
  • Reusable without quality loss

Energy-Efficient Manufacturing

  • Anodizing process consumes less energy
  • Lower carbon footprint than other metals
  • Process powered by renewable electricity

Anodized aluminum is aligned with solar energy’s sustainability goals. Key properties like:

  • Corrosion resistance
  • Strength and durability
  • Thermal conductivity

Enhance lifespan, cutting replacement needs.

The combined qualities make anodized aluminum a standout green material for solar farm infrastructure. Its closed-loop recyclability and energy-efficient production supports renewable energy’s mission to reduce environmental impact.

V. Comparison to Other Frame Materials

Anodized aluminum stands out from other typical frame materials:

Galvanized Steel

  • Heavier than aluminum
  • Prone to rust and corrosion
  • Higher maintenance costs
  • Narrow aesthetic options

Stainless Steel

  • More expensive
  • Heavier than aluminum
  • Limited decorative varieties

Composite Materials

  • Durability issues in outdoor settings
  • Can delaminate over time
  • Shorter lifespan than aluminum
  • Not easily recyclable

Anodized Aluminum Advantages

  • Lightweight strength
  • Resilience to extreme weather
  • Excellent life cycle durability
  • Ability to harmonize visually
  • Sustainable properties

As a metal, anodized aluminum offers an optimal balance of strength, corrosion resistance, and recyclability – enabling more durable and eco-friendly solar panel infrastructure. Combined with flexibility in colors and textures, it remains a premium framing choice.

VI. Conclusion

Anodized aluminum stands as a top-tier solar panel framework option when key deciding factors around resilience, sustainability and aesthetics are considered.

Key properties like corrosion and abrasion resistance lend well to long-term use within hot, humid or coastal environments – while an efficient strength-to-weight ratio provides structurally sound support regardless of mounting variables across diverse solar farm, commercial building and residential settings on ground, rooftop or elevated installations.

Sustainability merits also rate highly – with superior recyclability, energy-efficient manufacturing processes and lifecycle durability that minimizes replacement needs – thus aligning well with renewable energy ideals.

Additionally, ability to colour and finish in a plethora of architectural styles empowers more seamless visual integration within different landscapes.

Compared against steel, composites and other customary building metals on vital metrics ranging from weather resilience to eco-friendliness – anodized aluminum garners excellent marks as a specialized solar panel framework, earning its classification as an optimal top choice for critical infrastructure across an array of solar energy project needs.

Solar Carports

8 Major Benefits of Solar Carports

Solar Carports

I. Solar Carport Efficiently Use Space

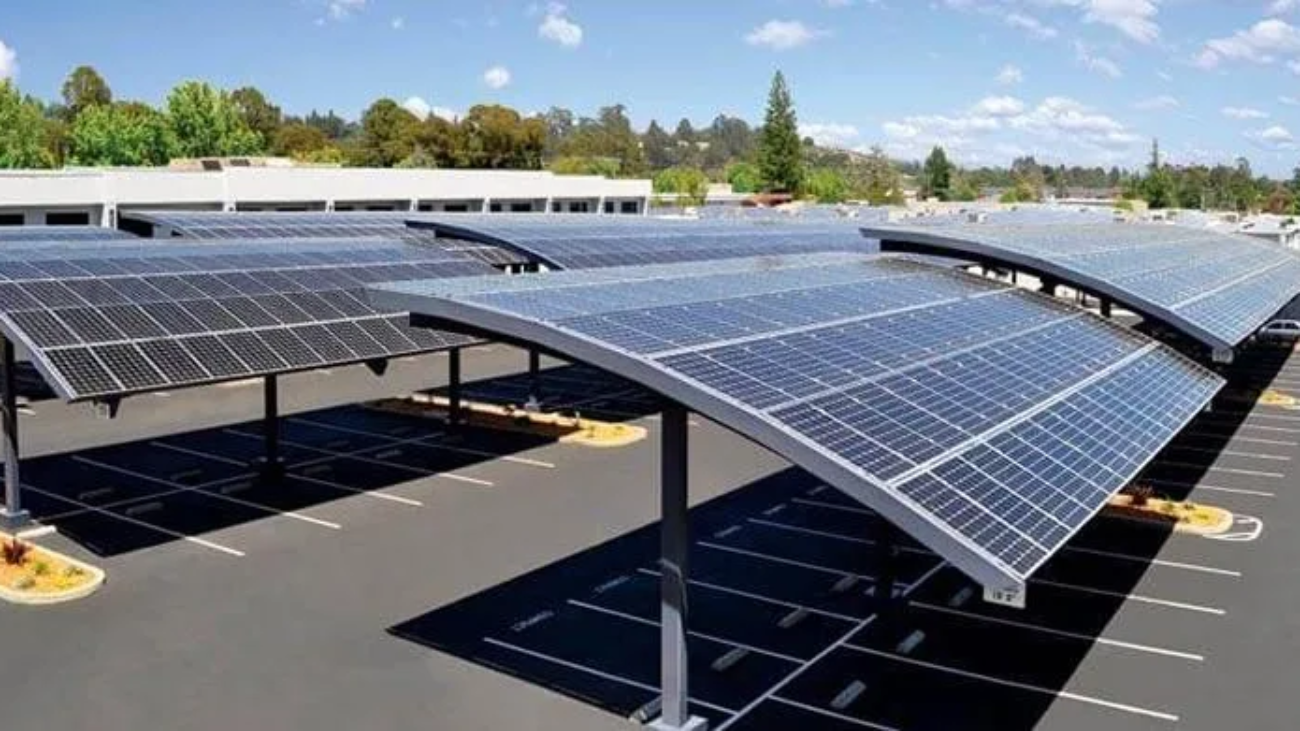
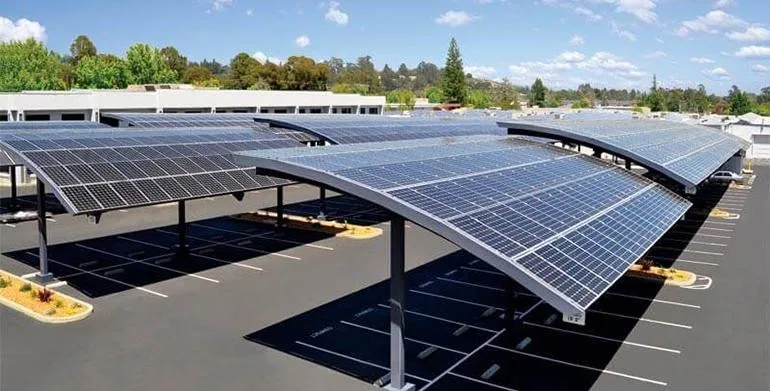
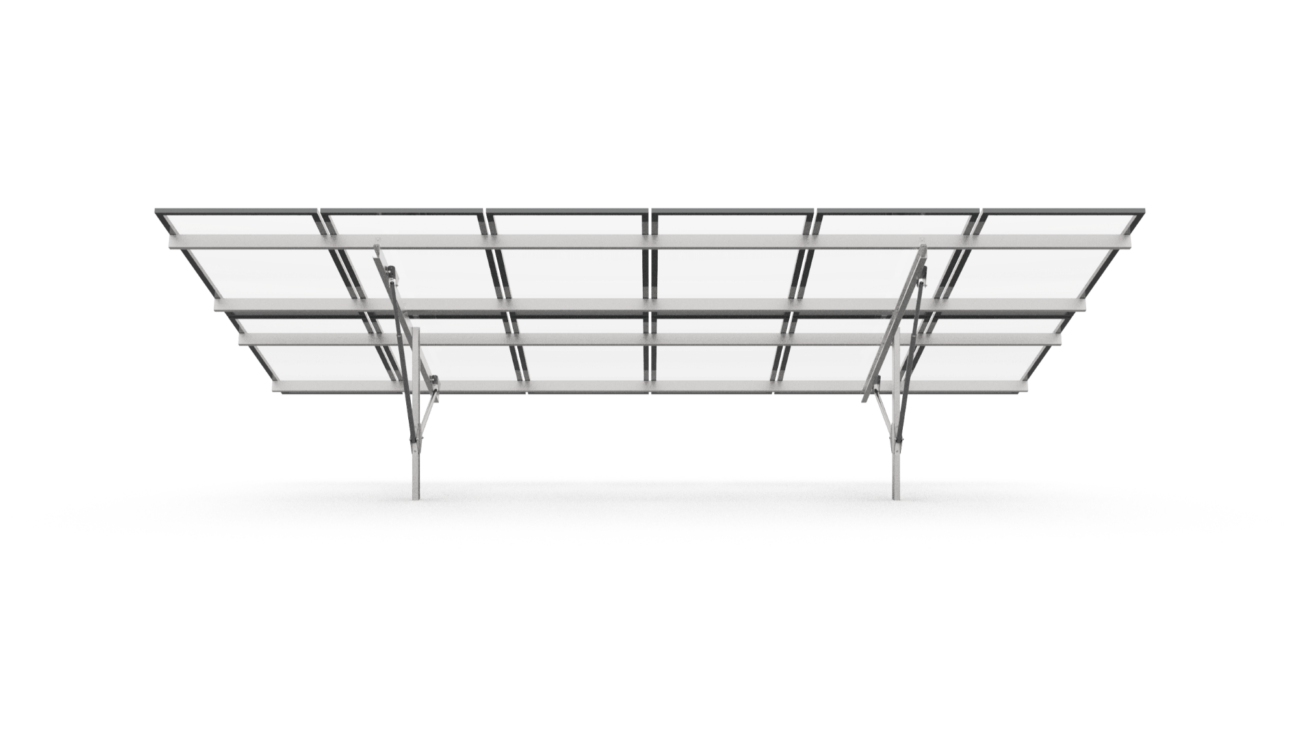
Our solar carports system are an innovative solution that utilizes existing spaces efficiently to generate clean energy. By installing solar panel canopy structures over parking lots and other areas that are already being used, solar carports are able to produce renewable power without taking up additional land.

Some key ways that solar carports leverage space efficiently include:

  • Using unused real estate: Solar carports are mounted over spaces that are often underutilized.
  • Parking lots
  • Driveways
  • Patios
  • Sidewalks
  • Maximizing horizontal spaces: The wide, flat canopy structures of solar carports are perfect for covering spaces used for parking and storage.
  • Making double use of necessary structures: Solar carports shelter vehicles, equipment, and people from the elements while also collecting energy from the sun.
BenefitsDetails
No lost land usageSolar carports added over existing infrastructure don’t require using up green spaces or acquiring additional land
Increased productivityThe shaded spaces under solar carports allow assets like vehicles to operate more efficiently
Dual-use infrastructureSolar carports do “double duty” by generating renewable power in spaces that serve other primary purposes like parking

The next time you walk through a parking garage or outdoor lot, consider the potential to install solar canopies or carports. By embracing the available but overlooked real estate, businesses and towns can generate clean energy efficiently through solar technology that maximizes existing space usage.

II. Solar Carports Reduce Costs

Our installing process of solar carports delivers major cost savings in two key areas:

Energy Expenses

  • Solar panels generate clean electricity, offsetting power that would otherwise need to be purchased from the grid
  • Businesses can save thousands per year on electricity bills with an appropriately-sized solar carport system
  • Solar carports can power adjacent buildings, electric vehicle charging stations, outdoor lighting, and other facilities

Infrastructure Costs

  • Solar carports serve dual purposes, eliminating the need for separate structure investments just for power generation
  • Building a solar carport over an existing parking lot costs less than adding a rooftop solar array
  • Multi-capability design reduces need for other weather/UV protection measures

Additional financial benefits stem from:

  • Lower maintenance needs than ground mount solar or traditional rooftop systems
  • Increased productivity from shaded working/storage areas protected from elements
  • Enhanced property value from improved generating capacity and modernized facilities
Cost Savings AreaSolar Carport Advantage
Energy expensesClean solar energy offsets grid purchases
Infrastructure costsDual-use structures reduce additional builds
MaintenanceEasy ground-level access minimizes upkeep
ProductivityWeather protection increases asset efficiency
Property valueModern energy infrastructure improves sites

With lower overheads and generation capabilities that pay for themselves over time, solar carports enable substantial cost reductions. And as electricity rates rise, solar carports will provide increasing levels of savings each year.

III. Solar Carports are Customizable

One of the key advantages of solar carports is their high degree of flexibility and customization potential. Installers can tailor solar carport solutions to meet the specific needs of the property.

Customization capabilities include:

  • Size: Carports can be small or cover expansive lots, with solar panels scaled appropriately
  • Layout: Flow with angled parking spots or irregular shapes using creative structural designs
  • Solar orientation: Panels can be tilted at ideal angles to maximize sun exposure and power generation
  • Aesthetic options: Choose colors/finishes to match branding or surroundings
  • Additional features: Integrate lighting, charging stations, storage, signage displays into the carport structure

This modular flexibility empowers property managers to create solar systems tailored to their sites. For example:

  • Retail stores can match carport colors to their brand palette
  • Fleet yards can install high-capacity carports to power maintenance facilities
  • Agricultural facilities can orient solar panels for optimum energy generation across seasons
Customization FactorCarport Capabilities
SizeSmall or large coverage areas
LayoutFlow across properties efficiently
Solar orientationOptimize panel angle for conditions
AestheticsMatch color schemes and branding
FeaturesAdd lighting, charging, displays

The adaptable nature of solar carports enables properties to establish renewable energy infrastructure that blends seamlessly with the space. Custom solar carport solutions meet generation needs while fitting aesthetically into the existing environment.

IV. Solar Carports are Easy to Maintain

Solar Carports are Easy to Maintain

One major advantage of solar carports compared to rooftop solar arrays is that they are much easier to access and maintain. Key factors that simplify upkeep include:

Convenient Access

  • Installers can reach panels and electrical components from ground level
  • No need for ladders, scaffolding or roof access
  • Streamlined inspections, cleaning, repairs

Weather Protection

  • Raised canopy structure channels rain, snow melt away
  • Prevents to build up of leaves, ice, and other debris
  • Prolongs equipment life by shielding from UV and temperature swings

Simplified Connection

  • Wiring neatly converges to single interconnection point
  • No complex routing through walls and ceilings
  • Easy grid integration with net metering

Enhanced Safety

  • Grounded access minimizes fall and electrocution risks
  • Clearly visible electrical conduits per code
  • Stable structures engineered for wind/seismic events
BenefitAdvantage
AccessibilityStraightforward ground-level component access
Weather protectionChannels precipitation away, shields equipment
Simplified wiringConverges to single interconnection area
SafetyReduced risks for installers and inspectors

The ability to easily reach, assess, maintain, and protect all aspects of solar carports ensures reliable clean power generation over their lifespan. Streamlined upkeep translates into lower operational costs.

Click Here to Learn More

V. Solar Carports Provide Protection

Solar carports safeguard vehicles, equipment, and inventory from exposure while also generating clean energy. Key elements of protection include:

Weather Shielding

  • Roof structure deflects rain, snow, hail
  • Prevents exterior damage, internal water incursion
  • Reduces weather-related repairs/clean up

Temperature Control

  • Shade cools interior temperatures by over 50°F
  • Prevents overheating that strains mechanical parts
  • Extends component life by limiting temperature swings

UV Ray Blocking

  • Reduces interior fading, cracking, discoloration
  • Shields electronics from solar disruption
  • Protects tires, seals, plastic components

Shelter from Debris

  • Captures falling leaves, airborne dust
  • Reduces abrasion, exterior dulling
  • Helps maintain asset appearance

Solar carports deliver essential weather protetion to improve durability and lifespan. Shielded assets will look better, require fewer repairs, and maintain optimal working order for longer under a solar canopy.

VI. Solar Carports Generate Clean Energy

Installing solar carports empowers properties to establish renewable energy independence using sun power. Key clean energy benefits include:

Lower Environmental Impact

  • Solar carports produce zero direct emissions
  • Reduce reliance on fossil fuels for electricity needs
  • Support corporate sustainability commitments

Energy Bill Savings

  • Lower or eliminate power purchases from utility
  • Insulate against rising electricity rates
  • Payback financing options often available

Grid Support

  • Excess power generation can be sold back to grid
  • Stabilize shared infrastructure during high demand
  • Enable establishment of micro grids

Enhanced Public Image

  • Highly visible sign of commitment to sustainability
  • Strengthen community relationships
  • Attract forward-thinking customers/partners

Transitioning a portion of power usage to solar carports helps properties minimize environmental impact in an economical way. And their visibility promotes an innovative, eco-conscious public image.

VII. Solar Carports Benefit Businesses

Installing solar carports Structura offers many tangible benefits for companies across sectors:

Cost Reduction

  • Lower facility energy bills
  • Leverage available parking/storage areas
  • Minimize additional weatherproofing spends

Productivity Gains

  • Protect inventory and equipment from elements
  • Prevent overheating of sensitive materials
  • Create comfortable outdoor working conditions

Sustainability Profile

  • Highlight green commitment to customers
  • Achieve environmental impact goals
  • Qualify for related tax/rebate incentives

Grid Independence

  • Establish micro grid from carpot output
  • Reduce vulnerability to utility outages
  • Store excess power in batteries for backup

Customer Experience

  • Provide shaded parking for visitors
  • Offer EV charging under carport awnings
  • Create space for outdoor dining/retail

Forward-thinking companies can leverage solar carports in many ways – from cost and resilience to brand image. The benefits for business operations and the bottom line are substantial.

VIII. Solar Carports Support Communities

Installing solar carports delivers benefits that resonate across neighbourhoods and towns:

Clean Decentralized Power

  • Reduce reliance on distant fossil fuel plants
  • Establish locally-generated clean energy
  • Increase community energy independence

Grid Infrastructure Resilience

  • Distribute solar widely across parking lots
  • Avoid centralized power failures from single points
  • Maintain access to electricity during outages

Civic Collaboration

  • Shared public carports in municipal lots
  • Joint projects between local stakeholders
  • Bring together constituencies around sustainability

Economic Development

  • Savings for businesses passed to consumers
  • New jobs created in solar installation/maintenance
  • Environmental leadership attracts talent relocation

Improved Quality of Life

  • Cleaner air from reduced emissions
  • Accessible community EV charging
  • Vibrant public spaces with carports as social infrastructure

Forward-looking towns are smart to embrace solar carports – they deliver environmental performance, resiliency, and quality of life benefits that serve the whole community.

Solar Mounting Structure Construction Methods

Solar Mounting Structure Construction Methods

Solar Mounting Structure Construction Methods

I. Selecting Solar Mounting Structures

Carefully selecting solar mounting structures is crucial in maintaining solar panel performance and system longevity. This process involves geological surveys, soil condition analysis, fixed tilt and tracker design considerations, and recommendations from advanced modelling tools.

Foundation Requirements

Our geological surveys must be performed to determine the optimal type of foundation for the solar mounting system, assessing:

FactorsRecommendations
Soil acidityApply protective coating if needed
N valuesIndicative of soil strength
GroundwaterPrevent corrosion
Soil conditionsDetailed analysis

Plant Design Considerations

The mounting structures must account for the planned plant design:

  • Fixed tilt: Angled at optimal degree for site location
  • Trackers: Follow sun throughout the day, best suited for flat sites

Analyse topography to account for complex terrain:

  • Foundation pile lengths
  • Model shadowing
  • Streamline parts and installation

Automated Recommendations

Leverage advanced modelling software like Rated Power to automate:

  • Plant layout optimization
  • Component selection for environmental conditions
  • Cost, performance and profitability projections

These tools provide data-driven recommendations to optimize mounting structure selection based on the project goals and constraints.

Their projections help determine required:

  • Pole diameter and depth
  • Fastenings rated for extreme weather
  • Reinforcements to prevent collapse

Carefully weighing these considerations enables selection of cost-effective, durable solar mounting systems able to withstand decades of operation.

Click Here to Learn More

II. Mounting Structure Types

The soil conditions and operational environment dictate the optimal mounting structure. Main options:

Ballast Mounts

Ballast Mounts Mounting Structure
  • Pre-cast concrete block
  • Rest on compacted soil
  • Residential rooftop installations
  • Avoid need to drill/excavate

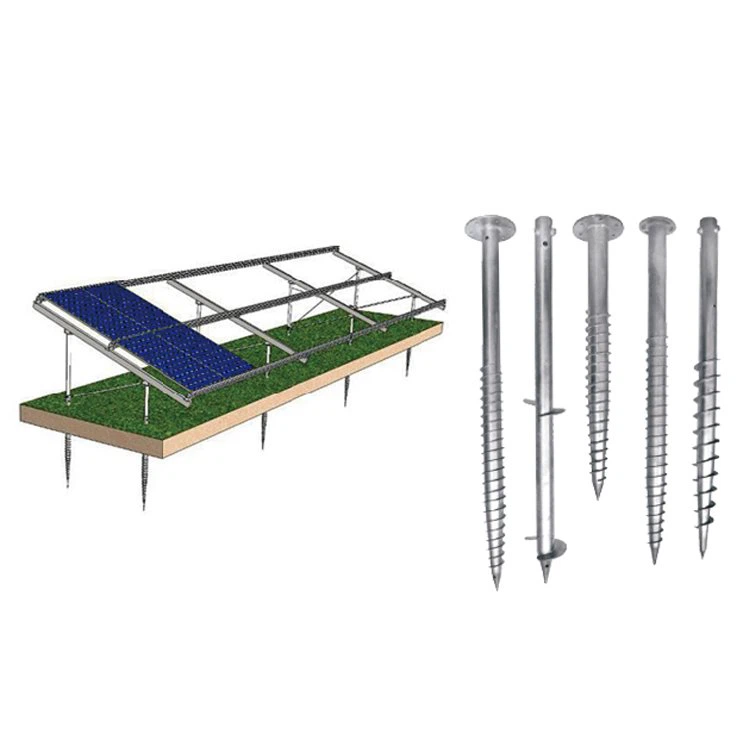
Helical Piles

Mounting Structure Helical Piles
  • Driven into soil conditions
  • Withstand uplift forces
  • Resist expansion and strong winds
  • Provide load-bearing capacity

Pole Mounts

Pole Mounts Mounting Structure
  • Steel poles with concrete anchors
  • Simpler than ballast mounts
  • Multi-pole systems
  • Single row of panels
  • Ease large project adjustments

Ground Screws

Ground Screws Mounting Structure
  • Soil conditions:
  • Compacted
  • Heavy clay
  • Rocky surface
  • Minimal earthwork and engineering
FactorConsiderations
Steep terrainScrews have limited gradient suitability
Granular soilsProvide less stability

Read More

Concrete Foundations

  • Ideal for:
  • Brownfield sites
  • Capped landfills
  • Wetland sites
  • Minimally invasive mounting

Careful analysis of the site geological surveys and planned solar farm size determines optimal structure types.

Learn More

III. Structure Installation

Once the mounting structure type is selected, proper installation is key to ensuring solar farm performance and longevity.

Location Planning

  • Survey site topology
  • Mark locations for:
  • Mounting structure base
  • Foundation piles

Considerations:

  • Access for construction equipment
  • Optimizing spacing and tilt angles
  • Minimizing shading

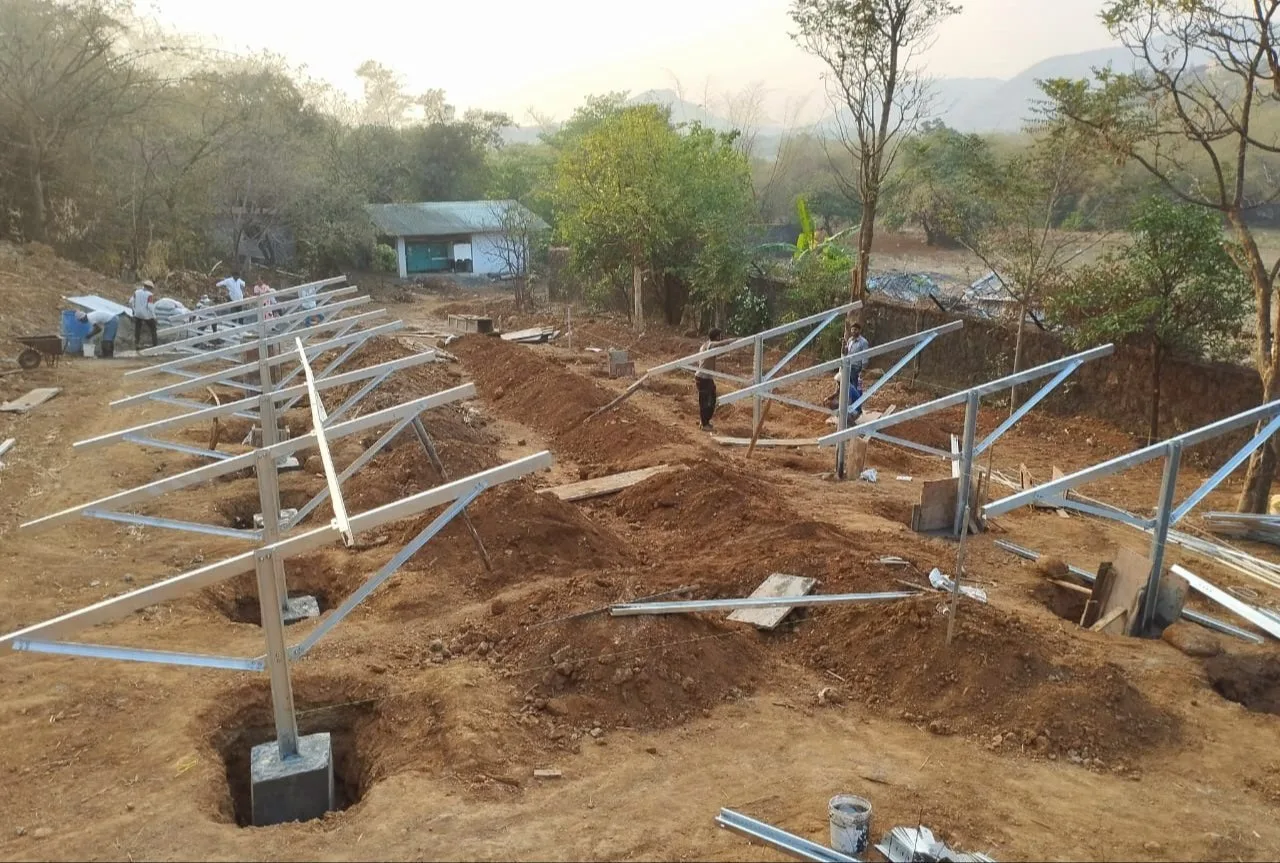
Foundation Installation

Method depends on structure type:

  • Ballast
  • Level ground
  • Position blocks
  • Bolt to frames
  • Piles:
  • Drive into ground
  • Depth based on soil, loads
  • Attach to structure
  • Screws:
  • Mechanically screw in
  • Add torque as needed
  • Concrete:
  • Cast foundation
  • Cure properly
  • Attach racks

For small sites, hand tools can be used. Larger solar farms require:

  • Excavation equipment
  • Pile driving machinery
  • Cement pouring

Other Considerations

  • Schedule installs around rain to allow proper curing
  • Check for shift/corrosion periodically
  • Assess after extreme weather events

Proper base structure installation ensures the solar farm can withstand environmental conditions for the project lifetime.

IV. Failure Modes

Improperly designed or installed mounting structures can fail, causing solar farm damage or collapse.

Design Failures

Inadequate design is a common failure mode:

  • Incorrect tilt angle
  • Reduces energy generation
  • Accelerates weathering
  • Insufficient corrosion planning
  • Shortens lifespan
  • Risks collapse
  • Not accounting for environmental conditions
  • Wind, snow, rain loads
  • Seismic factors
  • Lightning strikes

Use advanced modelling tools during design to predict and address these factors.

Installation Failures

Faulty foundation installation causes most failures:

  • Improper pile depth
  • Loosens over time
  • Insufficient anchor
  • Inadequate curing
  • Weakens concrete
  • Cracks under load
  • Poor leveling
  • Twists structure
  • Unbalances loads

Conduct pull-out testing after install to validate integrity.

Impact

  • Panel damage from detached arrays
  • Destabilized ground
  • Risks landslides
  • Further equipment damage
  • Lost energy generation
  • While repairs conducted
  • If decommissioned

Preventing mounting structure failure is crucial for utility-scale solar farm optimization. Adequate design and installation is key.

V. Advanced Modelling

We specialized solar design software leverages advanced algorithms to streamline and optimize mounting structure selection.

Key Features

  • 3D site modelling
  • Analyse terrain
  • Identify ideal layout
  • Automated engineering
  • Foundation sizing
  • Pull-out calculations
  • Structural analysis
  • Machine learning
  • Data from prior projects
  • Improves recommendations
  • Custom reporting
  • Details selections
  • Installation guidelines

Automated Deliverables

Extract key project outputs:

  • Bill of materials
  • Parts, quantities, costs
  • Permit drawings
  • Submit directly
  • Installation plans
  • Equipment needs
  • Construction schedule

Continuously optimize as design evolves:

  • Adjust for equipment purchases
  • Update code compliance
  • Reruns in seconds

Why automate?

  • Eliminates error-prone manual work
  • Provides data-backed recommendations
  • Saves significant time and costs
  • Enables design of high-performing mounting solution

Leveraging advanced tools ensures selection of ideal, cost-effective mounting systems for each unique solar site.

VI. Next Steps

Properly designing and implementing solar mounting structures is critical for project success. Key recommended next steps:

Detailed Site Analysis

Perform in-depth site surveys assessing:

  • Soil conditions
  • Composition
  • Load capacities
  • Topography
  • Height variations
  • Obstacles
  • Accessibility
  • Construction equipment
  • Maintenance needs

This data informs ideal mounting structure planning.

Design Optimization

Leverage advanced algorithms to automate optimizing for:

  • Energy generation projections
  • Land usage efficiency
  • LCOE minimization
  • Custom objectives

These tools run iterative simulations to determine optimal:

  • Tilt angles
  • Foundation sizing
  • Pole configuration
  • Tracking capabilities

Streamlining mounting structure design enables maximized ROI.

Demo Request

See a live demo of data-driven mounting structure optimization in action:

  • Custom 3D site modelling
  • Foundation design
  • Automated BOM generation
  • Performance/cost projection

Understand capabilities before committing, to ensure solution adequacy for specific project needs.

Implementation Planning

With optimized mounting structure selection completed, detailed implementation planning is next:

  • Permitting
  • Grid interconnection
  • Foundation and structure installation
  • Panel mounting
  • Inspection

Proper construction is vital for protecting long-term solar farm durability against extreme weather and maximizing energy generation.

We provide careful planning and leveraging modern solar design tools enables streamlined mounting structure implementations for productive, profitable solar projects.

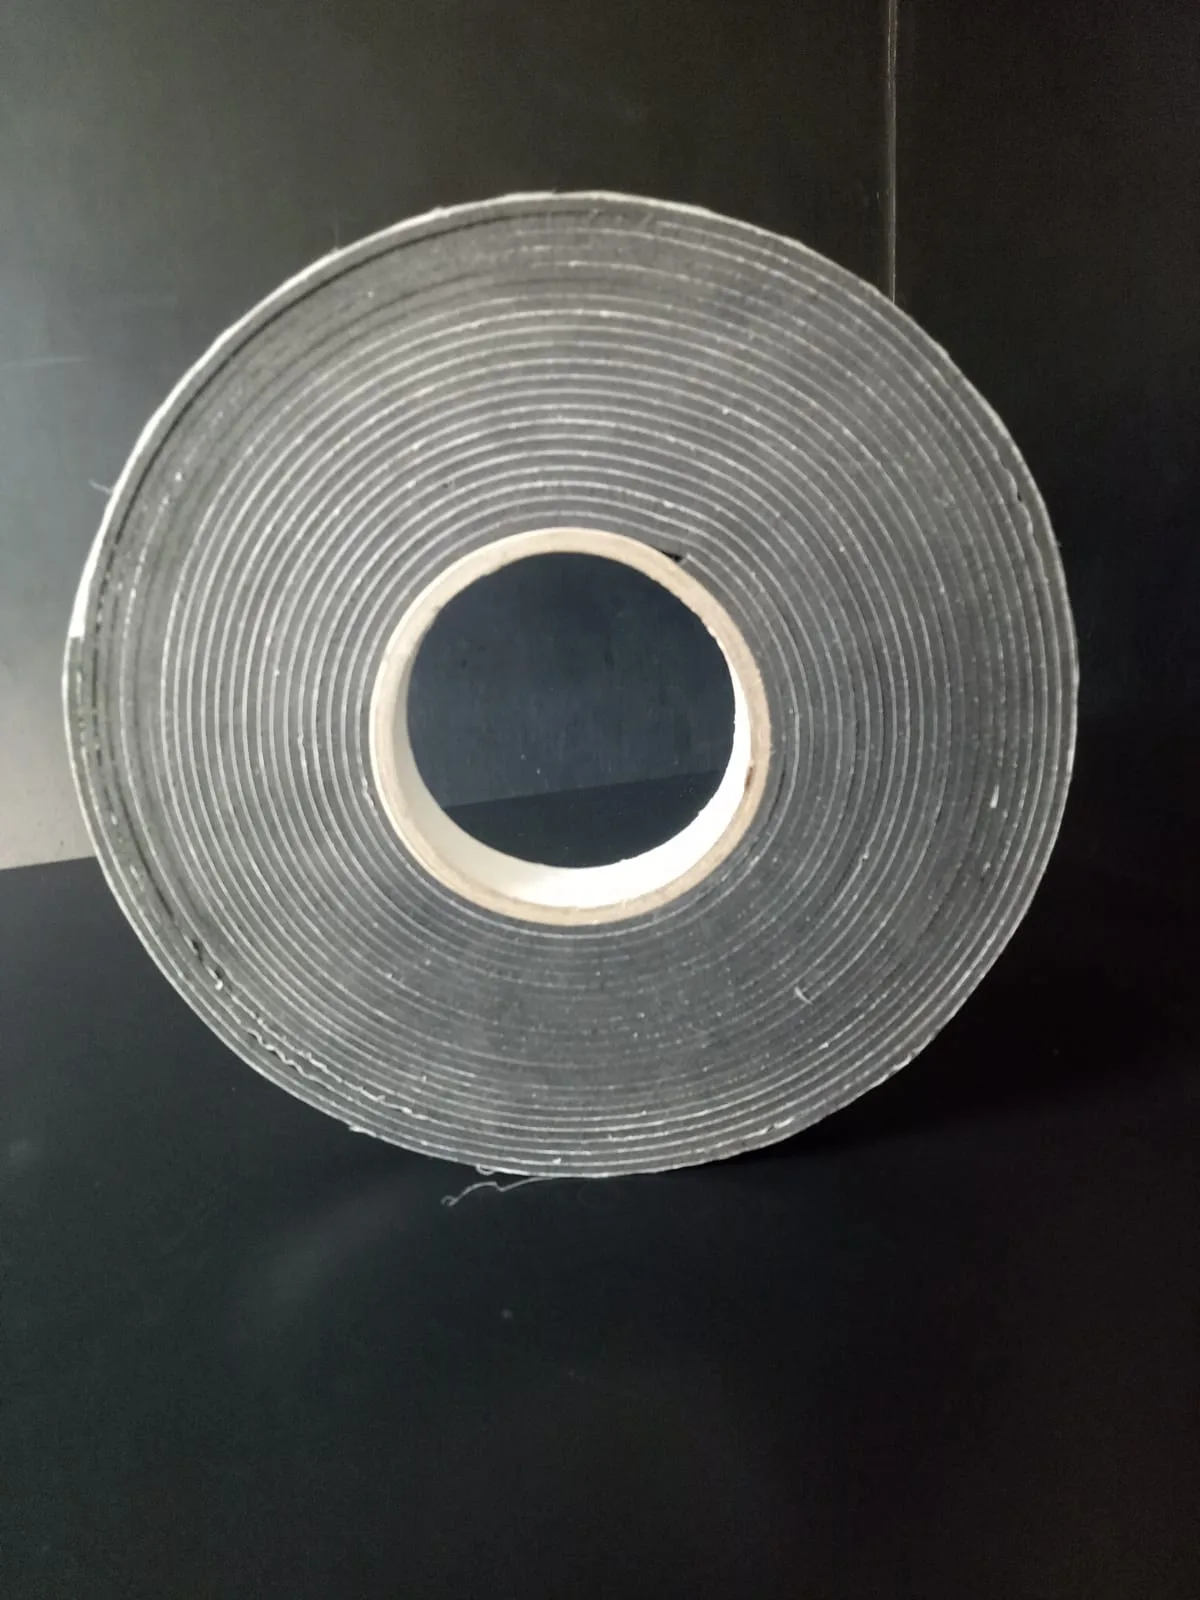
EPDM Rubber For Solar Mounting

EPDM Rubber for Solar Panel Mounting Structure

EPDM Rubber for Solar Panel Mounting Structure

Introduction to EPDM Rubber

EPDM (ethylene propylene diene monomer) is a type of synthetic rubber that offers excellent performance properties that make it well-suited for use in solar panel mounting applications. EPDM stands out from other rubbers due to its:

  • Durability
  • Weather resistance
  • Flexibility across a wide temperature range
  • Chemical resistance

These characteristics allow EPDM rubber to withstand outdoor environments for many years without degradation.

EPDM contains three main components:

  • Ethylene
  • Propylene
  • Diene

The diene facilitates sulfur vulcanization which enables crosslinking and gives EPDM its useful properties.

Key Properties

  • Temperature resistance: From -50°C to +150°C
  • UV radiation resistance
  • Ozone resistance

Due to its saturated polymer backbone, EPDM vastly outperforms unsaturated rubbers in terms of resisting heat, light, and environmental damage over time.

PropertyValue
Thermal expansion160 μm/(m·K)
Max temperature150°C
Min temperature-50°C

Solar Panel Mounting Applications

In solar panel mounts, EPDM is used primarily for:

  • Roof penetrations
  • Prevents water leaks
  • Protects electrical connections
  • Gasket material
  • Cushions and secures panels
  • Absorbs vibration

Its water resistance and weather resistance makes EPDM the ideal sealant and protector for roof-mounted systems in rainy climates.

With proper EPDM accessories like rubber pads and adjustable clamps, solar installers can securely mount frameless solar modules without risk of cracking thin film PV panels.

Overall, EPDM rubber offers an optimal balance of critical performance properties to safely and reliably mount photovoltaic arrays exposed to harsh outdoor conditions

II. EPDM Properties and Benefits

EPDM Properties and Benefits

EPDM rubber stands out from other rubber materials due to its exceptional weather resistance, durability, flexibility, chemical resistance and water resistance. These properties make it ideal for outdoor applications like solar panel mounting:

Weather Resistance

  • Withstands UV radiation, ozone and weathering
  • Saturated polymer backbone resists damage
  • Maintains properties after years outdoors

Durability

  • High temperature resistant up to 150°C
  • Retains strength and shape
  • Low temperature performance down to -40°C

Flexibility

  • Remains flexible in extreme cold and heat
  • Conforms to various shapes
  • Absorbs vibration and shock

Chemical Resistance

  • Resilient against acids, alkalis
  • Withstands many harsh organic solvents

Water Resistance

  • Waterproof and moisture-proof
  • Prevents leaks, flooding and corrosion
  • Protects electrical systems

These capabilities make EPDM ideal for:

  • Roof penetrations
  • Gasket material to secure panels
  • Protecting outdoor electrical connections

With its balance of critical properties, EPDM rubber is the preferred material to safely install frameless solar modules and mount PV arrays in harsh climates.

III. EPDM Applications

EPDM Applications

With its excellent weather resistance, durability and flexibility, EPDM rubber is widely used in outdoor applications that require reliable water and air sealing properties.

Key applications include:

Solar Panel Mounting

  • Roof Penetrations
  • Flashings, collars and seals
  • Prevents interior leaks
  • Gasket Material
  • Secures panels to mounts
  • Absorbs vibration
  • Protects components

Roofing Materials

  • Rubber Roofing Panels
  • Durable and waterproof
  • Resists mold and rot
  • Harnesses solar power

Accessories

  • Rubber Pads
  • Cushion clamps
  • Protect thin film PV panels
  • Module Clamp Rubber Strips
  • Secures frameless solar modules
  • Prevents glass cracking

Adjustable Clamps

  • Safely secures uneven and curved surfaces
  • Thermal expansion accommodation
  • Compatible with 5-10 mm panels

Outdoor Enclosures

  • Protects electrical boxes and gear
  • Seals out moisture, dirt and debris
  • Withstands weathering and UV rays

With EPDM’s balanced material properties, it serves critical sealing, mounting and protection functions across countless outdoor applications.

IV. EPDM in Outdoor Environments

EPDM’s exceptional resistance to heat, sunlight and environmental degradation makes it an ideal rubber material for permanent outdoor installation.

Temperature Resistance

  • Withstands high temperatures up to 150°C
  • Retains flexibility at low temperatures down to -50°C
  • Handles extreme weather fluctuations

UV Resistance

  • Specialized polymer backbone resists UV radiation
  • Prevents material degradation
  • Provides decades of exposure resistance

Ozone Resistance

  • Additives block ozone degradation
  • Prevents cracking and hardening
  • Extends service life

Weathering Resistance

  • Stands up to years of rain, sun and snow
  • Retains a like-new appearance
  • No visible signs of aging

Service Lifespan

  • Properly formulated EPDM lasts for decades
  • Far exceeds the capability of other rubbers
  • Reduces the need for replacement

These capabilities make EPDM the preferred choice for:

  • Roof seals
  • Solar panel mounts
  • Outdoor gaskets and seals
  • Protecting components in harsh environments

EPDM rubber delivers reliable, long-lasting performance in even the most punishing outdoor installation environments.

V. EPDM in Solar Panel Mounting

EPDM’s exceptional durability and weather resistance makes it an ideal material for solar panel mounting applications.

Key Uses

  • Roof Penetrations
  • Flashings and seals
  • Prevent leaks
  • Gasket Material
  • Cushion and secure panels
  • Absorb vibration

Solar Mounting Accessories

  • Rubber Pads
  • Protect thin film PV panels
  • Cushion adjustable clamps
  • Module Clamp Rubber Strips
  • Secure frameless solar modules
  • Prevent glass cracking

Benefits

  • Waterproof and moisture-proof
  • Accommodates expansion and contraction
  • Electrically insulating
  • Resilient shock absorption

Adjustable Clamps

  • Secure uneven and curved surfaces
  • Compatible with 5-10 mm panels
  • EPDM pads protect glass

Frameless Mounting

  • Secure mounting without frames
  • Rubber pads prevent damage
  • Clamp securely without slipping

With its durability and sealing capability, EPDM rubber makes an ideal accessory material for safely and reliably mounting solar arrays on rooftops and carports while protecting them from weather events and mechanical stresses.

Click Here to Learn More

VI. EPDM Accessories

EPDM’s flexibility and durability make it an ideal material for accessories used to safely mount solar panels. Key accessories include:

Rubber Pads

  • Cushion and protect panels
  • Place inside clamps
  • Prevent glass damage
  • Available thicknesses:
  • 5mm
  • 10mm
  • 15mm

Module Clamp Strips

  • Created from extruded EPDM strips
  • Protect frameless panel edges
  • Offer cushioning and grip
  • Lengths:
  • 8cm
  • 12cm
  • 15cm

Adjustable Clamps

  • Flashed aluminum clamps
  • EPDM rubber inserts
  • Secure uneven shapes
  • Grip 5-10mm panels

Flashing Seals

  • Seals roof penetrations
  • Split EPDM boot design
  • Prevents leaks
  • Reusable and adjustable

Specialty Gaskets

  • Seals electrical boxes
  • Moisture and dust protection
  • Custom shapes available

With its sealing properties and flexibility, EPDM enables solar installers to safely secure panels and protect components from weather and mechanical damage.

Conclusion

EPDM rubber offers an unmatched balance of properties that make it the ideal material for solar mounting applications. Key advantages include:

  • Weather resistance – Withstands decades of UV, ozone, rain, snow and temperature extremes
  • Durability – Retains properties after years of outdoor stress
  • Flexibility – Remains flexible across a wide temp range
  • Waterproof – Prevents leaks and flooding
  • Chemical resistance – Withstands environmental pollutants
  • Solar Mounting Uses:
  • Roof penetrations – Flashings, seals and gaskets
  • Gasket material – Secures panels, absorbs vibration
  • Rubber pads – Inside adjustable clamps to protect glass
  • Module clamp strips – Secures frameless solar modules

Out of all available rubber materials, properly formulated EPDM delivers the best assurance for long-term performance and reliability in the harshest outdoor environments.

With UV stabilizers and antioxidants, modern EPDM formulations resist degradation from heat, light and ozone for decades. Paired with adjustable clamps and compression seals, solar installers can securely mount PV arrays in all climates knowing the rubber gaskets will continue providing protection against the elements throughout the system lifetime.

EPDM rubber stands above other materials as the ideal choice for safely securing roof-mounted solar panel installations.

Solar Project Construction Costs Efficiency

8 Ways to Slash Solar Project Construction Costs Efficiency

 Solar Project Construction Costs Efficiency

I. Select the Right Land

Select the Right Land

Choosing the right piece of land is a critical first step to lower solar construction costs. The land has certain requirements and criteria that must be met before building a solar project on it, covering factors like:

  • Topography and terrain
  • Electrical infrastructure access
  • Wildlife impact

The land should ideally be:

  • Reasonably cleared and level
  • Within 1-3 miles of a substation
  • Within 1 mile of a three-phase power line

It’s important not to rush into leasing land only based on an attractive price. Being selective about your future solar site may cost more upfront and involve competition with other solar developers, but the wrong land could raise financial implications later on.

For example:

  • Contaminated lands bring liability and regulatory issues
  • Prolonged construction time and higher costs

Conducting site evaluations with a geotechnical investigation plan helps mitigate risk:

Site Condition EvaluationsImportance
Slope stability analysisEnsures proper foundation design
Sediment control testingInforms storm water management system
Subgrade examinationsVerifies adequate ground bearing pressure

Being selective about your solar land site may cost more upfront, but saves money in the long run by preventing avoidable construction issues. Analyse the size, shape, and terrain to determine if the land meets critical criteria. Don’t rush into a land lease solely based on an attractive price.

Click Here to Learn More

II. Let the Land Inform Design

Once you have secured the right land, conduct thorough site evaluations to inform the solar project design. This helps reduce unexpected issues arising during construction that add costs. Key steps include:

Geotechnical Investigations

Perform detailed geotechnical studies of the site including:

  • Slope stability analysis
  • Soil corrosivity measurements
  • Identifying soil bearing pressure and capacities

This data helps determine:

  • Proper foundation dimensions
  • Appropriate ground preparation
  • Necessary sediment erosion controls

Having accurate geotechnical inputs prevents under-engineering foundations that fail or over-building that wastes money.

Racking and Mounting Design

Racking and Mounting Design

The site’s soil and terrain conditions should also guide designing the solar racking system:

  • Account for slope, load capacities and wind shear
  • Ensure proper anchor sizing and embedment depths

Carefully matched racking avoids unnecessary costs from:

  • Insufficiently anchored structures failing in high loads
  • Oversized racking increasing materials, construction and land use

Storm Water Management Evaluation

Preventing runoff and erosion problems during construction protects water quality and avoids costly mitigation.

In sum, informed solar design optimized for the site’s unique properties saves money during builds and over asset life cycles.

III. Choose Reliable Equipment

Selecting durable, high-performing equipment suited for the solar project can help efficiently meet construction targets and budgets. Best practices include:

Vendor Evaluation

Thoroughly assess potential vendors and suppliers on:

  • Product quality and durability
  • Warranties and maintenance terms
  • Past performance meeting specifications

This reduces unexpected costs from fixes or change orders.

Specification Setting

Clearly define project performance requirements and operating conditions including:

  • Weather resilience testing (wind, humidity, temperatures)
  • Critical load capacities and safety factors
  • Compliance with all applicable standards

Equipment unable to meet specifications can slow progress or require replacements.

Testing and Inspection

Validate equipment condition and capabilities through:

  • Performance verification testing
  • Quality control inspections at factories and upon delivery
  • Operational trial runs before full deployment

This prevents integrating defective components into builds.

Preventative Maintenance

Follow all manufacturer recommended upkeep like:

  • Component lubrication and cleaning
  • Tightening loose connections
  • Tuning and calibration

Proactively caring for equipment prevents breakdowns or failures that are more disruptive to fix during active construction.

Choosing robust, durable equipment tailored to the project’s specific demands increases construction efficiency and asset longevity while lowering lifetime equipment costs.

IV. Simplify Racking Installation

Streamlining the solar racking installation process through thoughtful design and planning cuts costs by maximizing efficiency. Useful techniques include:

Adjustable Components

Specify racking with some flexibility to accommodate variability in site conditions like:

  • Slope grade changes
  • Subtle foundation shifts
  • Minor anchor position adjustments

This avoids expensive time delays from disassembly or holes requiring re-drilling.

Installation Work Plans

Create detailed work plans mapping the sequential process including:

  • Equipment and tool requirements
  • Labour needs and assignments
  • Anticipated production rates

Thorough plans allow coordinating teams and deliveries for smooth flows, preventing downtime from missing items.

Streamlined Hardware

Prioritize racking using simplified components like:

  • Universal clamps fitting multiple module types
  • Single bolt designs
  • Integrated ground bonds

Simpler assemblies with fewer unique parts quicken overall mounting.

Specialized Equipment

Leverage purpose-built tools for efficiency gains on repetitive tasks like:

  • Auto-dispensing auger rigs for drilling pile foundations
  • Custom jigs ensuring consistent positioning
  • Lifting aids for positioning sections

The right equipment prevents injury and enhances productivity.

Careful coordination, adjustable parts allowing adaption, and streamlined installations prevent complications that sap field productivity – saving costs with efficient solar racking assembly.

V. Control Construction Budget

Carefully managing the construction budget helps avoid cost overruns that erode project returns. Best practices include:

Early Cost Estimation

Develop initial budgets during early planning using expected:

  • Equipment, material, and labour expenses
  • Permitting, grid connection, and inspection fees
  • Site preparation and installation costs
  • Lease payments

Regularly update these projections with real quotes as specifics firm up.

Risk Assessment

Proactively evaluate uncertainties that may impact costs like:

  • Inclement weather delays
  • Potential supply chain disruptions
  • Changes in material pricing
  • Community complaints

Identify mitigations to contain budgets despite issues.

Contingency Funds

Incorporate 5-10% contingencies within budget estimates for the inevitable unplanned events on large builds. This prevents scrambling to fund surprises.

Value Engineering

Continuously identity ways to trim costs like:

  • Sourcing substitute materials
  • Simplifying designs
  • Using more efficient construction techniques

Savings from value engineering provide additional buffers.

Change Control

Carefully evaluate any project changes for cost/benefit before approval to prevent scope creep.

Ongoing cost oversight, planning for uncertainties, and continuous optimization prevents overspending, keeping solar projects economically viable.

VI. Account for Soft Costs

“Soft costs” like permitting, financing, and labour add up. Strategies to control these expenses include:

Streamlined Permitting

  • Research local solar ordinances in detail
  • Prepare thorough permit packages
  • Use expediters to ease process

Understanding requirements and properly completed submissions prevent delays from application issues.

Efficient Procurement

  • Comparison shop equipment and materials
  • Leverage online supply marketplaces
  • Optimize logistics like shipping modes

Casting a wide net surfaces best pricing and responsiveness.

Labour Optimization

  • Cross-train workers on multiple tasks
  • Use crews balancing experience levels
  • Incentivize on-time delivery

Flexible, motivated crews prevent downtime and inefficiencies.

Strategic Sourcing

  • Buy cables, connectors in bulk
  • Seek winter off-season discounts
  • Favour modular components

Order consolidation and tactical timing reduce supply chain expenses.

While some soft costs are fixed, focus on streamlining variable expenses.

Cost Containment Strategies

AreaSavings Approach
PermittingSubmit complete packages
ProcurementLeverage marketplaces
LabourReward on-time work
SourcingBuy at scale in off-seasons

Get ahead of soft costs early in planning to protect project profitability.

VII. Assemble Experienced Team

The right solar project team is crucial for on-time, on-budget delivery. Best practices for assembly include:

Diverse Expertise

Staff key roles with experts in areas like:

  • Solar design engineering
  • Procurement and supply chain
  • Project planning and controls
  • Grid integration and commissioning

This breadth covers the multifaceted competencies vital for success.

Proven Track Records

Validate capabilities by examining:

  • Years in industry
  • Projects successfully delivered
  • Client references
  • Safety and performance metrics

This reduces risk of underperforming personnel sinking progress.

Aligned Incentives

Structure contracts promoting shared project success through:

  • Bonuses for schedule and budget achievement
  • Penalties for missteps
  • Profit sharing

Incentive alignment prevents finger pointing during crunch times.

Scalable Resourcing

Ensure capacity to flex expert personnel levels up and down as activity fluctuates during project phases. This cost-effectively right-sizes labour.

Responsiveness Training

Conduct emergency response simulations preparing crews to smoothly handle incidents like storms or injuries if they arise with minimal safety and cost impacts.

Investing in the right expertise, experience, motivation and responsiveness in a solar build team pays dividends through maximized efficiency and risk reduction over the project lifecycle.

VIII. Prepare Contingency Funds

Despite best-laid plans, unexpected events during solar construction add costs. Maintaining contingency funds mitigates overruns threatening project viability. Best practices include:

Historical Spending Analysis

Examine past projects to estimate emergency cost frequencies in areas like:

  • Permitting delays
  • Weather downtime
  • Equipment failures
  • Materials pricing changes

These insights quantify contingency targets.

Probability Impact Matrices

Map identified risk events by likelihood and potential cost severity to prioritize responses and gauge required reserves.

RiskHigh LikelihoodLow Likelihood
High CostPermit denialsFoundation redesigns
Low CostInspectionsMinor repairs

Ongoing Reassessment

Re-evaluate required contingency amounts and probability estimates at major milestones as uncertainties resolve over the project timeline.

Contingency Tracking

Implement formal change control processes ensuring contingency funds only applied to eligible unforeseen costs rather than scope expansions.

Proactively earmarking reserves for the inevitable unknowns, continually refining estimates, and tightly controlling drawdowns ensures access to emergency funding without tapping capital required for planned activities. Sized correctly, contingencies become insurance policies enabling construction progress despite surprises.

Aluminium Channels

Aluminium Channels

Aluminium Channels

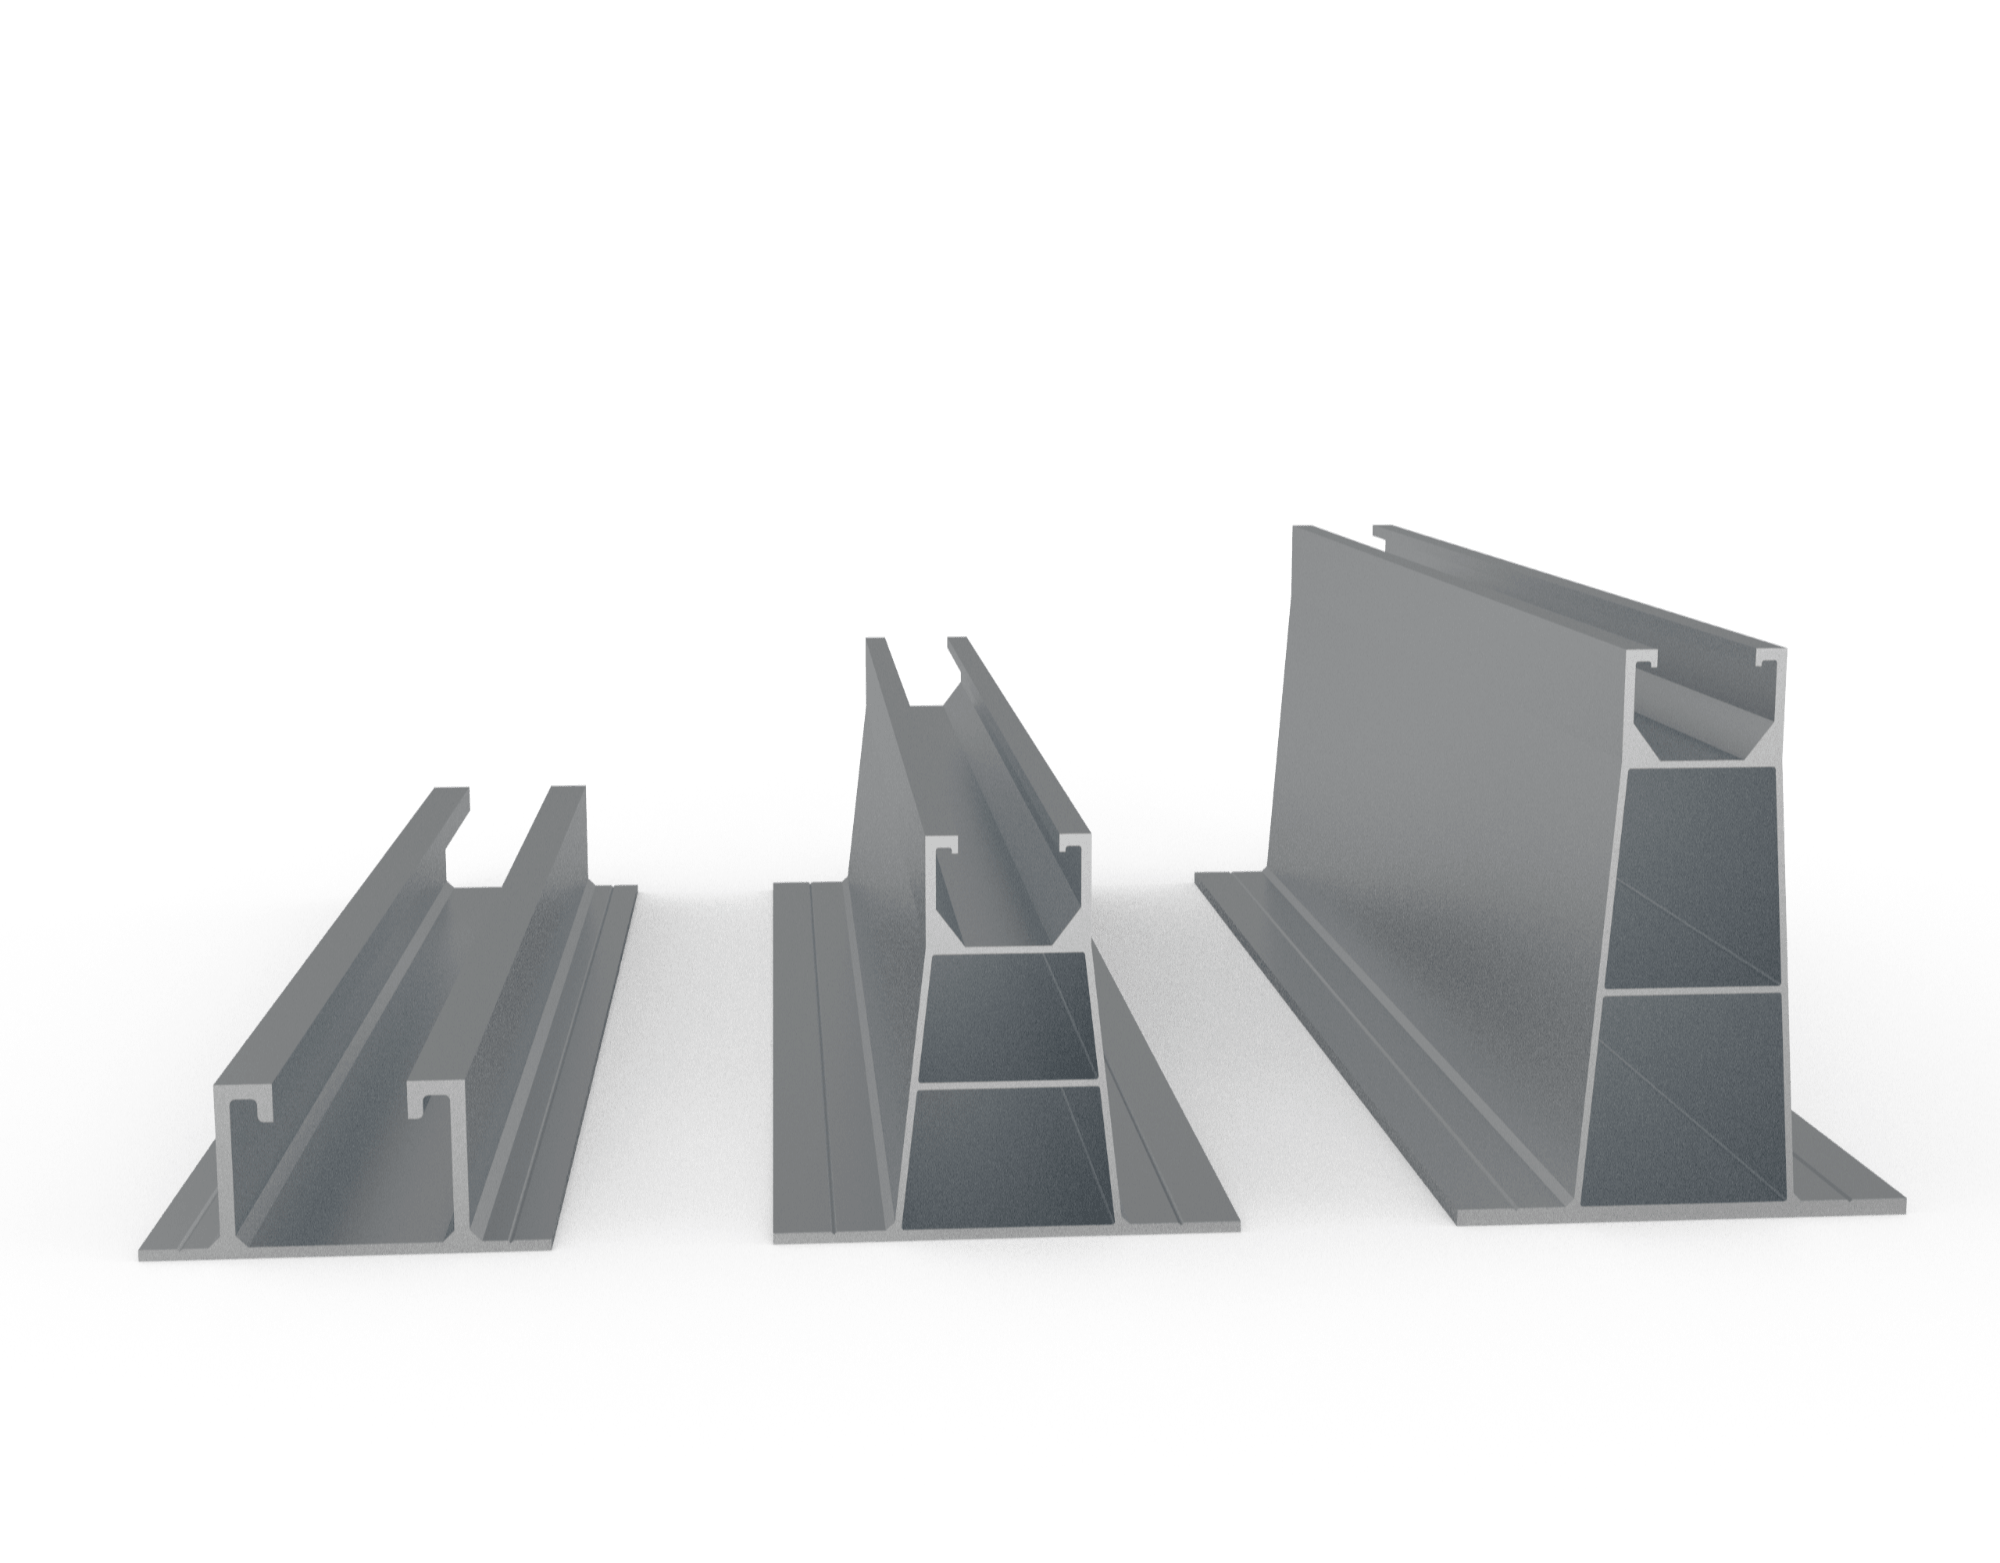
I. Introduction to Aluminium Channels for Solar Mounting Sytems

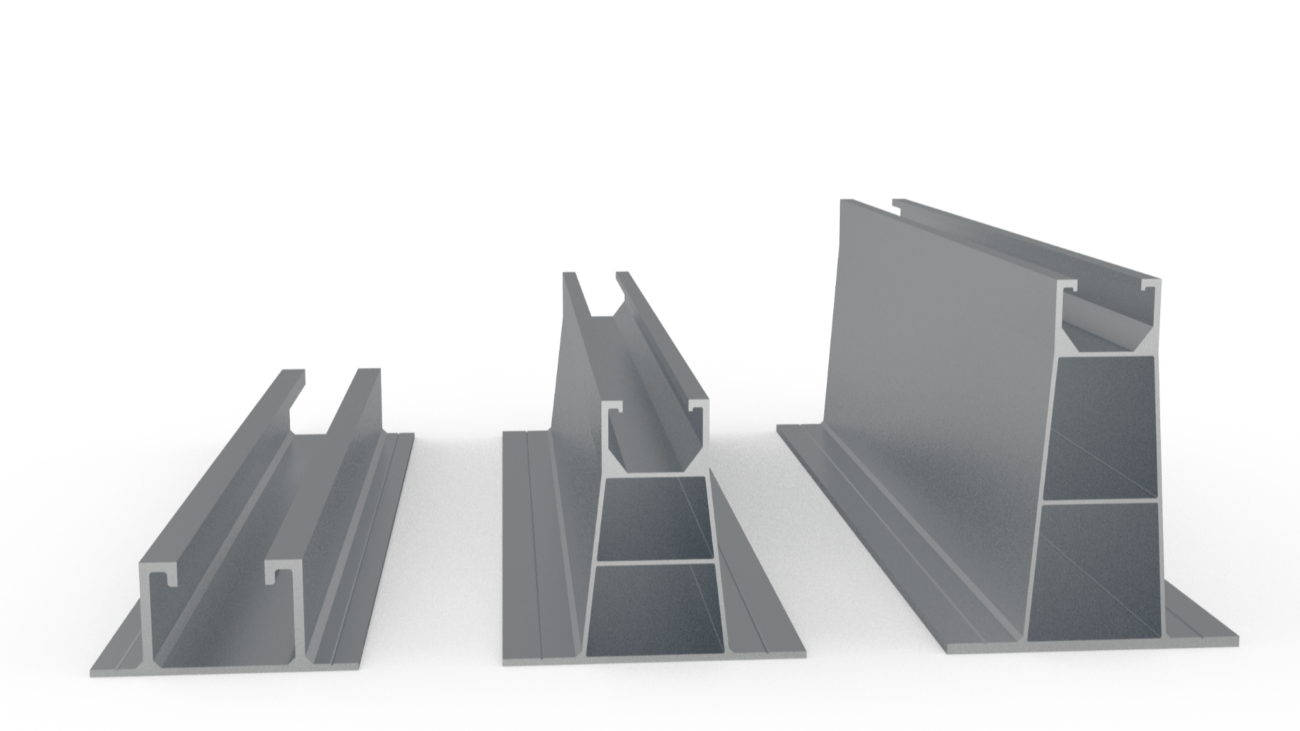
Aluminium channels refer to extruded aluminium profiles that have an inward facing radius suitable for mounting applications. Aluminium is a lightweight, strong, and durable metal that makes an ideal material for solar mounting components like rails, brackets, and panel frames.

Benefits of Aluminium Channels

Some key advantages of using aluminium channels for solar mounts include:

  • Corrosion resistant – Aluminium forms an oxide layer when exposed to air that protects against corrosion. This makes it very weather and rust resistant.
  • Lightweight – With only 1/3 the density of steel, aluminium minimizes weight loads on rooftops and structures.
  • Strength – Despite being lightweight, certain aluminium alloys like 6063 and 6061 provide excellent strength for structural applications.
  • Customizable – Aluminium can be easily machined and extruded into customized mounting components.
PropertyAluminiumSteel
WeightLowHigh
StrengthHighHigher
Corrosion ResistanceHighLow
CustomizationHighLow

Click Here to Learn More

Types of Solar Mounting Systems

Types of Solar Mounting Systems

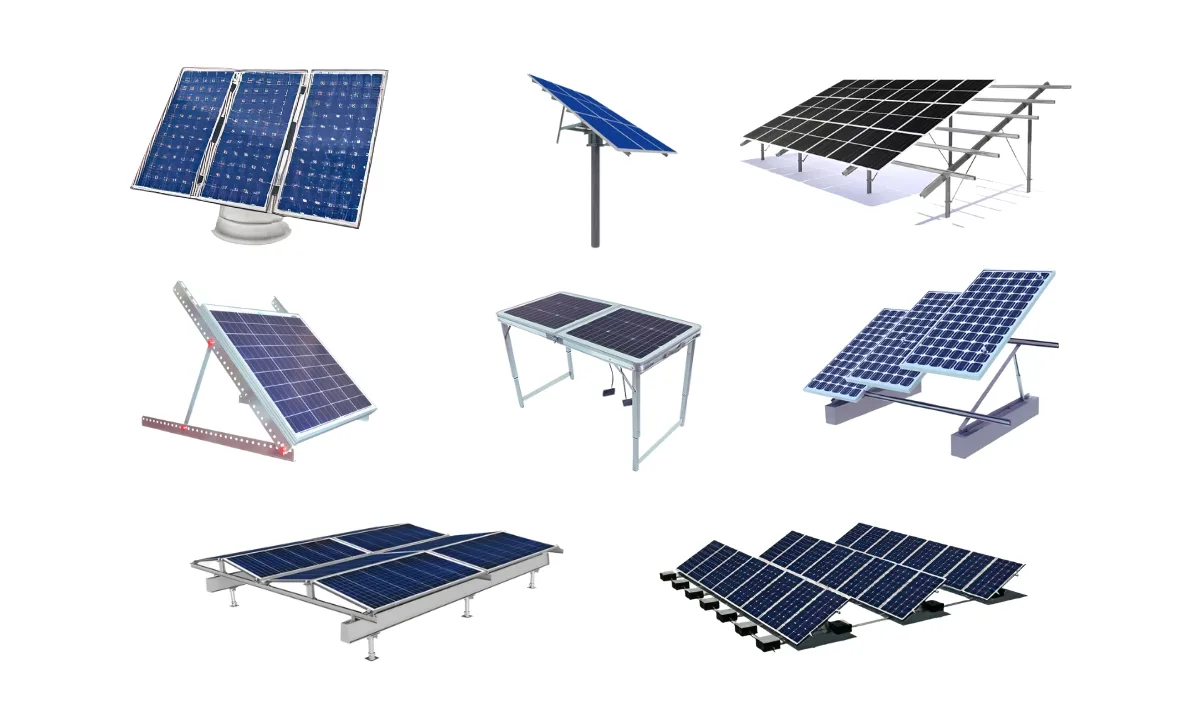
Common solar mounting systems that utilize aluminium channels include:

  • Roof Mounts – Aluminium rail systems to mount solar panels along rooftops.
  • Ground Mounts – Framed aluminium structures to mount panels on the ground.
  • Solar Farms – Large scale ground systems to mount panels across acres of land.
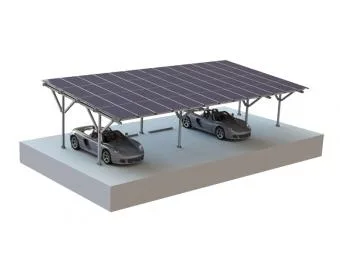
  • Carports – Aluminium structured carport frames that have integrated solar panel mounting.

These mounting methods typically include aluminium component likes rails, flashing, brackets, posts as well as hardware like bolts, clips, and connectors.

Aluminium offers an exceptional material for solar mounting hardware due to its versatile properties. Proper selection of durable and corrosion resistant alloys along with suitable structural design allows aluminium channels and components to reliably mount and frame solar modules for decades.

Learn More

II. Aluminium Grades and Alloys

There are numerous aluminium alloys available, but some stand out for applications in solar mounting systems due to their specific material properties.

Common Alloy Grades

The most common alloy grades used for solar mounting components are:

  • 6063 – This grade offers good corrosion resistance, weld ability, and finishing capability. It is easy to extrude into complex shapes.
  • 6061 – With excellent strength and corrosion resistance, this grade is suitable for structural mounting framing.
  • 7075 – Where very high strength is needed, this grade can be used despite difficulty welding and machining.
AlloyPropertiesUses
6063Corrosion resistant, easily extruded and machinedSolar rails, decorative trims
6061High strength, easily welded and machinedStructural brackets, supports
7075Very high strength, difficult to weld and machineHeavy loadbearing components


Alloy Properties and Strength

  • The silicon and magnesium content in 6063 and 6061 alloys provide good corrosion resistance and weld ability.
  • Addition of zinc, copper, and small amounts of other metals give 7075 alloy exceptional strength.
  • Heat treating and tempering alloys also enhances their strength considerably.
  • 6063 T6 and 6061 T6 tempers provide a good blend of strength, machinability, and corrosion resistance needed for most solar mounting applications.

III. Extrusion Process

Aluminium parts like channels, angles, and tubes for solar mounting systems are primarily made using the extrusion process.

Extrusion Methods

There are two main methods:

  • Direct extrusion – Material is pushed through a die using a ram.
  • Indirect extrusion – Material pulled through a die using a stem.

Direct extrusion is more common for larger aluminium sections like solar frame components.

Dies and Moulds

The shape and dimensions of the extruded aluminium profile is defined by the steel die design. Common dies exist for standard rails and channels.

Complex profiles can require custom die fabrication. Proper die heating up to 500°C is needed for smooth extrusion flow.

Billet Preparation

  • Aluminium billets provide the raw material.
  • Billets are heated up to 900°C to soften the aluminium for smooth extrusion.
  • Proper lubrication prevents sticking inside the chamber.
Extrusion VariableTypical Value
Ram Pressure15,000 tons
Billet Temperature750°C to 930°C
Extrusion Speed5 to 50 ft/min

This allows very customizable aluminium grades and profiles to be created for solar mounting components using the extrusion process.

IV. Mounting System Hardware

Mounting System Hardware

Aluminium channel extrusions and fabricated components make up solar mounting system hardware like rails, brackets, frames, and more.

Rails and Brackets

Common aluminium mounting hardware includes:

  • Rails – Channels that span rafters or posts to mount panels either in portrait or landscape orientation.
  • Brackets – Angle brackets to mount rails to rooftops and poles or act as panel support legs.
  • Flashing – Bent aluminium sheets to seal roof penetrations.

These components often use 6063 grade for good corrosion resistance and ease for fabrication.

Panel Racking and Frames

Panel racking refers to the entire support structure:

  • Framed racking uses joined aluminium profiles as vertical posts and horizontal cross beams.
  • Rail systems have minimal underlying structure.

Panel frames made of aluminium channels help rigidize panels.

HardwareDescription
RailsHorizontal channel supports
BracketsAngled brackets for attachment
FramesBorder channels around panel

Roof and Ground Mounts

Panel orientation hardware differs:

  • Roof mounts use tilt legs and clamped connections.
  • Ground mounts rely on fixed pole foundations.

Proper selection of durable aluminium hardware ensures long system lifespans.

V. Finishes and Coatings

Aluminium can be given different finishes and coatings to improve aesthetics, protection, and performance.

Anodizing

Anodizing is an electrolytic process that converts the surface to aluminium oxide for enhanced corrosion resistance.

  • Hard anodizing creates a thicker protective layer but poor wear resistance.
  • Soft anodizing offers better abrasion resistance.

Anodizing also allows dying the surface in colours like black for an attractive finish.

Powder Coating

Powder coated finishes are commonly applied through:

  1. Surface preparation
  2. Powder application through spraying
  3. Baking to cure the powder

Advantages include:

  • Highly abrasion resistant
  • Can produce metallic colour finishes
  • Environmentally cleaner process

Pre-treatments

Chemical pre-treatments like chromate conversion help cleaning and metal preparation to improve coating adhesion.

Finish/CoatingApplication MethodUse
AnodizingElectrochemicalCorrosion protection
Powder CoatingSpray then bakeColour finish
Pre-treatmentChemical cleaningImprove coating bond

Properly finished aluminium can maintain excellent performance and appearance for solar hardware when exposed to harsh outdoor environments.

VI. Design Considerations

Properly designing aluminium mounting hardware requires accounting for several factors:

Weight Ratios

The extruded profiles must provide adequate strength while minimizing weight.

  • Higher alloy grades enable thinner walls and less material.
  • But machinability and ductility decrease with stronger alloys.

Wind and Weather

The mounting components must resist:

  • High wind forces
  • Snow/ice loads
  • Temperature swings
  • Generally wet conditions

Corrosion resistant alloys and coatings are critical.

Vibration Dampening

Uncontrolled vibrations can slowly loosen connections and fasteners over time through metal fatigue.

  • Structural stiffness tuning using shapes like tubes or ribs help attenuate harmonic vibrations.
  • Bushings and grommets in mounting hardware also dampen vibrations.

Careful engineering ensures aluminium solar mounting hardware reliability over their ~25 year expected lifespan.

 VII. Advantages Over to Other Materials

Aluminium has many benefits compared to other materials for solar mounting construction.

Strength and Durability

  • Aluminium alloys provide very good strength while resisting corrosion.
  • Steel is strong but much heavier and prone to rusting.
  • Polymers are lighter but weaker and degrade under UV exposure.

Aluminium’s durability ensures continued structural stability over decades in harsh outdoor environments.

Cost Efficiency

Extruding aluminium is relatively affordable:

  • It is a high volume, continuous production process.
  • Tooling and setup costs are low compared to other processes that require moulds or custom fabrication.
  • Recycling aluminium requires little reprocessing.

These factors mean finished aluminium components are very cost competitive.

Customization Ability

The extrusion process allows creation of specialized and complex cross-sectional profiles:

  • Custom dies can make unique asymmetric shapes.
  • Strength can be tuned using different alloys and tempers.
  • Post-production fabrication allows further part optimization.

This flexibility allows aluminium solutions to be customized around application requirements.

Learn how durable and lightweight aluminium channels, extruded rails, and mounting hardware enable customized solar PV mounting systems.

Seasonal Tilt Solar Mounting Systems

Seasonal Tilt Solar Mounting Systems

Seasonal Tilt Solar Mounting Systems

I. Introduction

Seasonal tilt solar mounting systems refer to adjustable structures that allow for changing the orientation of solar panels to optimize energy production as seasons change throughout the year.

Key features of these systems include:

  • Manual adjustable joints and mechanisms to easily alter the tilt angle of the solar panels. This allows for:
  • Increased power generation during peak sunlight seasons. Seasonally adjusted panels can capture 5-10% more energy than fixed tilt systems.
  • The ability to position panels to maximize sunlight exposure depending on location and time of year.
  • Durable materials including galvanized steel, aluminium alloys, and stainless steel to withstand weather conditions over 25+ year lifespans.
  • Corrosion resistant treatments like anodizing and galvanization to protect system integrity.
  • Simple structures with less accessories and components, enabling:
  • Low installation costs
  • Reduced maintenance and operations expenses
TypeGround Mount
ColourNatural or Customized
TreatmentAnodized, Galvanized
Structural MaterialsAluminum Alloy, Galvanized Steel, Stainless Steel

By changing orientation 2-3 times per year, seasonal tilt mounting maximizes solar collection during peak seasons. Manual adjustability makes modification straightforward based on location and time of year. Durable, corrosion-resistant materials also minimize maintenance costs over decades of service.

II. Durable and Corrosion Resistant Materials

Durable and Corrosion Resistant Materials

Seasonal tilt solar mounting systems are designed for durability to withstand decades of outdoor exposure to various weather conditions. Key material considerations include:

Corrosion Resistance

Corrosion can compromise structural integrity over years of service. Therefore, systems utilize:

  • Galvanized steel: Galvanization applies a protective zinc coating to steel. This guards against rust for 25+ year lifespans.
  • Anodized aluminium: Anodization electrically treats aluminium alloy to reinforce corrosion resistance.
  • Stainless steel: Stainless steel alloys like 304 and 316 feature chromium to prevent surface oxidation from weather exposure or rust.

Simple Structure

Simpler designs result in:

  • Fewer components needed for installation.
  • Lower potential points of failure or wear compared to more complex structures.
  • This maintains system reliability over decades of operation.
  • Low Installation Costs
  • Minimized parts along with straightforward manual assembly directly reduce initial installation costs.
  • Easy Maintenance
  • Basic robust builds allow easy visual inspection.
  • Manual seasonal adjustments do not require expensive specialized equipment or expertise.

Combined with inherent durability, lifespan maintenance costs stay low.

By focusing on fundamentals of durable, maintenance-free structural design, seasonal tilt mounting systems deliver reliable service for 20-30 years. This allows for outstanding return on investment over the system lifetime.

Click Here to Learn More

III. Location and Hemisphere Factors

To optimize the energy generation, seasonal tilt solar mounting systems must adjust panel angles based on location and time of year. The key factors related to geography are:

Hemisphere

The hemisphere where the system is installed determines peak sunlight seasons:

  • Northern hemisphere – Peak production in summer
  • Southern hemisphere – Peak production in winter

This impacts ideal tilt strategies.

Country/Region

More specifically, the country and region indicate:

  • Latitude – Affects sun angle path
  • Climate patterns – Rainy or dry seasons affect solar availability

Sunlight Exposure

Tilt adjustments maximize sunlight exposure during peak seasons:

  • Winter – Tilt to maximize lower winter sun angles
  • Summer – Account for higher summer sun paths

Angles that capture the most sun during peak seasons will generate the greatest additional energy.

Ideal Tilt Angles

Formulas can dial in optimal orientation based on location:

  • Summer – (Latitude * 0.93) – 21°
  • Winter – (Latitude * 0.875) + 19.2°

Sensitivity Analysis around these starting points can further maximize yearly yield if seasonal cloud cover data is available.

Properly accounting for site geography informs data-driven tilt strategies that maximize solar utilization potential for seasonal mounting systems. This allows substantial gains in solar energy production on an annual basis.

Seasonal Tilt Adjustments

Seasonal Tilt Adjustments

To maximize power generation, seasonal tilt solar mounting systems must alter their orientation multiple times per year to match the sun’s shifting path across seasons. There are two main approaches:

Half-Yearly Adjustments

Half-Yearly Adjustments

Tilt angle can be changed twice a year based on spring/fall equinox dates:

  • Northern Hemisphere:
  • Summer tilt – March 20th
  • Winter tilt – September 22nd
  • Southern Hemisphere
  • Summer tilt – September 20th
  • Winter tilt – March 21st

This better aligns with seasons versus calendar dates.

Quarterly Adjustments

For more precision, adjust tilt 4 times per year aligned to solstices and equinoxes:

SeasonNorthern HemisphereSouthern Hemisphere
SummerJune 20thDecember 21st
AutumnSeptember 22ndMarch 20th
WinterDecember 21stJune 20th
SpringMarch 20thSeptember 23rd

Benefits

  • Increased energy collection during “shoulder” seasons
  • Reduced machine downtime for adjustments
  • Gradual angle changes better track sun’s daily course

Considerations

  • Additional manual labour required
  • Possible downtime during adjustments

Data Analysis

Historical on-site solar data can reveal optimal dates and degree days for adjustments. Sensitivity analysis identifies energy gains from extra tilts.

Automated Systems

For large installations, automated actuators can systematically alter tilt. But this adds complexity and capital costs.

Fine-tuning mount orientation to follow the sun’s seasonal movement provides outsized electricity generation gains for minimal incremental effort using seasonal tilt solar mounting systems.