
I. Introduction to Aluminium Extrusions and the Solar Industry
The solar industry has seen immense growth in the recent years as both companies and individuals look to harness renewable solar energy for the electricity needs in an eco-friendly manner. Solar panels play a crucial role in converting sunlight into usable electrical energy. The efficiency and longevity of these panels depend significantly on the quality of materials used to manufacture them.
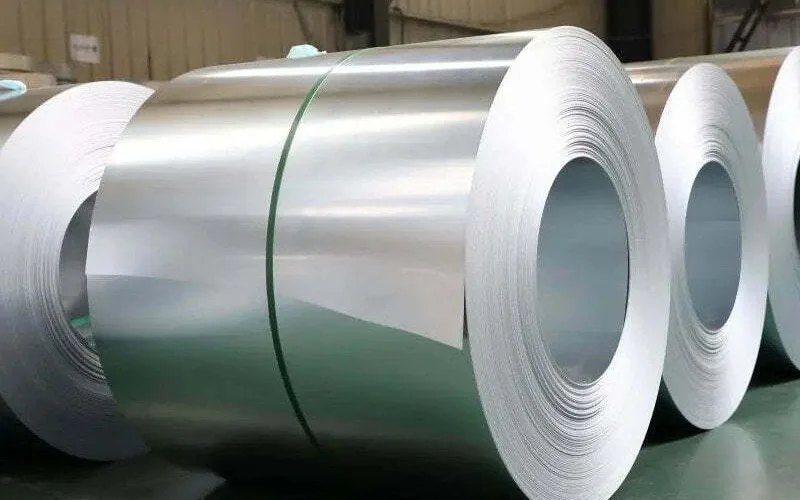
Aluminium extrusions have emerged as an important material choice for the components in solar panels including framing structures and the mounting systems. Extruded aluminium refers to aluminium that has been formed with a fixed cross-sectional profile by forcing heated aluminium billets through a shaped die via an extrusion process.
Benefits of Extruded Aluminium:
- Extremely lightweight yet strong metal with excellent conductivity
- Resistant to corrosion and harsh weather conditions
- Easy to fabricate into customized profiles and aluminium sheets
- More affordable option compared to metals like stainless steel
- Fully recyclable and sustainable material
As per the result the versatility and the durability of extruded aluminium make it worthwhile for the following the solar applications:
- Lightweight frames and casing for the solar panels
- Mounting systems to securely the fasten panels
- Heat sinks and devices to dissipate heat
- Reflective surfaces to maximize light absorption
The unique properties of aluminium extrusions cater efficiently to the needs of a rapidly evolving renewable energy domain like solar power. As demand grows for scaled solar implementations, aluminum alloy profiles offer an optimal and ecologically responsible solution. Specialist manufacturers of extruded profiles also enable customized solar-specific designs.
With enhanced collaboration across stakeholders spanning suppliers, engineers, architects, and sustainability experts – aluminium promises to be integral to the building of an efficient and circular solar industry.
II. Role of Aluminium in Solar Panel Components

Aluminium plays a vital role in the multiple components that make up the solar panels including:
Frames and Structures
- Provide rigid frames to encase and protect solar cells
- Enable installation onto rooftops, vehicles and infrastructure
- Custom extruded profiles for specific load requirements
- Anodized for weather resistance and desired visual finishes
Energy Conduction
- Excellent conductivity for electrons generated in cells
- Transfers current to be available for external use
- Reflective surface improves light capture to boost efficiency
- Comparable conductor to materials like copper and silver
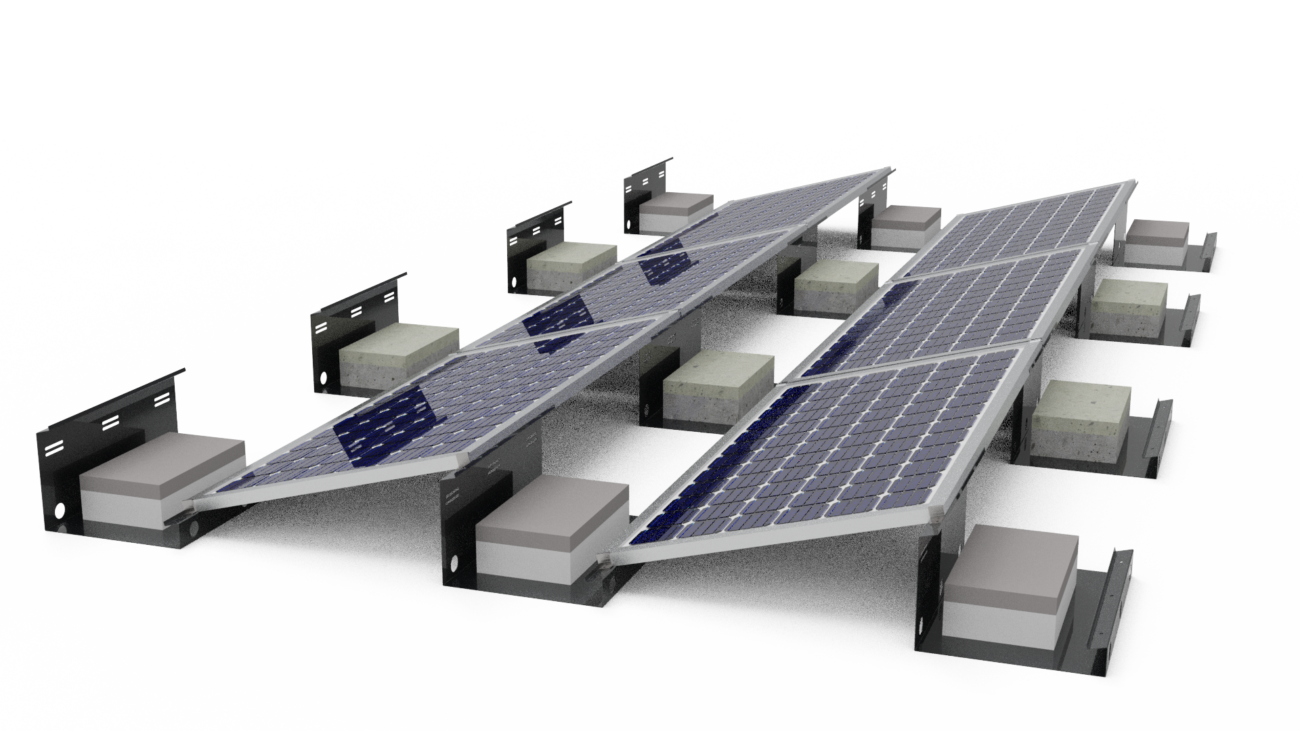
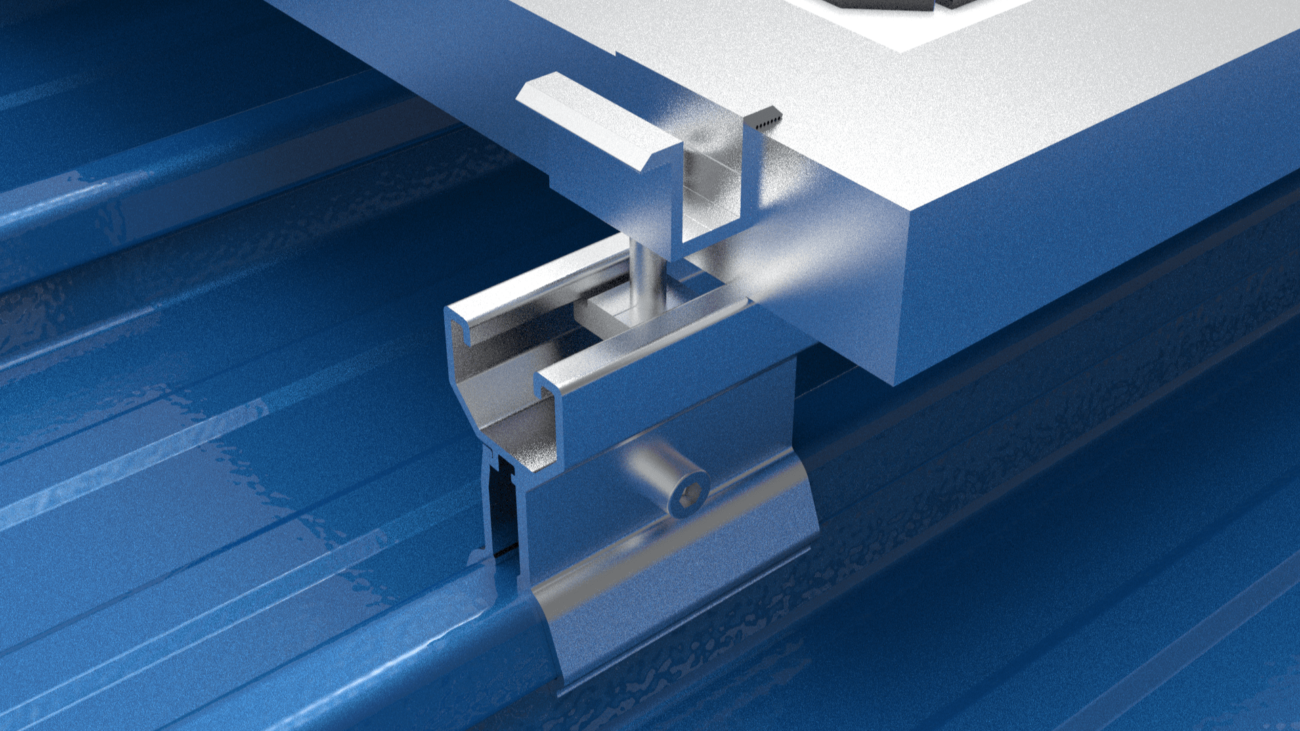
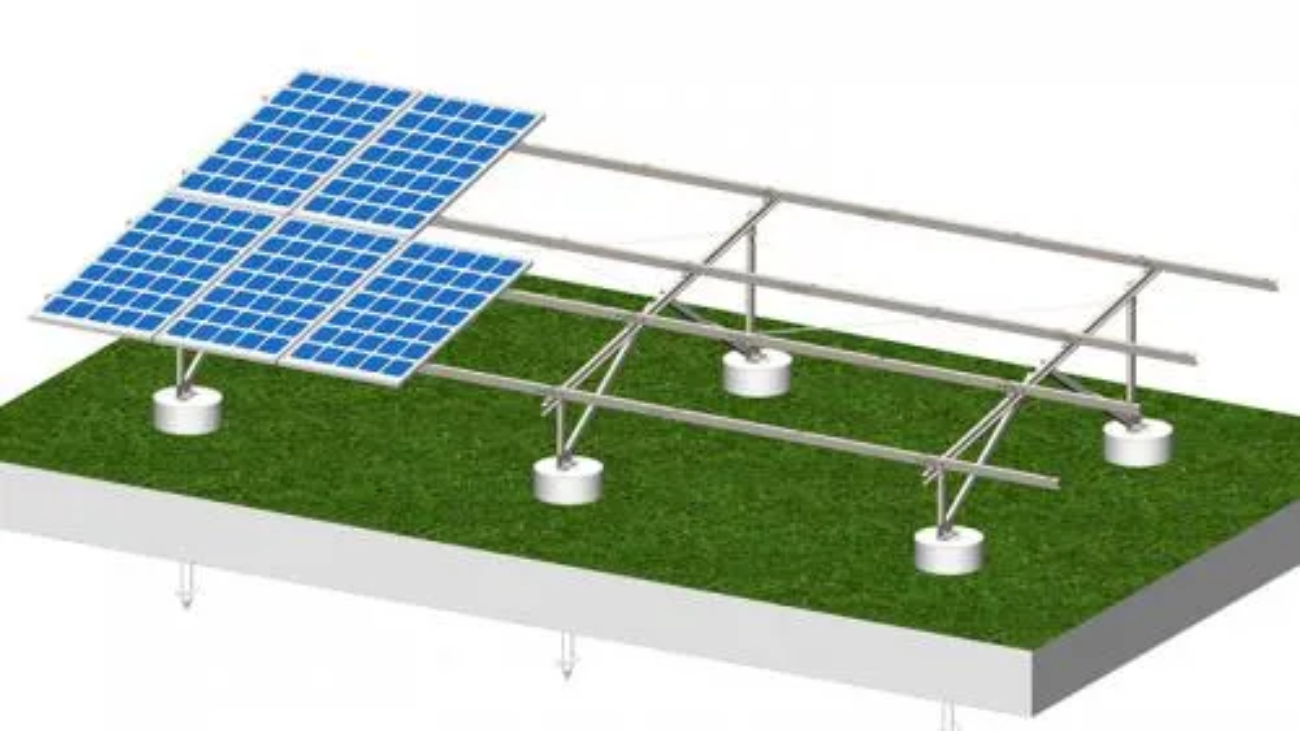
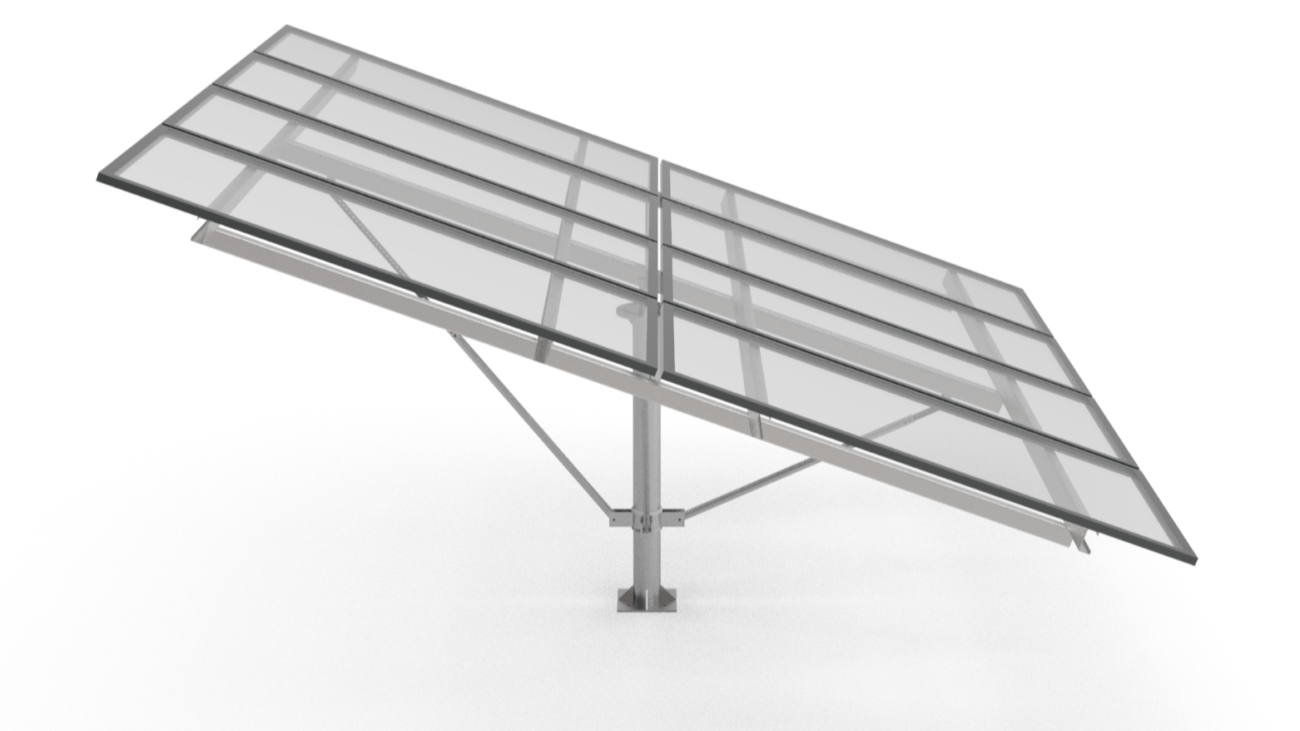
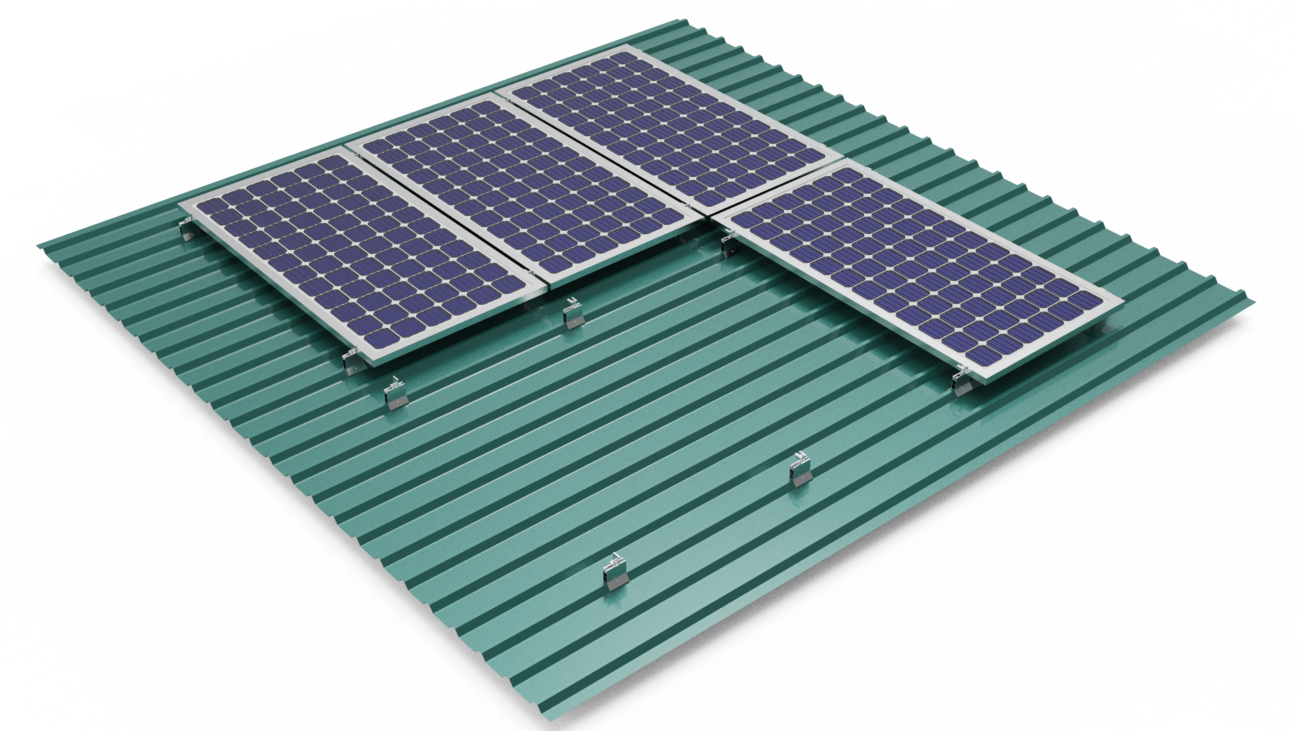
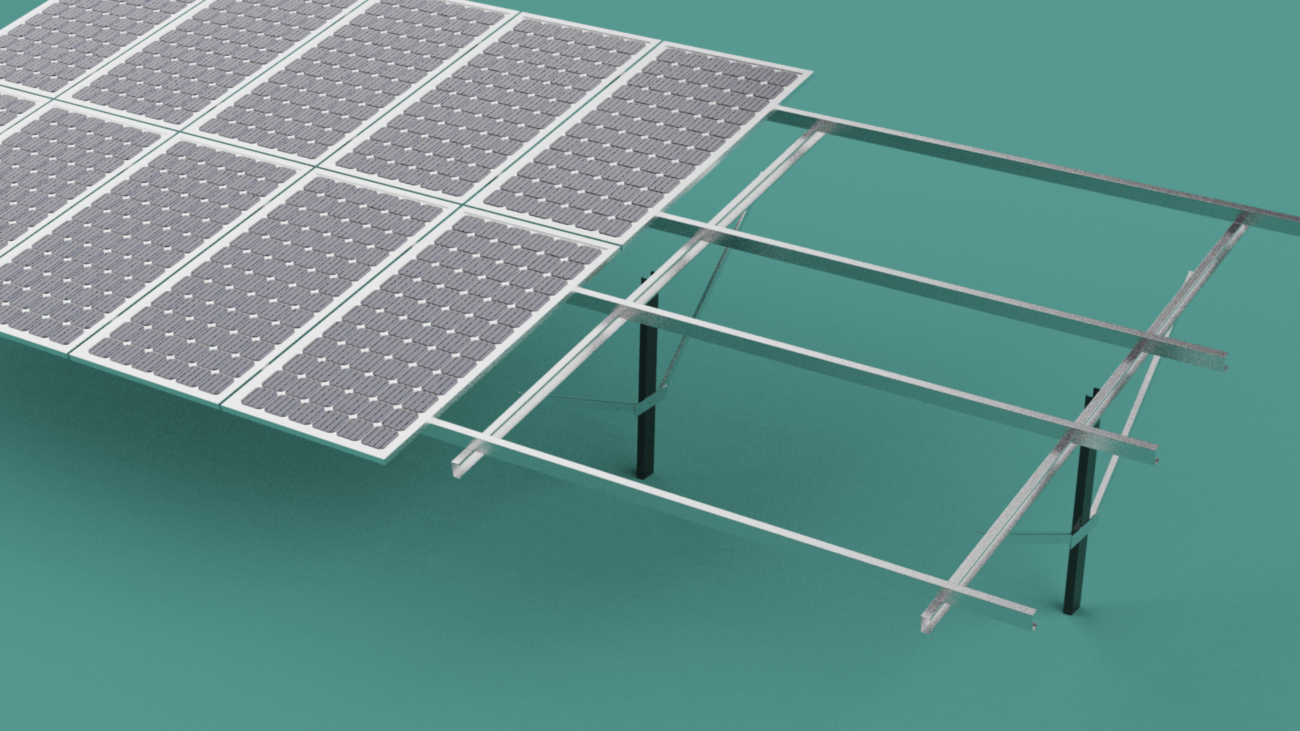
Mounting Systems
- Essential for securing panels in outdoor environments
- Anchor to various foundations – rails, poles, rooftops
- Withstand wind, seismic and snow loads
- Lightweight alloy vital for easy transport and assembly
- Modular profiles to suit all kinds of installations
The versatility of aluminium alloy compositions combined with the extrusion flexibility enables it to be fabricated into parts that serve critical functions across solar power generation systems.
III. Comparison to Other Materials like Stainless Steel
Aluminium extrusions offer distinct advantages over other metal alternatives, especially stainless steel, when it comes to usage in the solar panels:
- Cost – Aluminium is far more economical than stainless steel.
- Weight – About 3 times lighter allowing easier transportation and roof loading.
- Strength – Has requisite mechanical strength for frames and mounts.
- Workability – Softer metal that is easier to fabricate and bend.
- Conductivity – Excellent electrical and thermal conductor.
- Corrosion Resistance – Withstands weathering better with protective finishes.
- Sustainability – Highly recyclable material with low remelt energy.
Additionally, specialist aluminium alloy grades that have been designed to possess optimal properties for renewable energy applications. Availability of the diverse aluminium sheets, plates, rods and extruded profiles in a range of sizes facilitates scalable production of solar panel components.
Superior longevity ensures aluminium solar panel parts require lower maintenance over extended lifespan – offering better value compared to alternative metals. Standards for anodized coatings and testing procedures have also evolved to full fill quality expectations.
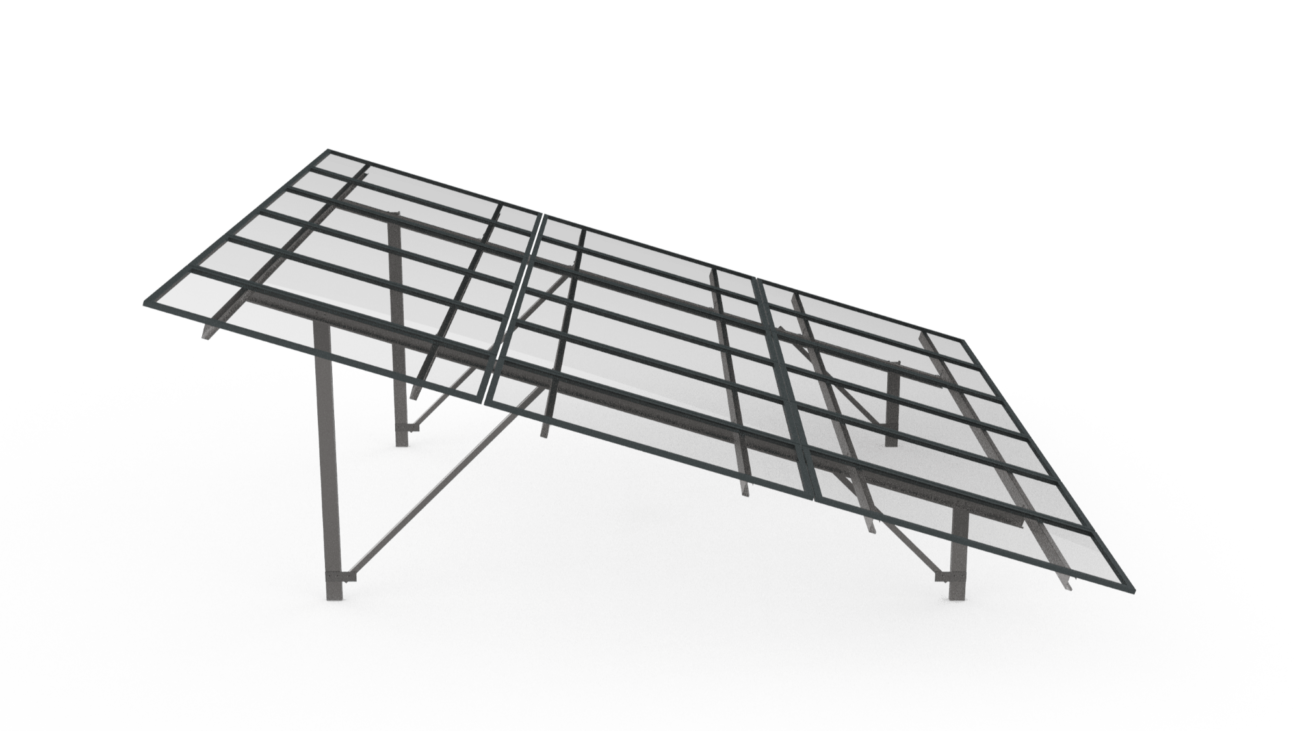
V. Applications of Aluminium Extrusions in Solar Industry
Aluminium extrusions find widespread implementation across the solar power domain:
Commercial Installations
- Industrial parks, factories
- Warehouses, airplane hangers
- Highways and dedicated solar farms
Residential Infrastructure
- Rooftop solar panels
- Carports and garage roofing
- RV and tiny homes
Off-Grid Power Systems
- Telecom towers, rural electrification
- Emergency power backup
- Traffic signals, highway sound barriers
- Spacecraft and satellites
The lightweight sturdiness along with design flexibility of extruded aluminium makes it suitable for small scale residential needs as well as large utility projects. Continued innovation of alloy grades and cost-effective manufacturing processes has enabled adoption across on-grid and off-grid solar applications.
VI. Aluminium Alloy and Extrusion for Affordable Solutions
The high upfront costs of solar photovoltaic systems pose adoption challenges. Aluminium alloy and extrusion offers a variable route to affordable solar power:
- Compared to systems based on copper or steel, aluminium panels have lower costs for the same wattage.
- Advanced alloying technique enhance electrical properties while retaining cost effectiveness.
- As a commonly available metal worldwide, global aluminium prices are competitive.
- Established manufacturing and recycling ecosystems make aluminium financially attractive.
- Custom extruded profiles help optimize material usage minimizing wastage.
- Lower weight results in reduced shipping and handling charges.
- Creates local job opportunities expanding solar value chain.
- Solar panel mounting structures fabricated from aluminium trim installation expenses.
- Encourages more users especially in developing countries to choose solar energy.
Continued efforts to improve efficiency of aluminium solar components coinciding with higher adoption will be facilitate further cost reduction – enabling the dream of inclusive and affordable solar power access.
VII. Surface Treatments and Finishes
While untreated aluminium offers good corrosion resistance, in an appropriate surface treatments and finishes that can be enhance the durability and aesthetic appeal of solar panel parts:
Functional Coatings
- Anodizing creates a harder insulating oxide layer improving the weather ability
- Organic paint-like coatings provide insulation and minor corrosion for protection
- Specialized solar glass coatings maximize light absorption and conductivity
Aesthetic Finishes
- Anodized layers are available in various tints besides natural finish
- Durable coloured paints and powder coated finishes suit custom themes
- Improves visual appeal for the building-integrated installations
- Screens can be mimic surround textures like brick walls or wood panelling
Specialized Testing
- Qualification tests assess treatment effectiveness and adhesion
- Accelerated corrosion testing verifies the noticeable enhancement of baseline aluminium corrosion resistance
- Exposure trials in real atmospheric conditions
Surface treatments render aluminium uniquely suitable for the stringent performance and aesthetic needs of solar panel components.
VIII. Future Circular Economy Considerations
The solar industry is expected to grow exponentially in the coming decades. Ensuring sustainable scaling requires circular economy thinking:
Reuse and Remanufacture
- Design solar mounting systems for easy disassembly
- Reuse intact aluminium profiles in the new installations
- Repurpose for non-structural solar balance-of-systems
Recycle
- Create buyback and takeback systems for old panels
- Extract aluminium content for low-energy recycling
- Process back into the raw material for new profiles
Ecological Impact
- Lightweight aluminium and transport optimization cuts carbon footprint
- Significant water savings using recycled aluminium versus primary metal
- Integrate renewable energy in remelting and extrusion processes
Proactive adherence to circular economy principles will allow to the solar industry to grow in a sustainable manner and continue providing clean energy solutions without adversely straining the planet’s resources.
IX. Role of Technical Expertise in Design
Harnessing aluminium’s full potential for solar applications requires extensive technical know-how:
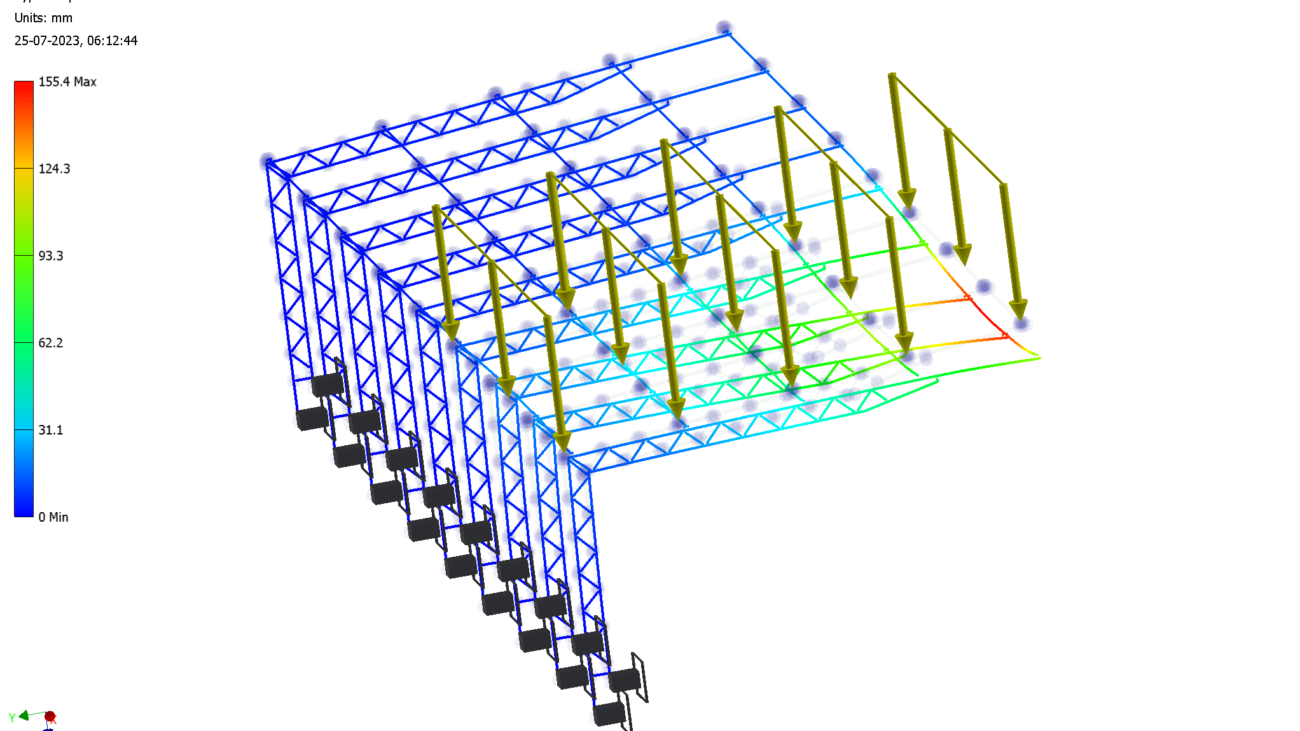
Simulation and Analysis
- Software-aided modelling and the structural analysis
- Predict thermal dissipation needs
- Ensure wind loading capability
Customized Design
- Expertise in translating concepts to the manufacturing extruded profiles
- Suitability evaluation of the different alloy grades
- Design optimization for material and energy efficiency
Prototyping and Testing
- Evaluate form, fit and functionality
- Carry out static and dynamic testing to meet norms
- Iterate based on feedback from controlled trials
Multi-domain Collaboration
- Partner with panel and other system manufacturers
- Joint development of integrated solutions
- Leverage emerging solar-specific advances in aluminium
Careful application of metalworking design skills, simulation tools and a collaborative approach is key to overcoming aluminium innovation barriers for solar structures.
X. Conclusion on Suitability of Aluminium Extrusion Profiles
The exponential growth and mainstreaming of solar technology in recent times requires eco-friendly, cost-effective and sustainable material solutions. Aluminium extrusion profiles serve as an optimal material choice in this context owing to:
- Lightweight yet sturdy profiles enabling modular and adaptable structural designs
- Alloy advancements tailoring electrical, mechanical and thermal properties
- Nearly infinite recyclability and environmentally prudent life cycles
- Custom manufacturability of the specialized cross-sections
- Continued focus on process efficiency, yield and quality improvement
- Increased adoption furthering innovation and cost optimization
- High relevance to renewable energy domains demanding longevity and reliability
With abundant technical expertise and manufacturing capability, aluminium promises to be integral to unlocking mass solar adoption. Strategic collaboration among stakeholders and deliberate perpetuation of circular-economy centric business models will be facilitate responsible solar industry growth.