untitled.109

Why Engineering Matters in Prefabricated Rooftop Solar Structures

When people evaluate a rooftop solar system, most of the attention goes to panels and inverters. The structure is often treated as a secondary component — something that simply holds everything in place.

But in reality, the structure is what carries the entire system for 20–25 years.

If the structure is not designed correctly, the risks are not immediate — they show up over time. Misalignment, stress buildup, deformation, and in worst cases, structural failure. By the time these issues become visible, the damage is already done.

This is where the difference between engineering-led design and cost-driven fabrication becomes critical.

1. Designed Scientifically, Not Approximate Solutions

Solar structure FEA analysis

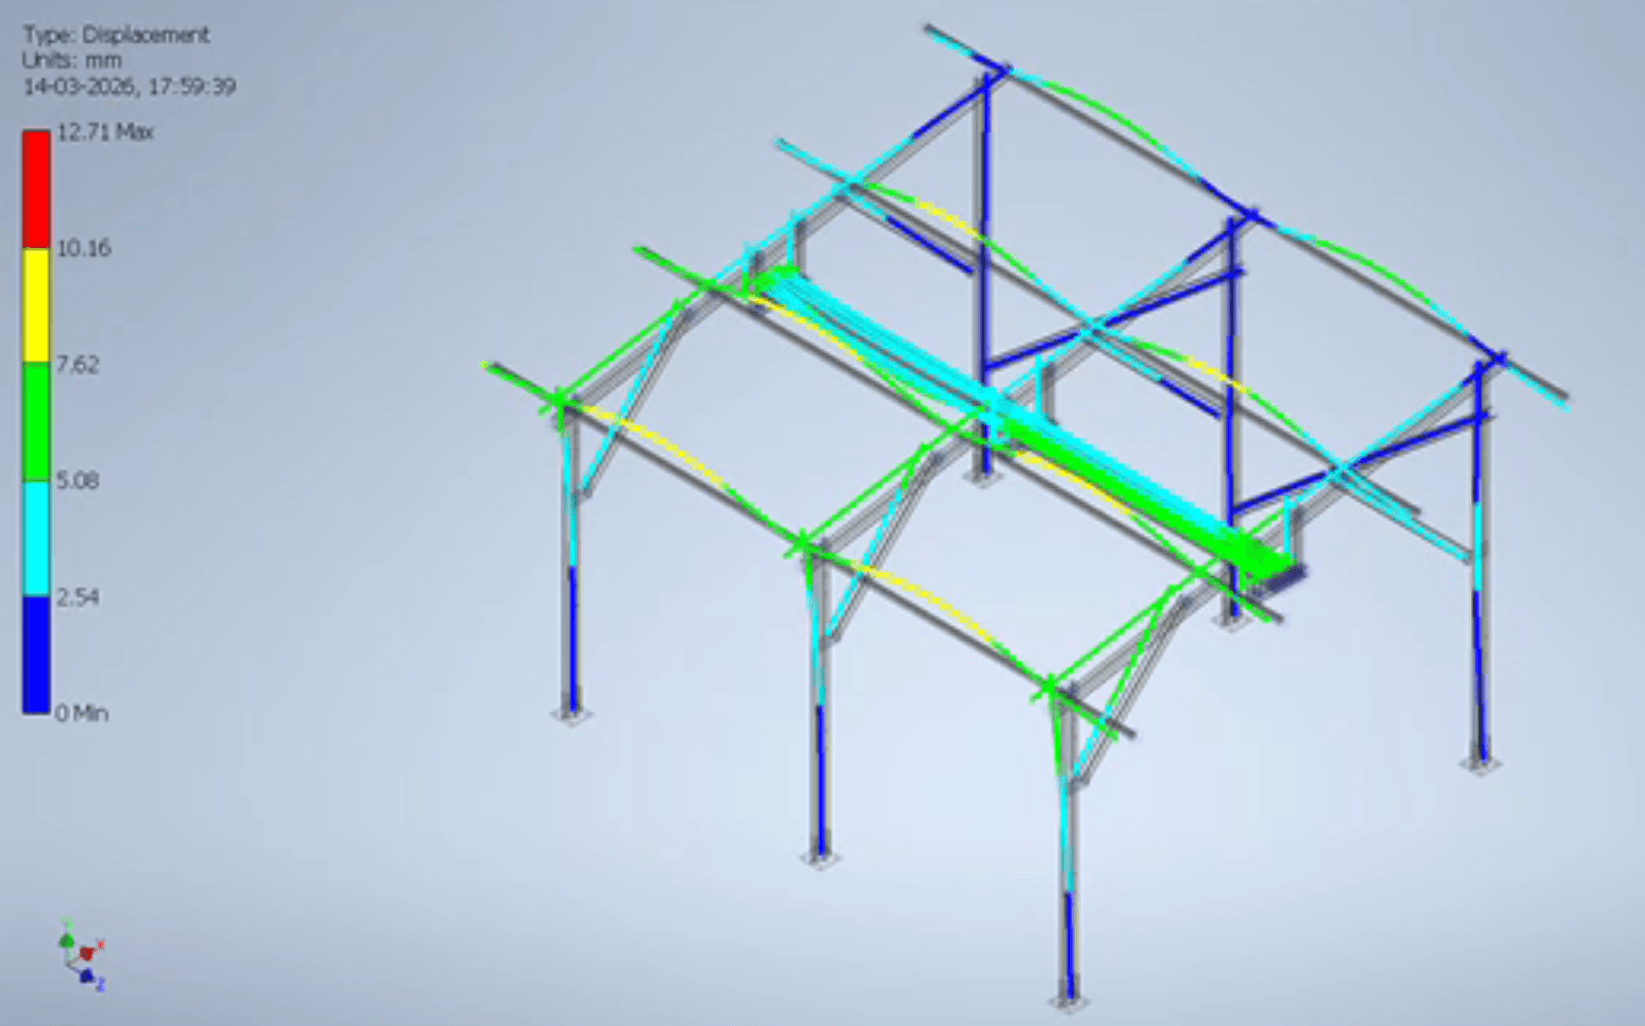
At Structura, every structure begins with engineering, not approximation.

We use:

  • Structural analysis tools like FEA (Finite Element Analysis)
  • Load simulations based on wind, weight, and real-world conditions


This helps us determine:

  • How forces move through the structure
  • Where stress concentrations can occur
  • What size and thickness each member actually requires


In contrast, many market solutions are still based on rough calculations or past templates. This typically leads to two extremes:

  • Structures that are too light and prone to long-term failure
  • Structures that are unnecessarily heavy and expensive


A well-engineered structure sits in between — optimized for both strength and efficiency.

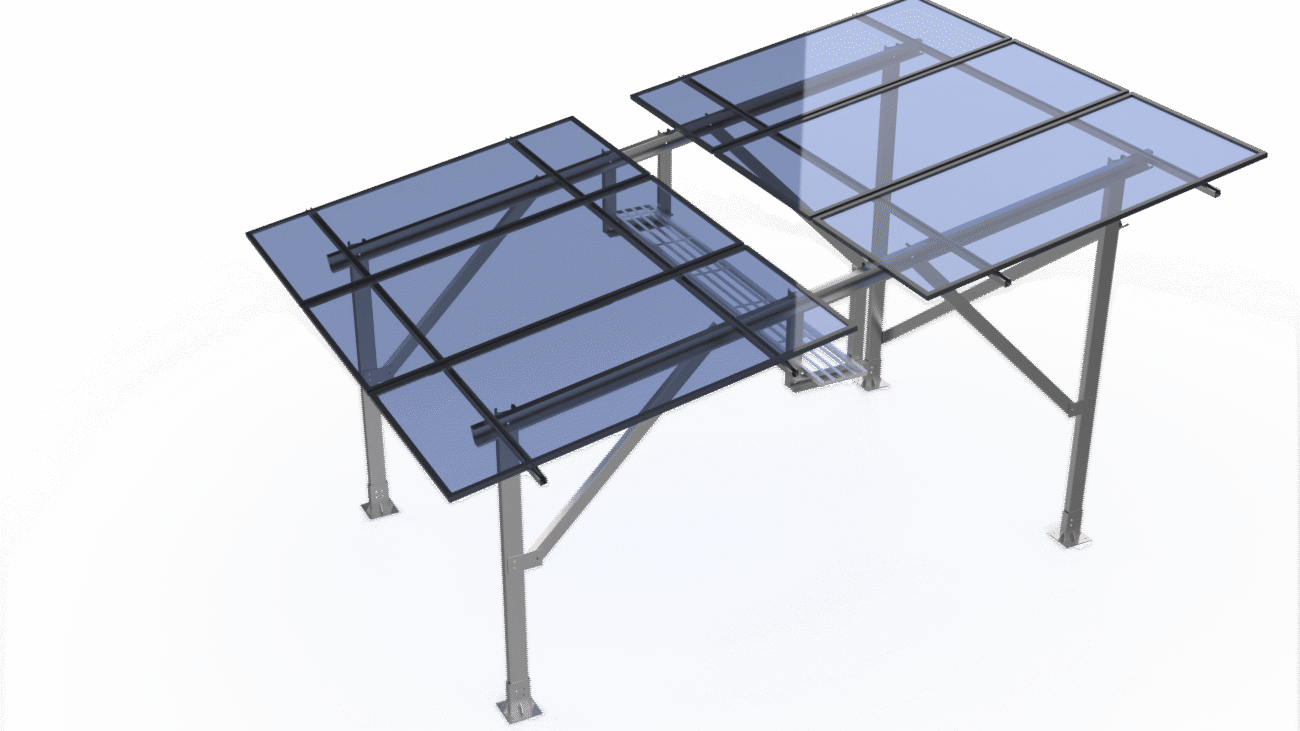
2. Column Base: The Most Underrated but Critical Component

The column base is not just a support plate. It is the foundation of load transfer between the structure and the rooftop.

In structural engineering, base plates are sized based on:

  • Load magnitude
  • Bearing pressure on the foundation
  • Long-term stress distribution


Heavier base plates are used in critical structures because they:

  • Distribute loads more evenly
  • Reduce stress concentration at connection points
  • Improve long-term stability under cyclic loads (like wind)


At Structura:

  • We use a heavy column base with four bolted connections
  • Two bolts include capsule slots, allowing minor adjustments during installation


This design helps:

  • Maintain proper alignment
  • Reduce shear stress in columns caused by uneven surfaces or installation deviations
  • Prevent long-term fatigue in structural members


When this detail is overlooked, even small misalignments can introduce stress into the columns — and over time, that stress compounds.

3. Bracing Connection: Where Real Engineering Shows

Bracing is meant to stabilize the structure. But it only works when connected correctly.

We use:

  • Dedicated bracing plates placed at the vertical center of the column
  • Double-bolted connections to secure the plate


Why vertical center matters:

  • It aligns the force path with the column axis
  • Reduces torque on the column
  • Converts lateral forces into vertical loads, which columns are designed to handle more efficiently


Why double-bolted connections:

  • Prevent rotation or loosening over time
  • Provide redundancy and stability


In many market implementations, bracing is connected using:

  • Offset joints
  • Single bolt connections
  • Improvised attachments


These methods may look acceptable initially, but:

  • They introduce torque into the column
  • Reduce the effectiveness of bracing
  • Can make the entire bracing system functionally weak


In such cases, the structure behaves closer to an unbraced system, increasing long-term risk.

4. Strengthening Critical Joints: Column to Rafter

The column-to-rafter joint is one of the most critical load-bearing connections in the entire structure.

At Structura:

  • We use a double-bolted connection


This improves:

  • Load sharing between fasteners
  • Joint stiffness
  • Alignment of structural members


This approach is not new — it is already a standard practice in ground-mounted systems, where structural loads are even more demanding.

However, in rooftop structures, this is often simplified to reduce cost, which directly impacts the integrity of the frame.

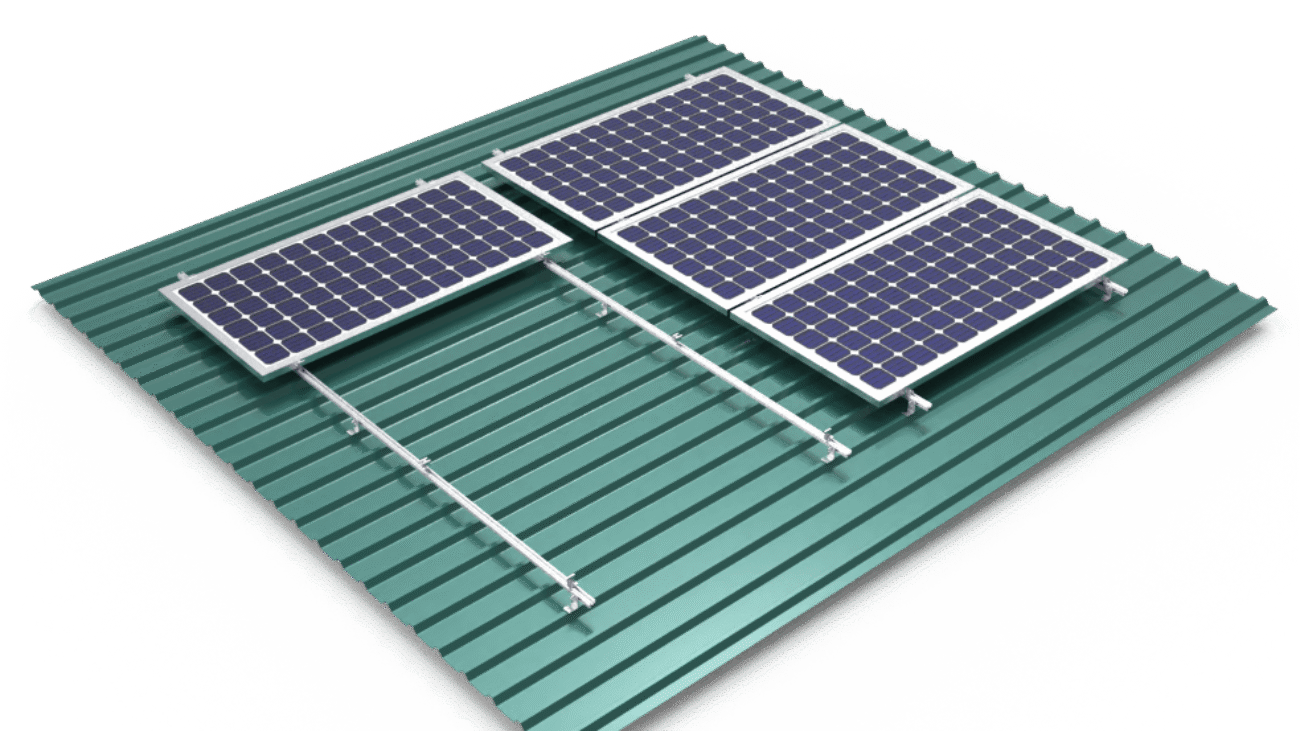
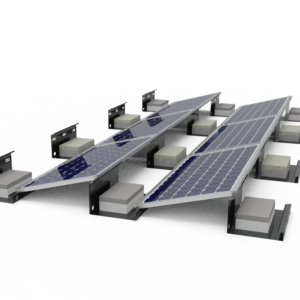
5. Walkway System: Integrated, Not Added Later

Walkways are often treated as an afterthought. But in reality, they introduce additional loads and interaction with the structure.

Our walkway system is:

  • Connected directly to rafters using double-bolted joints
  • Designed using structural analysis, not assumption
  • Built using welded pipe platforms


This allows:

  • Safe load handling up to approximately 300 kg
  • Minimal impact on primary structural members


In contrast, common issues seen in the market:

  • Walkways connected to columns instead of rafters
  • Load transfer into unintended members
  • Visible deflection or bending under use


These are not just visual issues — they indicate structural inefficiency and long-term risk.

6. Fasteners: Small Component, Big Impact

Structural integrity depends heavily on connections.

We use:

  • SS304 grade bolts
  • 12 mm diameter for structural joints


This ensures:

  • Corrosion resistance over time
  • Consistent clamping force
  • Reliable joint performance


Using undersized or lower-grade fasteners may reduce upfront cost, but it weakens the system where it matters most — at the connections.

7. Material Selection: Right-Sized, Not Cost-Driven

All structural members are selected based on analysis, not assumption.

We use:

  • Roll-formed sections with minimum 2 mm thickness
  • Profiles sized as per actual load requirements


The goal is simple:

  • Avoid under-designing for cost
  • Avoid over-designing for safety margins without reason


This balance ensures:

  • Structural reliability
  • Cost efficiency
  • Predictable performance over time


8. Designed for Real Conditions, Not Standard Templates

No two rooftops are the same.

Factors like:

  • Wind zones
  • Roof conditions
  • Tilt requirements
  • Layout constraints


All influence structural design.

At Structura:

  • We have an in-house design team
  • Structures are customized and modular
  • Designs are adapted based on project-specific requirements


This allows:

  • Better system efficiency
  • Improved installation feasibility
  • Long-term structural reliability


Standard, one-size-fits-all solutions often ignore these variables — and that’s where problems begin.

Conclusion

A rooftop solar structure may look simple, but its performance depends on a series of engineering decisions.

Each connection, each member, and each detail contributes to how the system behaves over time.

The difference is not always visible on day one.
But over years, it becomes the difference between:

  • Stability and deformation
  • Reliability and failure
  • Confidence and risk


At Structura, the focus is clear:

Every structure is designed with intent, validated through analysis, and built for long-term performance.

Because in solar, it’s not just about installing a system —
it’s about ensuring it performs reliably for decades.

Long Rail Mounting Structure

Solar Roof Mount – 5 Things to Know

Solar Roof Mount - 5 Things to Know

I. Roof Requirements for Installing Solar Roof Mounts

Installing solar panels on your roof requires ensuring your roof’s direction, sun exposure, condition, and expected lifespan will support a successful solar array installation. Meeting key roof requirements will allow your solar roof mount system to maximize energy production over the 30+ year system life.

A. Roof Direction and Sunlight Exposure

Optimizing roof direction and sunlight access is crucial for solar. Some key considerations include:

  • The roof should face southwards to maximize exposure. Southern roof orientations are best, while east/west may work depending on panels and location.
  • Trackers may help capture more energy if limited by non-southward roof directions.
  • The roof should get full sun for at least 5 hours per day year-round.
  • Nearby trees, buildings, or other structures should not heavily shade the solar roof space.

Some Guidelines for Hours of Direct Sunlight

Roof Direction Good Solar Exposure Marginal Solar Exposure
South 6-8 hours 4-6 hours
East/West 5-6 hours 3-5 hours

B. Roof Condition and Lifespan

The roof must also meet durability and lifespan needs:

  • Roof condition should be assessed before installing solar. Look for:
  • No major damage, leaks, or structural issues
  • No more than two layers of roofing
  • At least 10 years of expected lifespan remaining
  • If roof condition is inadequate, replace or repair prior to or alongside solar install.
  • Roof must withstand 30+ years to match expected solar panel system lifespan.
  • Additional roof supports may be added depending on climate factors like snow.

Professional installers conduct thorough roof inspections and advise if repairs or reinforcements are recommended before mounting racks and panels. Solar arrays can place significant weight loads on roofs.

Following proper procedures for durable roofing and structural enhancements ensures your home can support solar over the long term. This allows you to maximize return on investment through decades of ongoing solar energy harvesting.

Click here to Learn More

II. Types of Roofs Best Suited for Solar Mounts

Many common roof types can support solar panels, including:

  • Asphalt – The most popular residential roofing. Durable and low maintenance.
  • Metal – Long lasting. Galvanized steel and aluminum are common.
  • Tile – Beautiful option made from terracotta or concrete. Handles weather well.
  • Slate – Traditional natural stone roofing with longevity. More expensive.
  • Gravel built-up roofs – Common flat commercial roofing using gravel for reflectivity.

The best roof type depends on your home’s specific:

  • Building size, height, and layout
  • Climate and weather conditions
  • Location’s seismic activity
  • Aesthetics and budget

An experienced solar installer will evaluate the above situation and structural factors during a site survey. This informs the customized system design and installation plan for your roof.

Both sloped and flat roofs can integrate solar successfully. Ballasted footing systems are often used on commercial flat roofs since they don’t penetrate the roof membrane.

Solar shingles that embed panels directly into your roof are also an option. While more expensive, they provide a sleek, integrated appearance.

Overall, a reputable solar provider can customize the solar setup for nearly any residential or commercial roof type.

III. Ballasted vs. Penetrating Solar Roof Mount Types

Ballasted vs. Penetrating Solar Roof Mount Types

There are two main solar roof mount system types – ballasted and penetrating:

Ballasted Mounts

  • Placed on top of the roof without penetrations
  • Held in place by heavy weighted bases as ballast
  • Well-suited for flat commercial roofs
  • Pros:
  • Don’t damage roof membrane
  • Easier installation
  • Can be moved and reconfigured
  • Cons:
  • More prone to wind or storm disruption
  • Generally require larger roof space

Penetrating Mounts

  • Attached directly into the roof using lag bolts
  • Provides very secure attachment
  • Allows for steeper angle/tilt for sloped roofs
  • Pros:
  • Maximum stability and wind/seismic resilience
  • Enable roof tilt for better sun exposure
  • Cons:
  • Risk leakage if not properly sealed
  • May void roofing warranties

Professional installers evaluate factors like roof type, weather, seismic issues, and snow load to recommend the optimal mounting system. Hybrid approaches are also possible using some ballast along with penetrating mount points.

The right solar mounting method helps ensure safety, stability, and maximized solar panel efficiency over decades of operation.

IV. Amount of Roof Space Needed for Residential Solar Panels

A common question homeowners have is how much roof area a solar panel system requires. For a typical residential home, the average system size is:

  • 400-700 square feet – This usually allows meeting 60-100% of the household’s electricity usage, depending on energy efficiency and family size.
  • Within that range, considerations for solar array size include:
  • Percentage of electric bill offset desired
  • Available south-facing roof square footage
  • Panel output and efficiency ratings
  • Electricity usage amounts and patterns
  • Budget
  • Aesthetic preferences

If limited by insufficient rooftop space, you still have options:

  • Smaller
  • to offset a portion of usage
  • Ground-mounted panels in the yard
  • Panels split across available roof sections
  • Solar shingles embedded seamlessly into roof
  • Offsite or community solar program subscriptions

For specific homes, an even larger or smaller customized system may be recommended by your solar installer:

  • Large luxury homes may install 1000+ square foot arrays
  • Special projects like garages or pool houses could use 50-200 square feet

Factor in your own goals and talk to an installer about tailoring the optimal solar system size for your residential roof.

V. Hiring an Experienced, Licensed Solar Installation Company

The key to a successful, problem-free solar array installation is hiring a qualified solar provider. Be sure to verify any potential installers:

  • Have all required licenses for solar and electrical work in your state
  • Carry general liability insurance plus workers’ compensation
  • Have certified installers on staff
  • Are registered with the Better Business Bureau
  • Have been operating for 5+ years
  • Can provide multiple local customer references

For roof-mounted solar, prior roofing experience is highly recommended to safeguard your home’s integrity. Seek out installers with expertise in:

  • Inspecting roof structural soundness
  • Assessing roof lifespan compatibility with 30-year solar life cycles
  • Mounting racking systems securely on sloped and flat roof structures
  • Sealing penetrations properly during mounting to avoid leakage
  • Working carefully around vents, skylights and other rooftop elements

Choose a reputable local solar company dedicated to:

  • Providing customized site evaluations and solar system design
  • Clearly explaining mounting methods, panel options, and installation steps
  • Minimizing interference and damage to your roof
  • Installing solar properly to meet your energy needs and maximize ROI

Taking care to vet and hire the best solar provider protects your investment and ensures your roof-mounted solar system performs safely for decades.